
The series so far:
- How to query blob storage with SQL using Azure Synapse
- How to query private blob storage with SQL and Azure Synapse
- Performance of querying blob storage with SQL
The queries from the previous article were made against the public container in the blob storage. However, if the container is private, you will need to authenticate with the container. In this article, you’ll learn how to query private blob storage with SQL.
NOTE: Be sure that the Azure Synapse Workspace and the storage account with the sample files are set up before following along with this article. You will also need to replace your storage account URL each time that a storage account URL is used in the article.
There are three possible authentication methods, and these methods may have some variation according to the type of storage account and the access configuration. I will not dig into details about storage here and leave that for a future article.
The three authentication methods are:
Key: The storage account has two keys. If you provide one of the keys during the connection, you have access to the storage account.
Shared Access Key (SAS): A SAS key is used in a similar way to the key; however, it has additional benefits, such as:
- It has an expiration date
- It has limits of what permissions the user can have
Azure AD: You can make the authentication using Azure Active Directory.
These authentication methods are supported in general by storage accounts. However, SQL Server On Demand has limitations about what authentication methods it supports for the storage: SAS and Azure AD using Pass Through.
Authenticating with SAS key
The first method to try is with the SAS key. Follow along with key management next.
Understanding key management
First, you must understand how to generate the SAS key. Each storage account has two main keys used to control access to the storage. Using these keys is one of the methods of access, also called SAK.
The accounts have two keys to allow creating a management policy over them. At any moment, you can revoke one of the keys, and every client application using that key directly or indirectly will lose access.
On the left side panel of the storage account, under settings, you can see the Access Keys option. On this option, you find the two main keys, and you can revoke them, generate new keys and cancel the access of all applications depending on these keys, directly or indirectly.
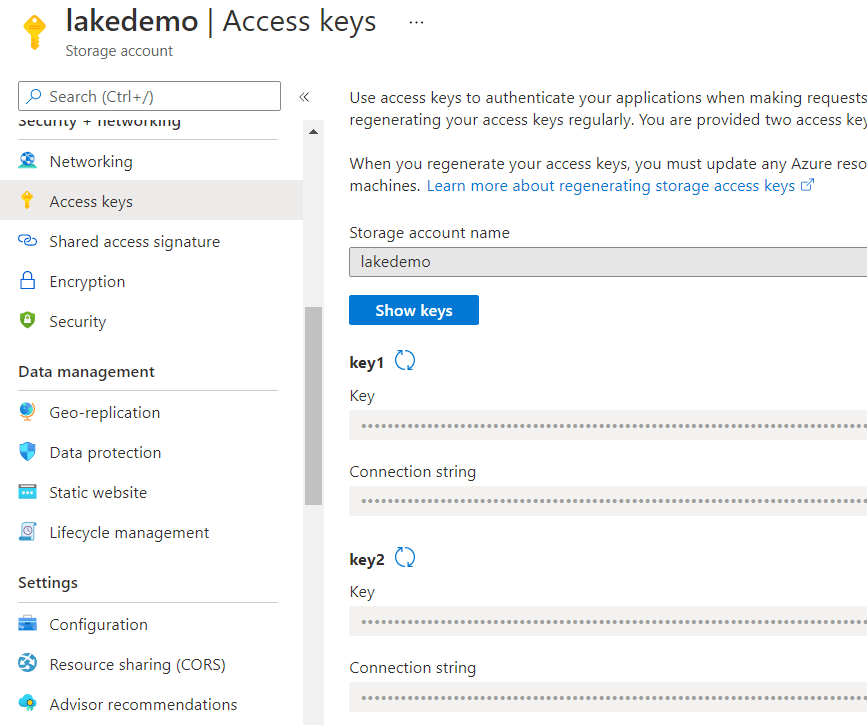
You may also notice the Shared Access Signature option on the left. That’s where you can generate SAS keys. The SAS keys are encrypted by one of the main storage account keys. If you regenerate the main SAK used for the encryption, all the SAS keys encrypted by it will become invalid.
Good Practice
One good practice is always using the secondary SAK to generate the SAS keys because you will be able to regenerate the secondary SAK to invalidate all SAS keys without stopping critical applications, making access directly with the primary SAK.
You also can break down your applications by how critical they are and generate their SAS keys based on the primary or secondary SAK.
However, you only have two SAKs available. Regenerating one of them will drop the connection from many applications. The best option is still relying on the SAS expiration date.
Generating and managing the SAS key
The basic and most important detail you need to know about the keys is: They are not managed by Azure. This means that once you generate a SAS key, you can’t cancel the key directly. The only way to cancel the SAS key is regenerating one of the SAKs, which then creates a cascading effect on other keys, as explained before.
As a result, the rule is simple: Take care of the SAS keys you generate.
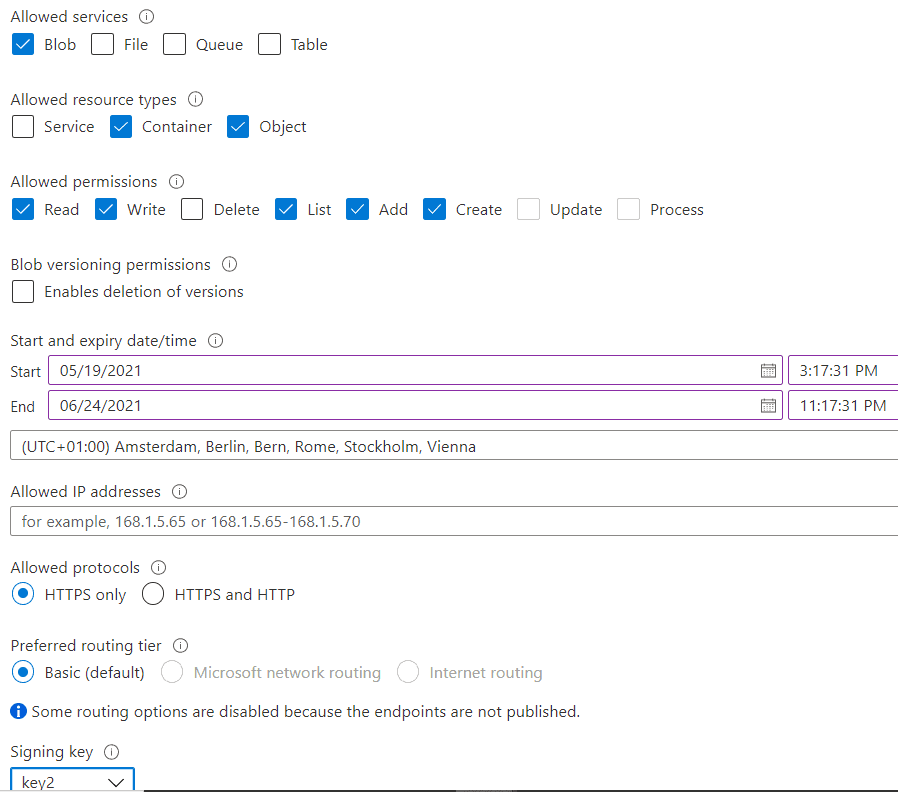
Once you click on the Shared Access Signature page, you will need to fill in the following details to build your SAS key:
- Allowed Services. In this example, you only need the blob service.
- Allowed Resource Type. Here you specify what API level you would like. Service Management, Containers Management or Objects. You need objects, of course. However, the List Blobs API is related to the Containers resource type. For this example, you don’t need to enable containers management and creation. However, you need the user of the key to be able to list the blobs in the container, so you also need to include the Containers resource type
- Allowed Permissions. You will need the following permissions: Read, Write, List, Add, Create
- Blob Versioning Permissions: This is not needed for the example.
- Start/Expire date/time. It’s up to you to decide how your Azure key policy will be. Make sure that the key will not expire while following the example.
- Allowed IP Addresses. You can limit the IP addresses that can use this key. If you are using a server application or service to access the blob storage, you can create IP restrictions to make the key more secure. If the service is on Azure, I would build a private network first. In this example, you are running the queries from the Synapse Workbench, so leave the field blank.
- Allowed Protocols. By default, it only allows HTTPS access; this is good for security.
- Preferred Routing Tier: This one is a bit more complex. Any option is ok for the example; the choice depends on the rules of your environment. See the section below for more information about this functionality.
- Signature Key. You can choose any key; it’s not important for the result. This gives you the freedom to plan your storage key policy in the way you prefer.
|
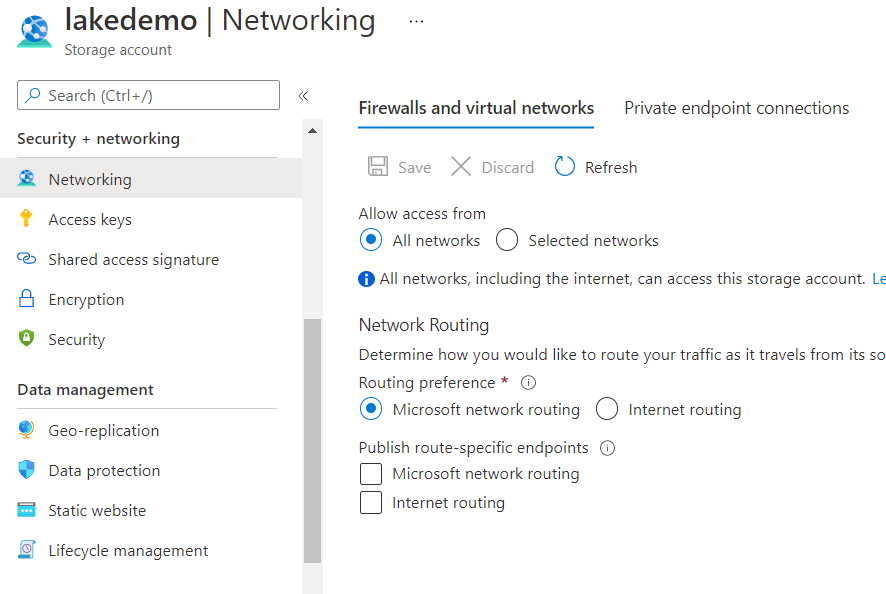
Preferred Routing Tier Microsoft has a worldwide network linked to Azure. When you try to access something hosted inside Azure, there are two access possibilities. These possibilities are related to the concept of POP – Point of Preference. The POP is the network access where your packages will get into Microsoft Network. It can be the closest POP to the client trying to access or the closest POP to the storage location. POP Close to the client: The package will get into Microsoft Network as soon as possible, which means it will be faster and safer, but it will increase your networking costs. POP Close to the Storage: The package will move through the internet and only get into Microsoft Network at the last moment possible. This will reduce the networking costs, reduce the security, and the performance may vary a lot. In order to use these options, you need first to enable them on the Network tab. By doing so, Azure creates different URL’s to the storage account, one for the Microsoft Network routing and another for Internet Routing.
When you choose to enable the SAS key for one of these routing options, it’s not only a matter of the key, but also the URL. The key will only work with the correct URL |
After clicking the Generate button, the resulting SAS key is a set for querystring parameters to be used in a URL, as part of the querystring. You may notice the following details:
- Each SAS parameter is a pair of ‘key=value’ data in the querystring
- The querystring is already URL encoded, so you can include it in a URL
- The querystring is provided with a starting ‘?’, which is exactly what may be needed to include it in a URL. The question mark is not part of the SAS key; some places accept the question mark, others require the question mark to be removed.
- The sig parameter is the heart of SAS key. It’s a value encrypted by the storage key chosen, ensuring the security of the access.
- The sv parameter points to the version of the SAS key generator. There are tools able to support up to some specific versions. This example will not face this challenge.
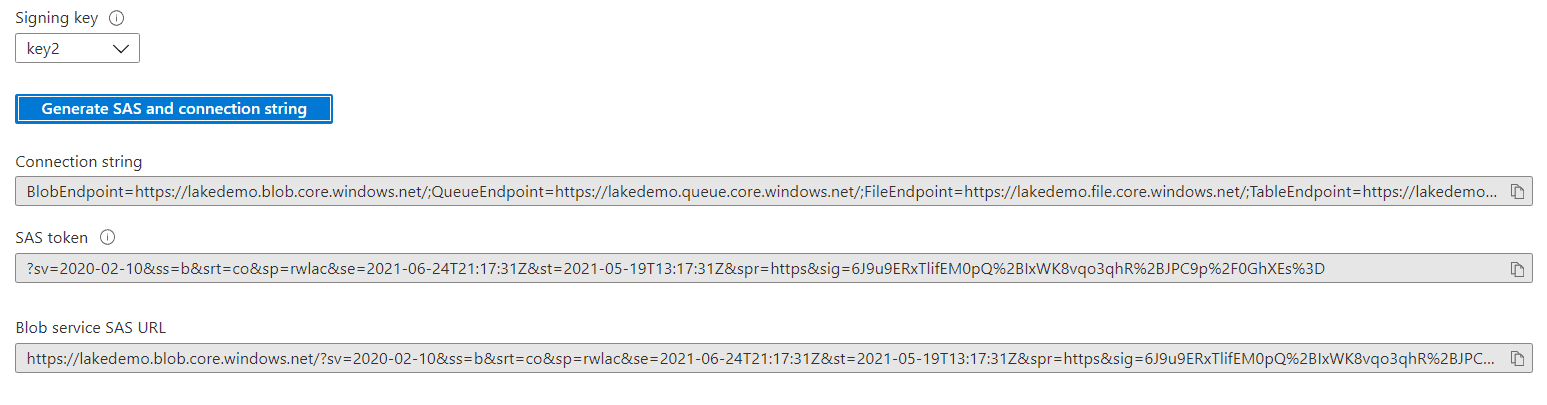
Save the generated SAS token as you will need it later.
Configuring the serverless Pool
In order to store the SAS key safely in Synapse, you use Credential objects. SQL Server supports two kinds of Credential objects:
- Server level Credential
- Database Level Credential, introduced in SQL Server 2016
The difference is simple: Database level credential provides you more flexibility to move the solution and the database, while server-level credential is re-usable for all databases on the server.
The Credential object is important because it’s part of the encryption structure in SQL Server to keep critical information, such as the SAS key, safe.
Recommended additional reading: https://docs.microsoft.com/en-us/sql/relational-databases/security/encryption/encryption-hierarchy?view=sql-server-ver15&WT.mc_id=DP-MVP-4014132
The credential will not solve the problem by itself: the OPENROWSET doesn’t accept the credential object directly. You need to create at least one more object, called External Objects.
The two existing databases on the Serverless pool can’t be used for that. The existing databases are:
Master: The traditional SQL Server master database
Default: A database to integrate Spark Pool and SQL On Demand Pool. It’s a replicated database. Synapse has access to Spark data through this database.
You must create a new database to hold the objects needed. Call the database NYTaxi. Open Synapse Studio to run the script. (The first article in the series has the required steps)
According to the way SQL Server encryption works, you need to create a master key in the database, as you will learn by reading the link provided above. The master key will be responsible for the encryption of the objects inside the database, in this case, the credentials.
Creating the database and credentials (replace with your own SAS key token):
|
1 2 3 4 5 6 7 8 9 10 11 |
Create Database NYTaxi GO USE NYTAXI GO Create Master Key GO CREATE DATABASE SCOPED CREDENTIAL [MaltaCredential] WITH IDENTITY='SHARED ACCESS SIGNATURE', SECRET = '?sv=2019-12-12&ss=bfqt&srt=sco&sp=rwdlacupx&se=2021-12-23T07:34:32Z&st=2020-11-21T23:34:32Z&spr=https&sig=mJpur3JCEp99w5OqHxcXSXGOh4g44rOZfl5j8%2B6St30%3D' GO |
Once the script is executed, the execution context will be on the NYTaxi database. You are still working on the Serverless Pool, but now with your own database.
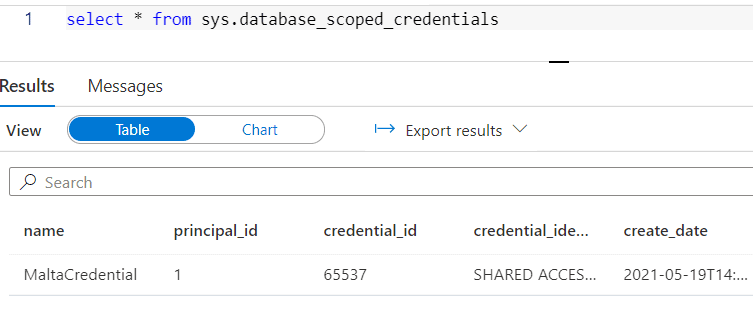
Three details to highlight here:
- The IDENTITY value is fixed, always SHARED ACCESS SIGNATURE when using SAS keys.
- The SECRET includes the question mark ‘?’ . Some features expect the question mark, but others don’t.
- The credentials are not visible on the UI. You need to use DMV’s to see the existing credentials
Checking the existing credentials on the database:
|
1 |
select * from sys.database_scoped_credentials |
Serverless pool databases
You can look in detail at your new database using the second toolbar icon, located on the left side of the screen.
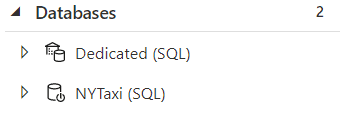
The databases from the Serverless Pool are not easily visible, but once you use the Refresh on the action menu (“…” besides Databases), they will appear on the Databases list.

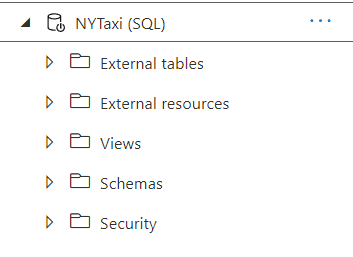
One very important difference between regular databases and the database on the Serverless Pool is you can’t create tables on the Serverless Pool. You can create what is called External Objects and views.
External Objects were introduced in SQL Server 2016 as part of the Polybase architecture, allowing access to data remotely from many different formats, especially unstructured formats. This doesn’t mean you are using Polybase: Synapse Serverless pool has a native provider for blob storage which takes a detour from Polybase.
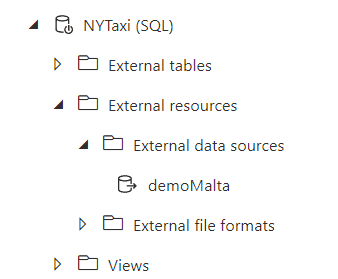
External Objects are objects used to map external sources, such as blob storage, to SQL and allow you to query them like regular tables. The Serverless Pool will not be holding the data, only pointing to it. In the same way, you can create views over the External Objects, encapsulating more complex queries.
The image below shows exactly this: the database can’t have tables.
Creating the External Object
OPENROWSET doesn’t support the credential directly. You need to create an object called External Data Source to use the credential.
Create the external data source, replacing the URL with your URL from your storage created in the first article:
|
1 2 3 4 5 6 |
CREATE EXTERNAL DATA SOURCE [demoMalta] WITH ( LOCATION = 'https://lakedemo.blob.core.windows.net/datalake', CREDENTIAL=MaltaCredential ); go |
The LOCATION attribute uses HTTP/HTTPS protocol, the only protocol accepted by serverless pool to connect to blob storage.
You can check the created Data Source in the Databases window
OPENROWSET with External Data Source
The query below is the same already used in the previous article of this series, but modified to use the External Data Source:
|
1 2 3 4 5 6 7 8 9 10 |
select Month(Cast(Cast(DateId as Varchar) as Date)) Month, count(*) Trips from OPENROWSET( BULK '/trips/', Data_Source='demoMalta', FORMAT='PARQUET' ) AS [rides] group by Month(Cast(Cast(DateId as Varchar) as Date)) order by Month |
Some details about this syntax:
- The data source makes the syntax easier
- You don’t specify the full URL anymore, only the final path
- The data source holds the credential, but the data source can also be used on public access scenarios to make the syntax easier
The result is similar as before:

Azure Active Directory pass-through authentication
Azure AD authentication is the default authentication method used by serverless pool. When you don’t provide any other authentication, Synapse will try to authenticate us using Azure AD.
The documentation mentions Pass-Through authentication as slower than SAS authentication. However, this is the kind of internal detail that changes every day. While I was writing this article, they had similar performance; sometimes, with Pass-Through having even better performance than SAS.
The requirement for the pass-through is very simple: The user making the query needs to have data permission over the storage.
Since it may not be a good idea to set this permission user by user, the best option is to create an Azure AD group, include the users needed in the group, and then give the permission to the group.
Create an AD group and set the permission
Follow these steps to create the AD group and give permissions:
- On Azure Portal, open the main menu
- Click Azure Active Directory
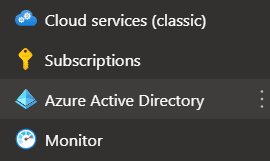
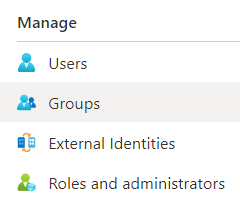
- Under Manage, click Groups
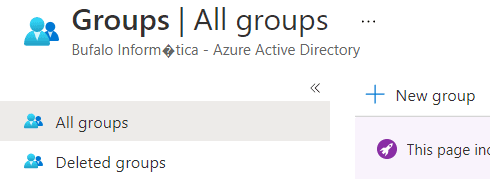
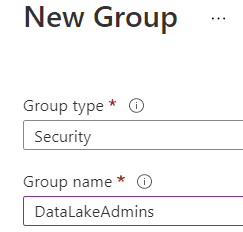
- Click New Group button
- On Group Type dropdown, leave Security
- On Group Name, you can choose any name; I will call the group DataLakeAdmins
- Under Members, click the No Members Selected link

- In the Search box, type the name of the account you are using. Only part of the name may work; Azure will search for your account.
- When you see your account below the Search box, select it
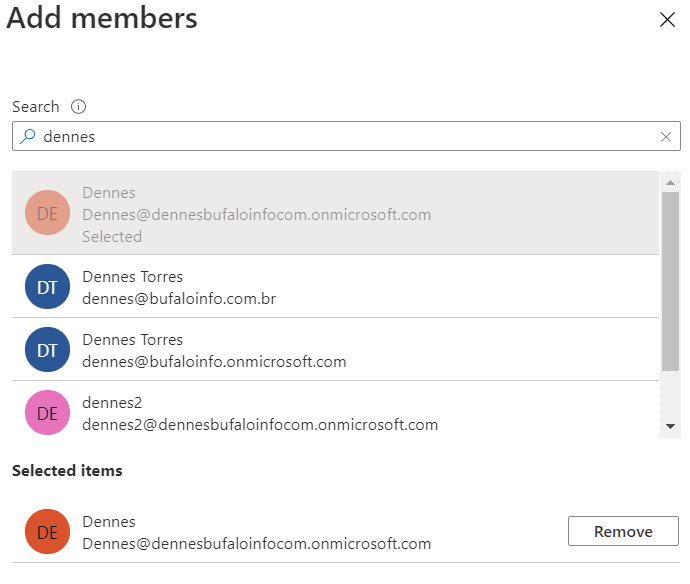
- Once your account is selected, click the Select button
- Click the Create button, completing the group creation
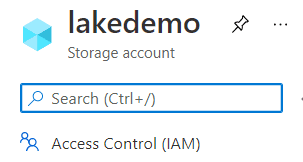
- Return to the Home of Azure Portal
- Locate your storage account, LakeDemo, and click on it
- Click Access Control (IAM) option on the left side menu
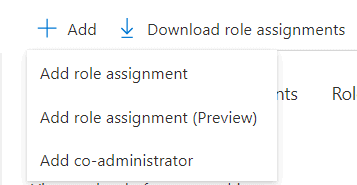
- Click the Add button and the Add Role Assignment option
- On Role dropdown, select Storage Blob Data Contributor
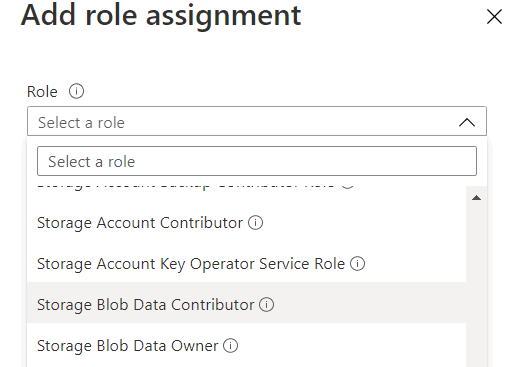
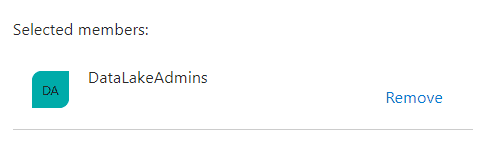
- On the Select box, type the name of the group, in this case, DataLakeAdmins
- Select the group as soon it appears below the Select box
- Click the Save button to create the role assignment
Now you can execute the query on Synapse without providing the credential, using the pass-through authentication. Note that you will need to close out of the Synapse Workspace and open it again to get the refreshed permissions.
|
1 2 3 4 5 6 7 8 9 |
select Month(Cast(Cast(DateId as Varchar) as Date)) Month, count(*) Trips from OPENROWSET( BULK 'https://lakedemo.blob.core.windows.net/datalake/trips/', FORMAT='PARQUET' ) AS [rides] group by Month(Cast(Cast(DateId as Varchar) as Date)) order by Month |
Analyzing the log and comparing the methods
One good way to compare both methods is by using Azure Monitor and Log Analytics to compare what happens with each authentication. Both are very important tools when working with Azure. You can read more about them in this other article https://www.red-gate.com/simple-talk/blogs/saving-money-log-analytics/
Once you have the diagnostics configuration enabled, a simple Kusto query can show what happens with each Synapse query execution.
Enabling Diagnostics on the storage account
The Diagnostics configuration in Storage Accounts is among the features that most change on Azure. At the time of this writing, there are two Diagnostics options in Storage Accounts.
Due to that, the steps below may change:
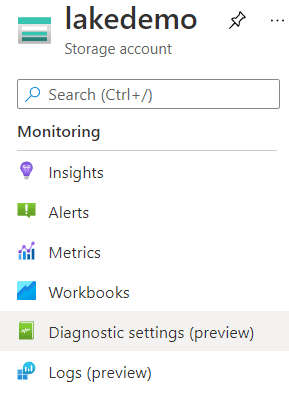
- Open the LakeDemo Storage Account on the portal
- Select Diagnostics Settings (preview) on the left tab
- Click on the Disabled button besides the blob row

- Click the Add Diagnostic Settings link
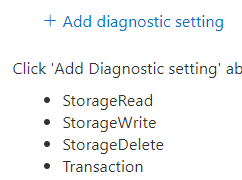
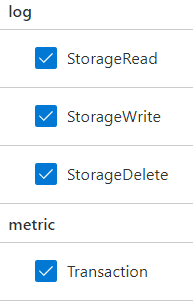
- On the left side, select all the information options to be sent to Log Analytics
- On the right side, select Log Analytics as the destination of the information
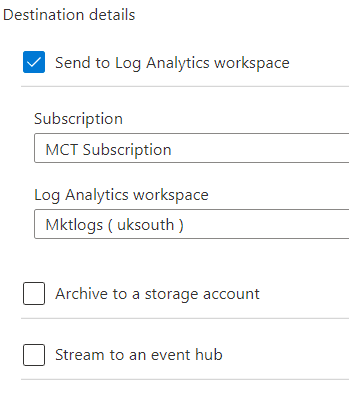
- On the Subscription drop down select the subscription where the Log Analytics workspace is located
- On the Log Analytics workspace dropdown, select the workspace which will hold the log information
- On the Diagnostic Settings Name textbox, type the name of the diagnostics configuration. In most types, there will be only one, and the name is not very important.

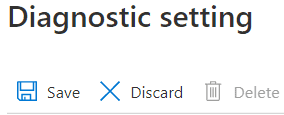
- Click on the Save button
Checking the logs
Execute this query on Synapse Serverless:
|
1 2 3 4 5 6 7 8 9 10 |
select Month(Cast(Cast(DateId as Varchar) as Date)) Month, count(*) Trips from OPENROWSET( BULK '/trips/', Data_Source='demoMalta', FORMAT='PARQUET' ) AS [rides] group by Month(Cast(Cast(DateId as Varchar) as Date)) order by Month |
- Open the Storage Account in the portal
- Click on Logs (preview) on the left side menu
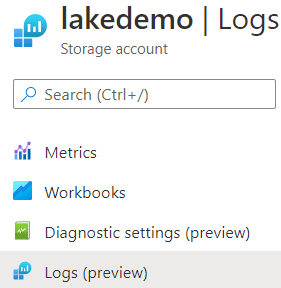
- Close the Queries window that appears
- It may take a few minutes before the log information is up to date. In the New Query 1 window, type the following Kusto query:
|
1 2 3 |
StorageBlobLogs | where TimeGenerated > ago(1h) | order by TimeGenerated desc |
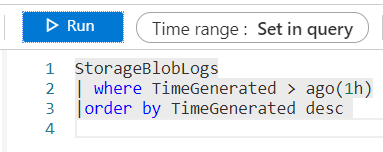
- Click the Execute button
You may notice the following details on the result:
- A single
OPENROWSETquery on Synapse over one folder with a single file generated six operations on the storage account
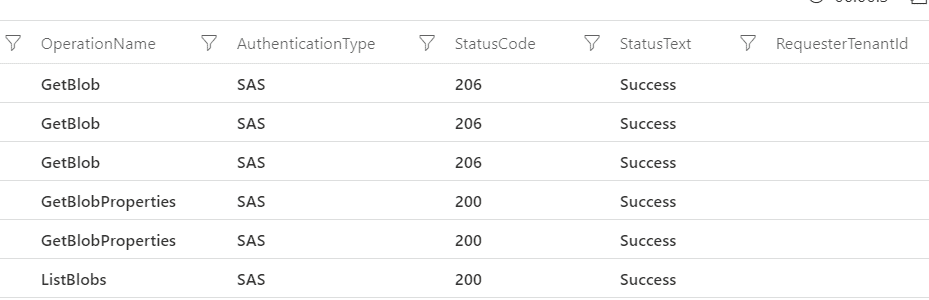
- The AuthenticationType field appears as SAS – Shared Access Key
- HTTP Status 206 means Partial Content. The GetBlob method returns the result in pieces, to control the transfer of big blobs
- The total number of calls may vary due to the number of pieces GetBlob method returned
- The RequesterTenantId field is empty because the AuthenticationType is SAS
Now, try the pass-through authentication. Execute the following query on Synapse Serverless:
|
1 2 3 4 5 6 7 8 9 |
select Month(Cast(Cast(DateId as Varchar) as Date)) Month, count(*) Trips from OPENROWSET( BULK 'https://lakedemo.blob.core.windows.net/datalake/trips/', FORMAT='PARQUET' ) AS [rides] group by Month(Cast(Cast(DateId as Varchar) as Date)) order by Month |
Execute the Kusto query again on the storage log:
|
1 2 3 |
StorageBlobLogs | where TimeGenerated > ago(1h) |order by TimeGenerated desc |
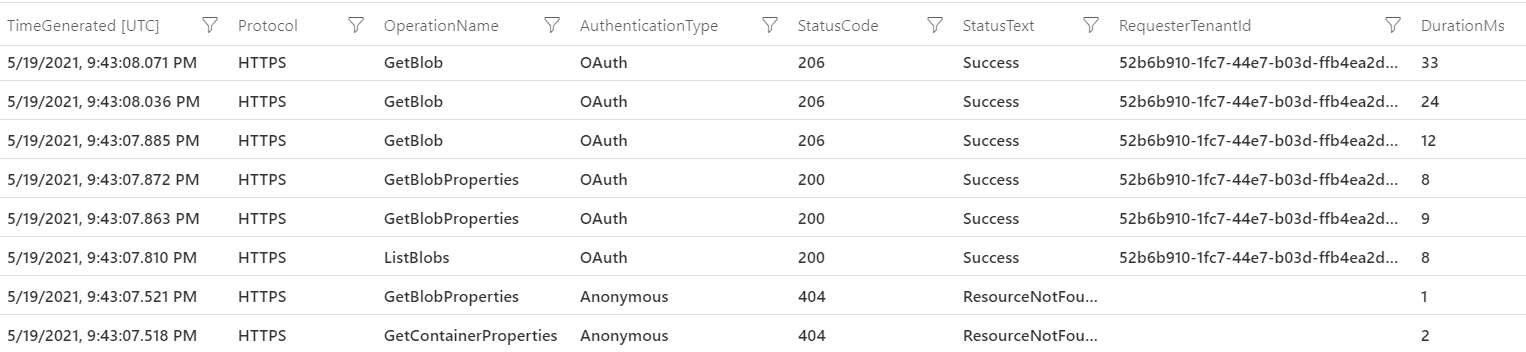
You may notice the following:
- The query generates eight activities on the storage, two more than the SAS authenticated query
- Synapse first tries to use anonymous access, generating the first two access and resulting in HTTP error 404. After the failed attempt, it reverts to pass-through
- The pass-through authentication appears as OAUTH, the protocol used by Azure Active Directory
- There is a bigger interval between the second failed request and the first OAUTH request (0.3ms). On this interval, Synapse was contacting Azure Active Directory and requesting the authentication
- The RequesterTenentId field is now filled with the id of the tenant used for the authentication.
Query private storage with SQL
The two authentication methods create a safe way to access data in Azure storage. However, it could still be a bit better if you could use its own Synapse Managed Identity as an authentication method to the storage.


