
The series so far:
- How to Linux for SQL Server DBAs — Part 1
- How to Linux for SQL Server DBAs — Part 2
- How to Linux for SQL Server DBAs — Part 3
- Navigate Linux for SQL Server DBAs
Part 1 of this series covered a little history about Linux, how to set up a Docker container with Linux to utilize as a demo environment and some basic docker commands to maintain your Linux host. Part 2 is going to dig deeper into Linux to ensure you understand the power of root, logins/users and groups to then connect all of these areas to help you understand how Linux functions differently than Windows at the user level.
To log into a Linux host, you must have a login. That login may be root (aka God), but you must have a username and password or a certificate authenticating your access to log into the Linux host, or the authentication will fail. Each login is assigned a default group, which is similar to roles in a database. You can have more than one group assigned to a user login on the host and a default group is set by the administrator, commonly at the time of the user creation.
A user login is created with one of two commands:
- adduser
- useradd
As Linux is the descendant of decades of Unix, it’s good to know the difference and the similarities of these two commands that appear to simply switch the order of the words.
- Both commands will create a user login.
- Only one, (adduser) will ask you to interactively create a password, add a group and other pertinent information for the user.
- Useradd will simply create a user, and all other steps must be performed separately if not added via arguments at the time of the command.
- If you need to remember which one is which, remember that the one that comes first alphabetically is the one that’s interactive, requiring less manual work post the user creation.
If you have your Docker container set up, work with these commands and see the difference between them. No, you might not have to do this in real life, but then again, how many SQL DBAs have a Linux administrator on staff to set up a box properly? How many of you may be the ones to help your Windows administrator set up a Linux box properly to support your new SQL Server environment? It’s worth it to know how.
Start by opening a Command Prompt, (or you can do this from Putty or PowerShell Interface. These steps won’t be impacted like the build of the Docker container covered in the last article.)
Now it may have been a while since you worked with your docker container. You’ll need to check on the status of your container first and if it’s Exited, then start it:
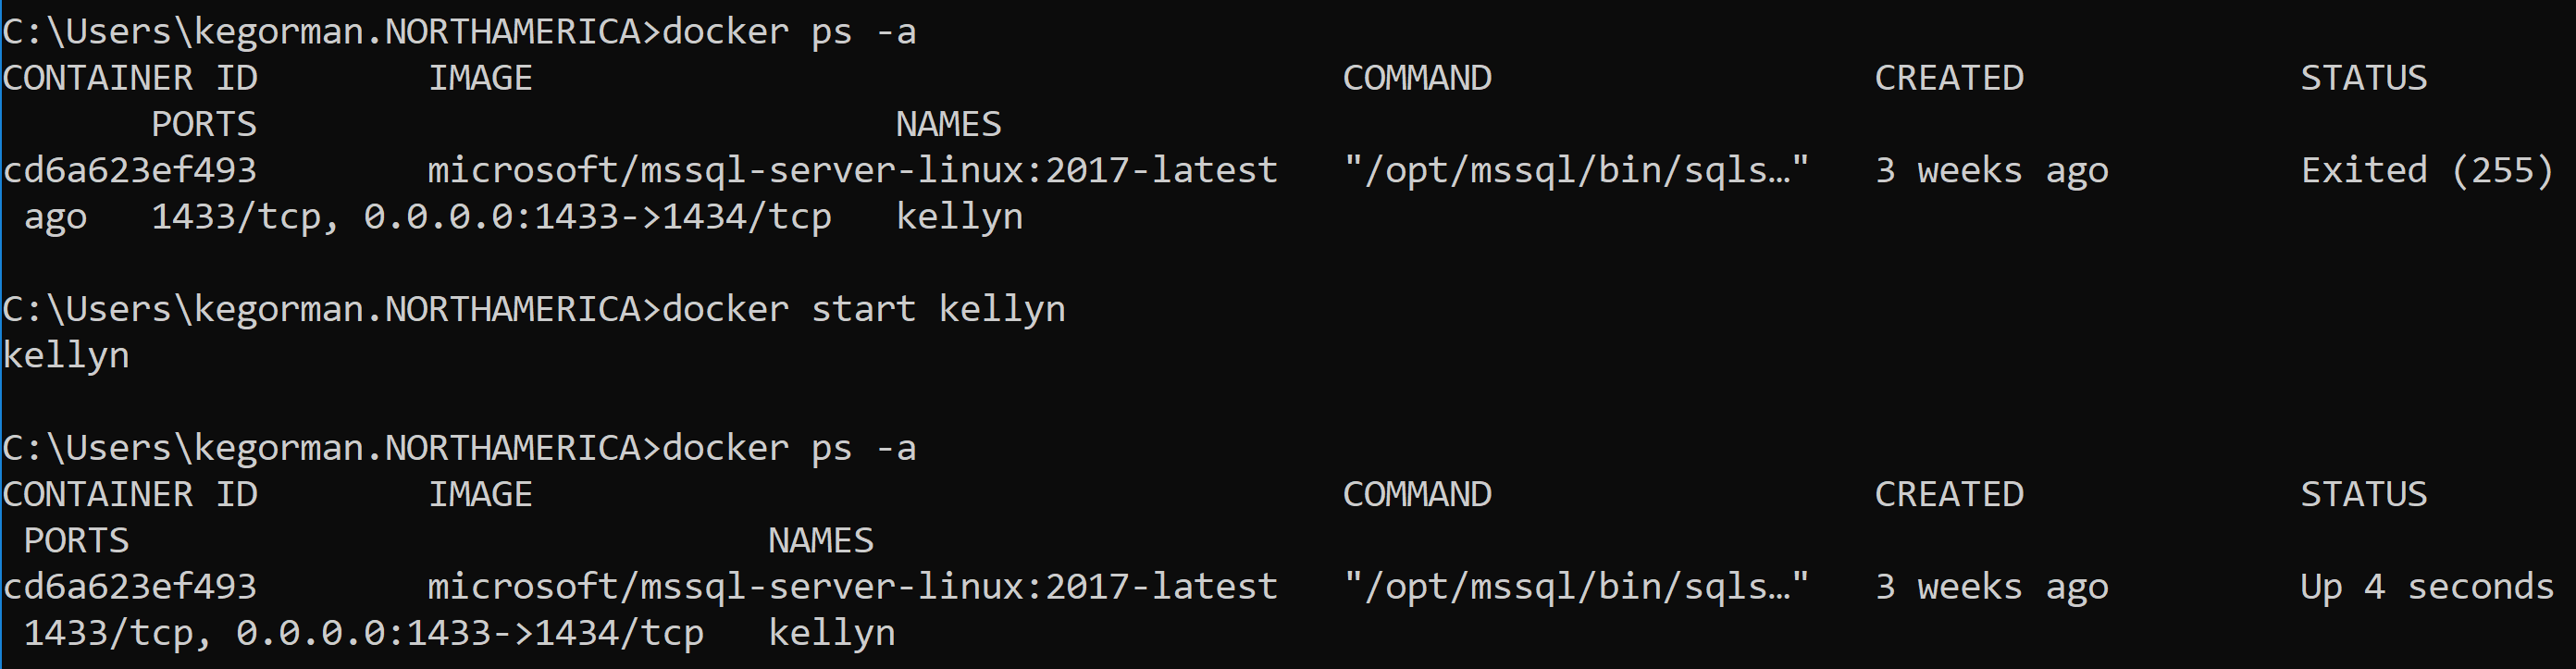
The command to check your container status is:
|
1 |
docker ps -a |
Note the name of your container under the NAMES column. In the example above, my container is named ‘kellyn.’
You can start your container with the following command:
|
1 |
docker start <container name> |
Then check the status again- you should see in the status that it is Up and how long it’s been in that status.
Log into Your Container
A simple command gets you logged into your container and at the command line:
|
1 |
docker exec -it <container name> "<shell choice>" |
Using my own docker container, I can offer an example:

What you see to the left of the prompt, (#) is the <user>@<container identifier>. This isn’t a standard configuration for a command prompt, but it is one I prefer and find helpful when working with multiple hosts in an environment.
Notice that no password is requested to log into your container. It may alarm you that you’re able to do this, but the docker exec command used the -it argument. This is a request to keep the standard input open and interactive and the docker container you created as root. All other users would require a password, and only you can do this.
We’ll begin with a few navigation commands to help familiarize ourselves with Linux navigation and basic commands:
|
Command |
What it Does |
Warnings or Hints |
|
whoami |
Tells you who you are logged in as |
If you’re switched users, it will show you the user you ARE currently. |
|
pwd |
Directory path you currently are in |
No, it’s not for password. No, don’t attempt to make an alias to try to make it a password. Bad idea. |
|
df -h |
File system, directory and storage information in appropriate size format |
You can perform this same command with a -k instead of the -h if you like really big numbers to calculate from kilobytes. |
|
ls ls -la ls -ltr |
To list To list all, including permissions To list all, most recent last |
Notice the differences in these commands and what DOESN’T show up when you don’t add the -a argument. |
|
cd <directory> cd .. cd |
Change directory Change directory one dir up Change directory to home dir |
cd to /var/tmp, then perform the next two and see how the location changes. Note that there is a space between cd and the two dots |
|
Profile or bash.rc file |
Run commands at login to set environment variables and settings. |
.bash_rc is default with .profile called secondary by the .bash_rc to perform specific settings for aliases, environment variables, and links. Best practice is to use a .profile with any additions and add that to the .bash_rc file. Home for this file is /home/<user> |
|
id <user> |
User login information |
Tells basic information about a user on the Linux host. Without the <user> argument, it returns information about the current user |
|
ps ps -ef |
Process information |
Utility to report on processes running on a Linux host. |
|
/etc |
Directory containing configuration and system files |
The common user would not have access to the files in this directory, and many files are protected from a DBA from even reading and most likely writing to the files. Any files owned by the database software would be given rights to the dba group. |
|
su sudo |
Switch user Switch user domain owner |
One is a command to switch to another user. The second is a command placed in front of a second command that asks that command to be run with root privileges, similar to running “as administrator” in Windows. |
Creating Users
Create a user, named jdoe1 for John Doe with the useradd command and jdoe2 for Jane Doe with the adduser command.
|
1 2 |
useradd jdoe1 adduser jdoe2 |
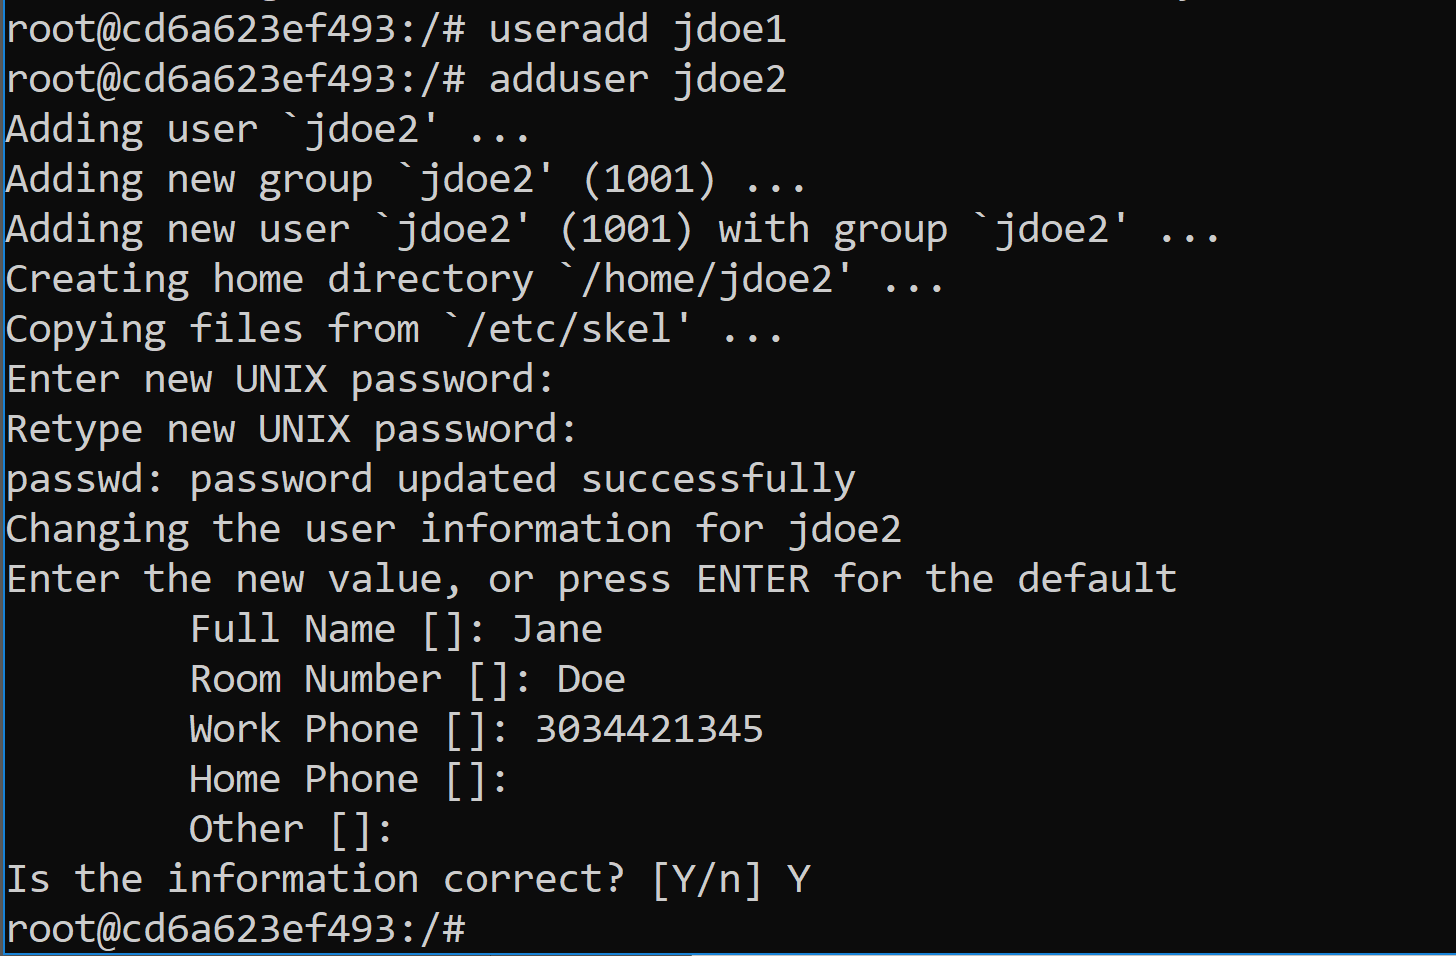
Note the difference with the useradd command for John’s user, jdoe1. After typing in the username, it’s complete. No request for a password or additional information.
For the adduser command for Jane’s user, jdoe2, I was asked for a password, to confirm the password and additional information about the user. You can use the id command to view the user:
|
1 2 |
id jdoe1 id jdoe2 |

Notice that the user logins look the same and note that they’ve been assigned a group that is the same as their login.
Inspect the difference with passwords. For this, you’re going to ‘pipe’ two commands together. The first is cat, (concatenate) and the second is grep, which allows you to filter information from the first data captured from the file we’ll pass to it. You’re going to use the password file and return only the rows that have information about user logins and passwords that have jdoe in them:
|
1 |
cat /etc/passwd | grep jdoe |

Notice that jdoe1 is missing user name information, phone number, a shell, etc. The directory /home/<user name> is the user’s home directory assignment. This is their directory that includes their login settings, (aka bash profile or run commands) and often the location where they will save their personal files. Could the adduser and useradd commands create the same output results? Yes, but it would have taken numerous arguments and information at the command line vs. interactively. If you’re curious to find out more, refer to the following link.
As you can see, jdoe1 is incomplete, and you’ll need to assign much of his full profile manually.
Setting a Password
Jdoe1 will require a password, and the following command works as root to either set a password or update a password for any user:
passwd <user>
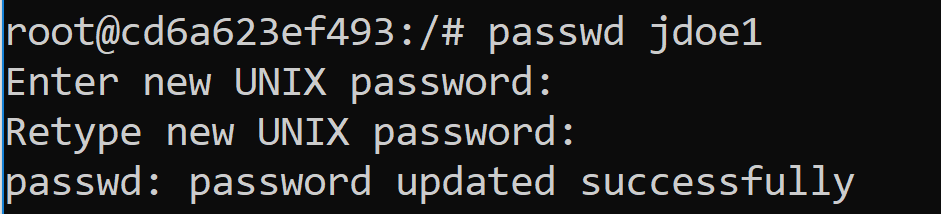
The password for the jdoe1 user is now set, and they could successfully login. It may be alright to simply set these users to having groups the same as their login, but traditionally, there will be a group, (i.e., role in the database world) that each user will be allocated to.
Creating and Setting a Group
To create a group, use the groupadd command. After creating groups, you can then assign privileges to files and directories to this group, which will then be assigned to users. It’s really not that different than roles in a database.
|
1 |
groupadd <group name> |
Add two groups, one for the database owners and database, called sqlinstall and a second called devgroup for developers working on this ‘development box.’
|
1 2 |
groupadd sqlinstall groupadd devgroup |
You will then need to modify the user to assign a group to them with the usermod command with the -a, (add) and -G, (group) arguments:
|
1 |
usermod -a -G <group name> <user name> |
Assign jdoe1 to the dba group, (sqlinstall) and jdoe2 to the developer group, (devgroup).
|
1 2 |
usermod -a -G sqlinstall jdoe1 usermod -a -G devgroup jdoe2 |

How do the users look now that their groups have been updated? Run the id command to find out.
|
1 2 |
id jdoe2 id jdoe1 |

You can now see the groups have been added, but what if you didn’t want the users to have groups with their name and what if you wanted the devgroup and sqlinstall groups to be their primary groups? You’ll then need to modify the user and add the group to the user configuration:
|
1 2 |
usermod -g devgroup jdoe2 usermod -g sqlinstall jdoe1 |
Inspect the user with the id utility again:
|
1 |
id jdoe2 |

Now the user shows as only having the devgroup as the primary and the devgroup ID assigned to it. If you wanted to add more groups to this user, just as you saw previously, you could do that, but now the user’s login is set up as a proper manager of the database installation, (sqlinstall) as jdoe1. And jdoe2 is in the development group, (devgroup).
One thing you may be asking yourself is about the identifiers assigned to each user and group. The Linux kernel identifies not by name, but by ID. The Root user is ALWAYS 0. All users added after that are added from 1001 on, but as an Oracle DBA, it’s standard to have Oracle as 503 with the orainstall group being 504 in most organizations. Why is this? It was around 2006 that Oracle became a standard in the Unix world, and it became common for the creation to be the third login, fourth login for the group created at a time that it started with 501. As new systems were added, and legacy systems were still in place, it became a common UID to see for Oracle. The reason for keeping it the same across hosts is each host recognizes the synchronized login as the same user by the identifier. Using the same usermod command you used earlier, the UID can be updated for a user, and the groupadd command can do the same to synchronize the groups to ensure this is consistent across a network that may require it. This may be valuable to know as MSSQL logins are created to own SQL Server software across hosts on a network and need to identify the user as the same login for remote access, etc.
Being God Isn’t Good
Let’s begin with discussing WHY it’s not a good idea to be root on a Linux host unless absolutely necessary to perform a specific task. Ask any DBA for DB Owner or SA privileges, and you will most likely receive an absolute “No” for the response. DBAs need to have the same respect for the host their database runs on. Windows hosts have significantly hardened user security by introducing enhancements and unique application users to enforce similar standards at the enterprise server level, and Linux has always been this way. To be perfectly blunt, the Docker image with SQL Server running as root is a choice that shows lacking investigation to what privileges are REQUIRED to run, manage and support an enterprise database. This is not how we’d want to implement it for customer use.
Unlike a Windows OS, the Linux kernel is exposed to the OS layer. There isn’t a registry that requires a reboot or has a safety mechanism to refuse deletion or write to files secured by the registry or library files. Linux ASSUMED if you are root or if you have permissions to a file/directory, you KNOW what you’re doing. Due to this, it’s even more important to have the least amount of privileges to perform any task required.
Proper deployment would have a unique MSSQL Linux login owning the SQL Server installation and a DBAGroup as the group vs. the current configuration of ROOT:ROOT owning everything. With all the enhancements to security, this is one area that as DBAs, we should request to have adhered to. Our databases should run as a unique user owning the bin files and database processes.
Processes running as root aren’t logged or audited the same way as it would be if you used commands to switch over or ran with the SUDO, (switch user domain owner) command. All users logging into a Linux host should have their own login and then switch user (su) over so that it is a fully logged and audited step in the system log files. As you further enhance your environment design, you should then consider utilizing more advanced features, such as stick bit, iptables, SGID and advance group creation and allocation whenever required.
Never as Root
If you’re still unsure why this is such a sticking point, consider the following example to assist in demonstrating the risks. With the SQL Server and all support files owned by root, our example will load data via Excel spreadsheets as part of the workload. A hacker has discovered this and builds malware to attach to the Excel spreadsheet, and as the files are owned by the same owner as SQL Server, the malware is able to take advantage of the vulnerability, and subsequently running scripts on the host as root. If SQL Server had been installed as the OS user MSSQL, with limited privileges and proper group affiliation, this type of attack would be isolated, and impact lessened, along with clear logging of who/what/when of the attack.
Linux administrators will consistently demand you justify why you need to run anything as root. No matter if it’s access to update files, run scripts, modify applications or execute system tasks to any directory or non-owned location on the host. By having a proper user/group configuration, your database server will:
- have the ability to track via an audit who has switched over to any user or to super user.
- be more likely to eliminate human mistakes by executing catastrophic commands, often unintentionally.
- simplify identifying what processes are part of an application stack
- provide a second layer of security that could save the company from becoming the next security breach.
- limit the amount of data the application/any user is privy to on the host.
Create a proper MSSQL OS User on Linux and create a DBA and SQLINSTALL group. As Microsoft matures its SQL Server offering on Linux, features are going to increase and be enhanced. Microsoft will embrace mature practices, so get ahead of the game and start now, building proper security from the beginning.
Connecting to SQL Server
For our last step, we’ll learn how to log into the SQL Server on our container. The assumption is that you’re connected to the container at the command line, and you’re at the command prompt, (username@hostname#). The environment isn’t set up as optimally as we’d like yet, so we’ll need to use the full path to the SQLCMD tool to log into SQL Server. To do so, type in the following command:
|
1 |
<path to sql command> -S localhost -U <Username> -P '<password>' |
As an example:
|
1 |
/opt/mssql-tools/bin/sqlcmd -S localhost -U SA -P 'T3st1ng!' |
If you’re thinking to yourself, “I don’t remember setting a password!” look back on your command that you used to create your container with. There was an argument for MSSQL_SA_PASSWORD=. The value for this argument is your password that was set for the SA login for your SQL Server. If you need to reset the password to a new password or to one that meets requirements for the SA password, then use the following command:
|
1 |
opt/mssql-tools/bin/sqlcmd -S localhost -U SA -P "<old password>" -Q "ALTER LOGIN SA WITH PASSWORD='<NewPassword>'" |
There is a second way to log into the container, including from a remote location, (if the container has been configured to allow remote connections) through the following command, which again, should look familiar, but with just a few differences when concerning a container environment:
|
1 |
<path to sql command> -S <ip address,port> -U <username> -P '<password> ' |
Capture the IP Address for your container with the following command:
|
1 |
ifconfig -a | grep inet |
Once you have the container IP address, connect to your own container, using the following example as a guide:
|
1 |
opt/mssql-tools/bin/sqlcmd -S 172.17.0.5,1433 -U SA -P 'T3st1ng!' |
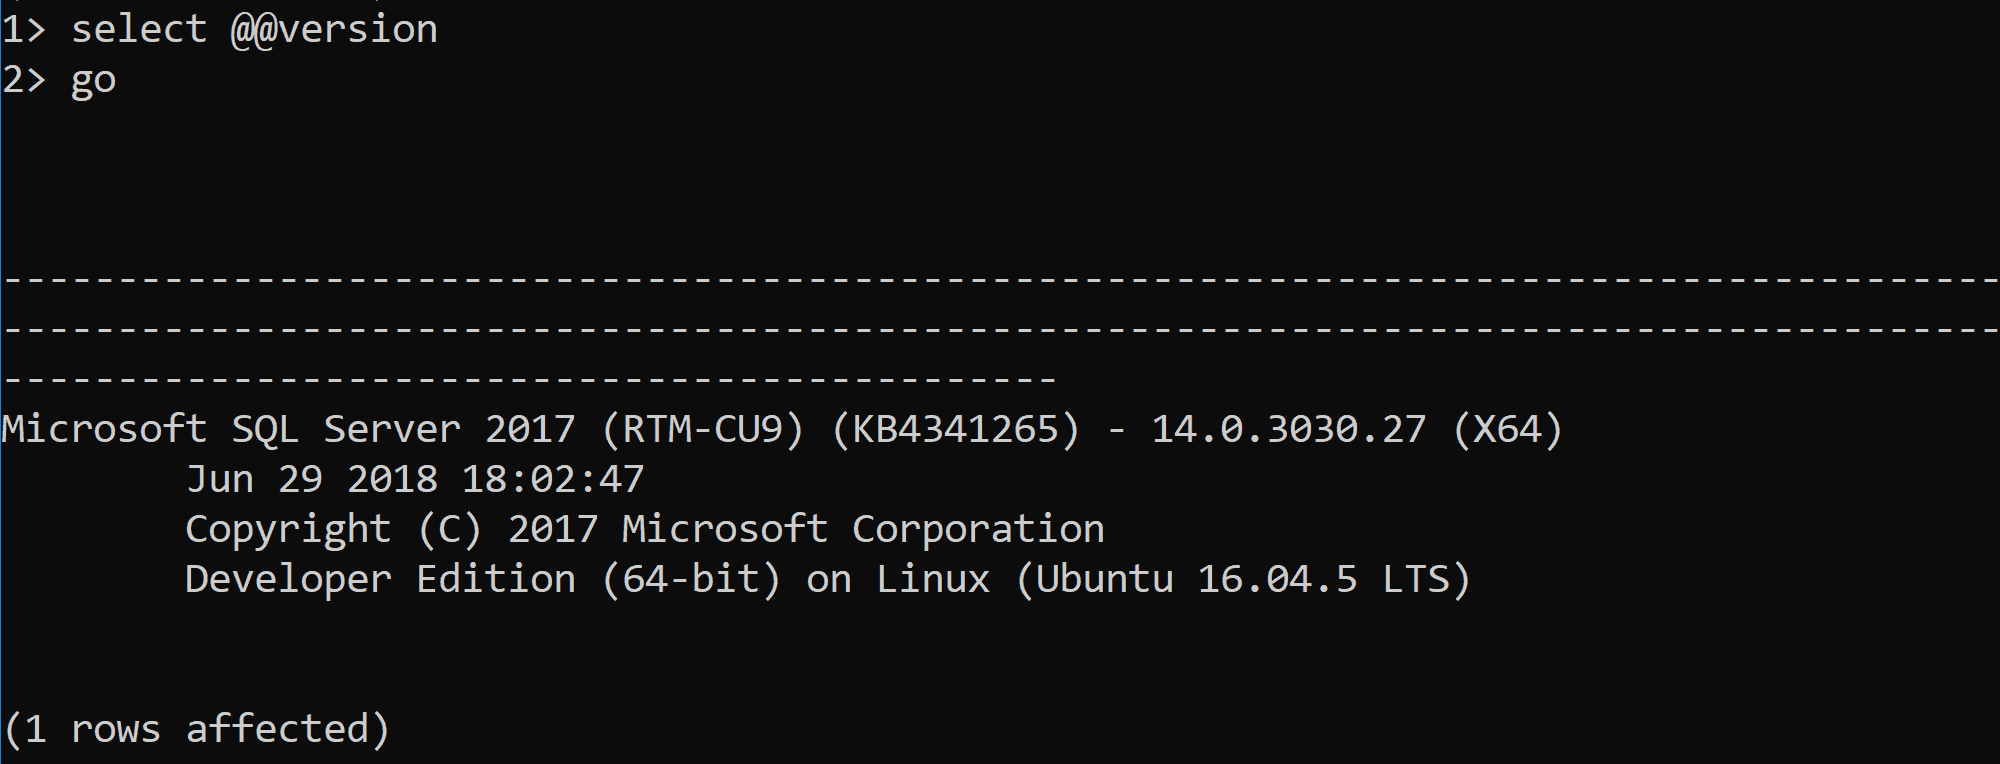
Notice that there is a ‘,’ between the host IP and the port for the SQL Server. That’s the only change required and everything else is the same. You should see the 1> prompt, prepared for you to execute SQL. To verify, type in the following statement to check the SQL Server version:
|
1 2 |
1> select @@version 2> go |
You should see the following output or similar, (if you have a different version for your image):
Conclusion
Congratulations — in the previous two articles, you’ve successfully built out, updated, maintained and set up logins on your SQL Server environment. All these steps are important as you build out your foundation of knowledge by working with SQL Server on Linux. As a database administrator, you should continue to practice what we’ve covered to build your comfort level with the operating system. Part II ended with how to log into the SQL Server from the command prompt so you may explore the database you already know and love, experiencing it on this new platform. In part III, you’ll be ready to move onto files, navigation, and permissions, an important aspect to knowing the Linux environment.