
If you’re working with software development now, regardless of what specific type of developer you are, chances are that you (or your team or company) make use of automated releasing pipelines. One option is Azure DevOps.
There are tons of different tools (most of them agnostic, by the way) that help with the essential task of automating build processes. In the cloud era, you’ve got plenty of options to set everything up without any need for further downloads or tools installation.
In the world of .NET, Azure DevOps has been the leader of this race, bringing to the table flexibility, simplicity and full-integration (especially among Microsoft’s solutions) to your application deployments. If you’re part of the open-source world, aka GitHub user, or maybe work for a company that hosts their projects within the giant Octopus platform, you are halfway there, since Microsoft’s GitHub ownership led the organization to facilitate things a little bit. Figure 1 shows a glimpse of the Azure DevOps features, some of which you will learn about in this article.
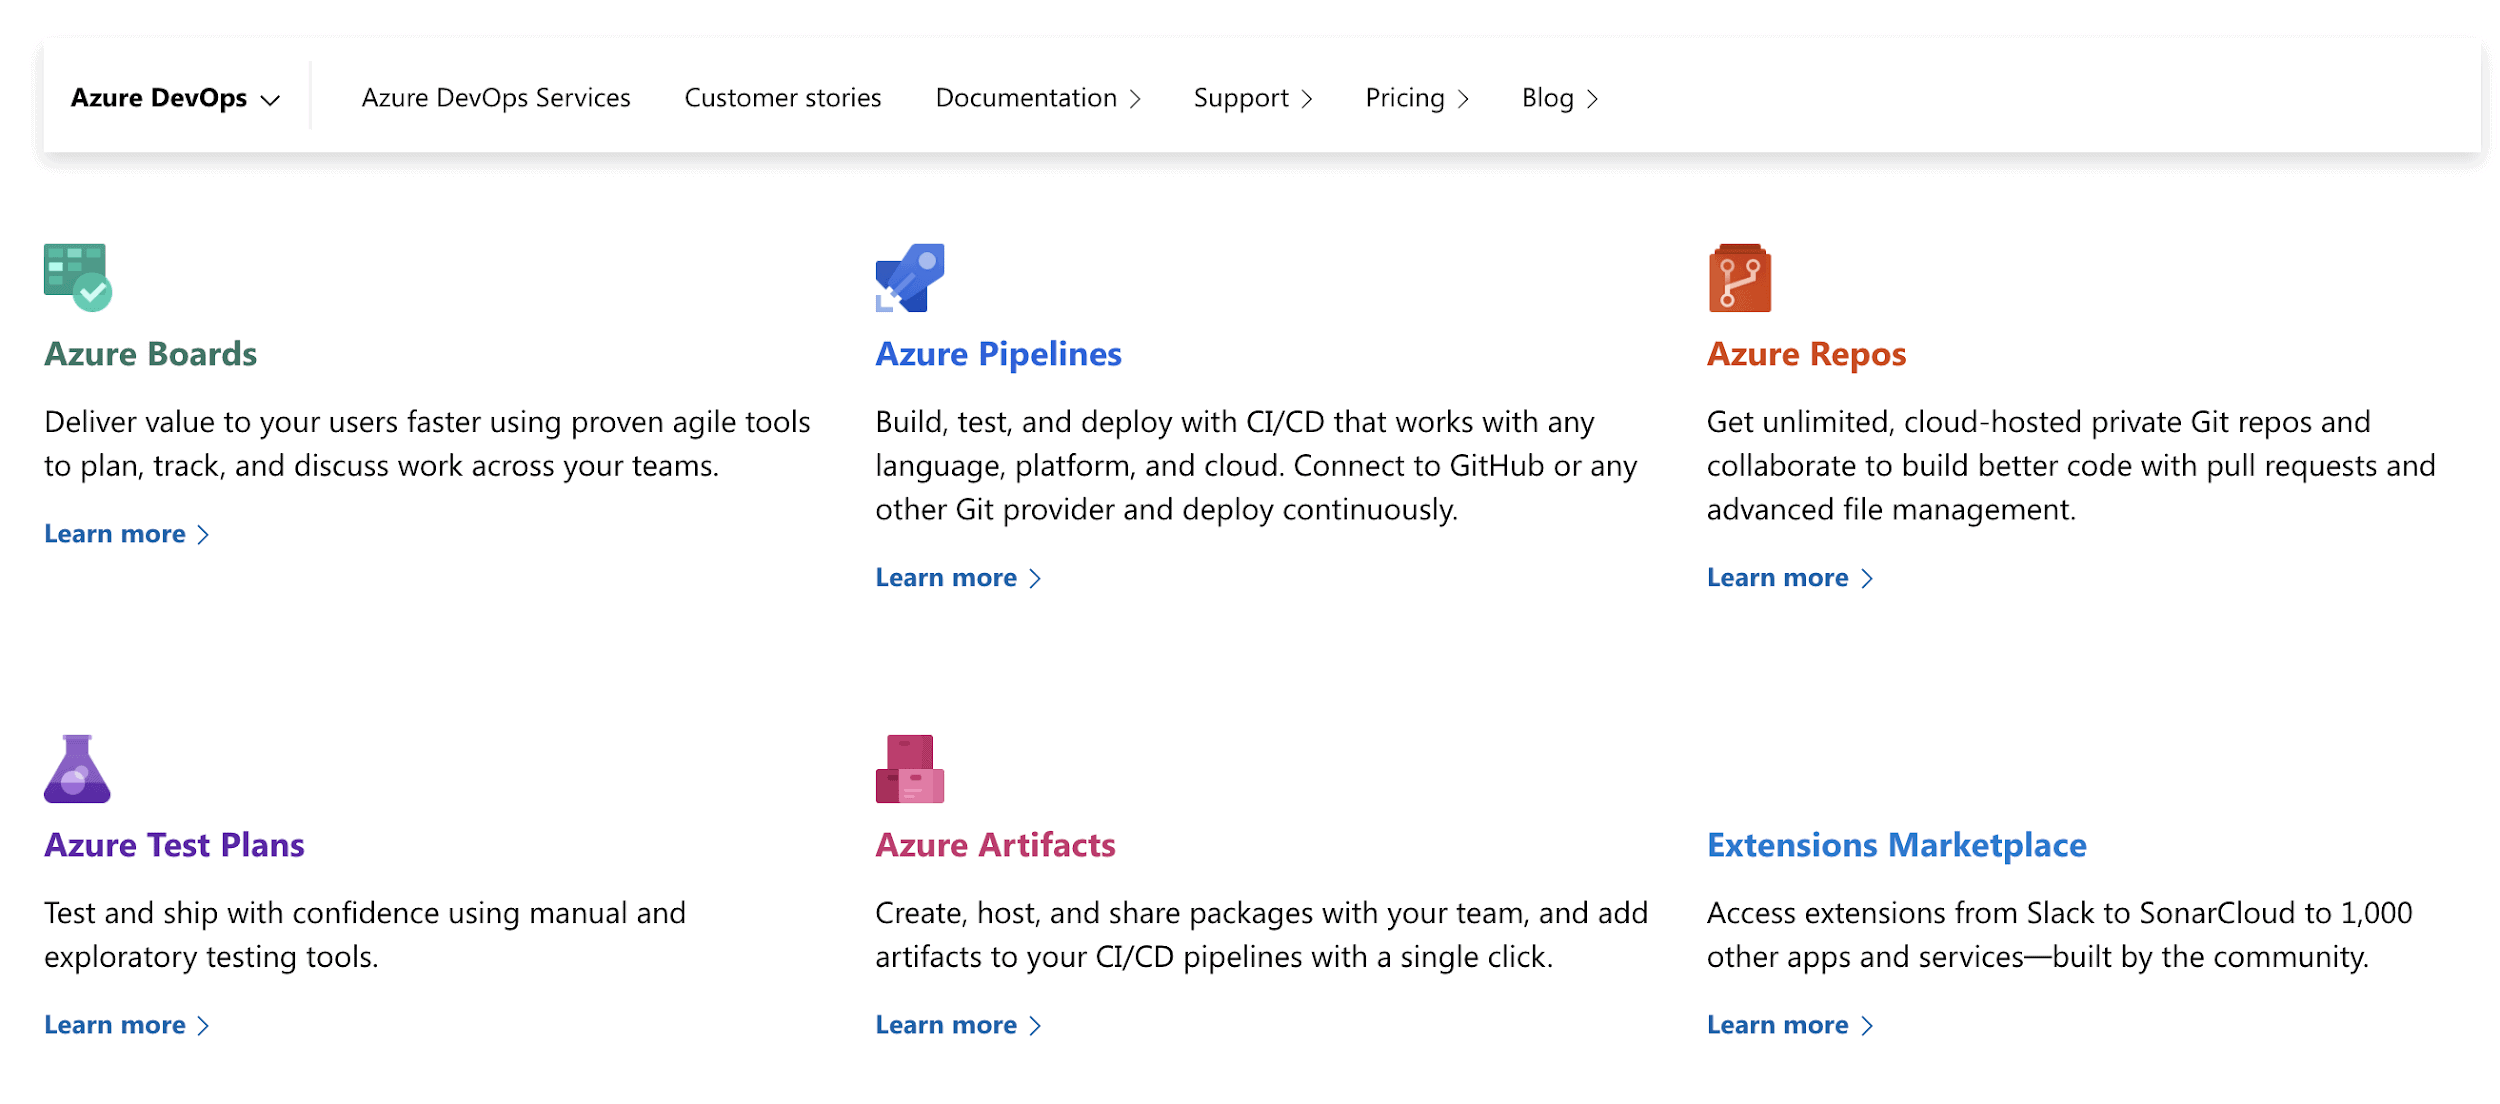
Figure 1. Azure DevOps features.
In this article, we’re going to explore a bit about the basics of Azure DevOps. What is it actually? How to get started, set up, create important artifacts like repos and pipelines, and deploy/release your code.
For the purposes of this article, you must have installed Visual Studio Community IDE and created an account in Azure DevOps. Don’t worry; it’s all free!
Creating Your First Repo
Navigate to Azure DevOps. After you sign in and get redirected to the Azure DevOps home page, you may immediately see a form with some inputs to create a new project (Figure 2): 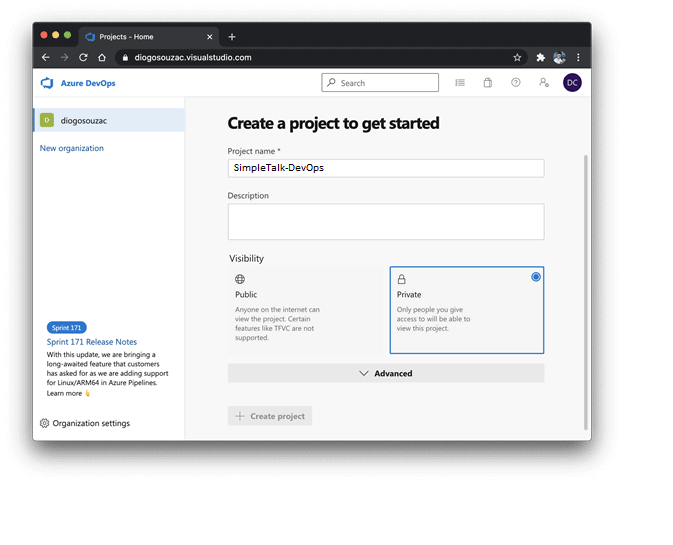
Figure 2. Form to create a new project.
Fill them in with your own project name and description. You can choose between Public and Private visibility because it works similarly to the GitHub repos. You’re allowed as many private projects as you want.
Within the Advanced toggle, you get to see two options: Version control, to define which versioning system your project makes use of, and Work item process, to identify in which type of agile working process your team works on. They’re, by default, respectively set to Git and Agile.
Click the Create project button. It can take a while until it gets finished.
Once it’s done, you’ll be redirected to the Summary overview of the project which, until now, is empty.
Next, you need to initialize the repository by getting the Git credentials. For this, click the Repos menu option in the left-side panel and may you see something like Figure 3.
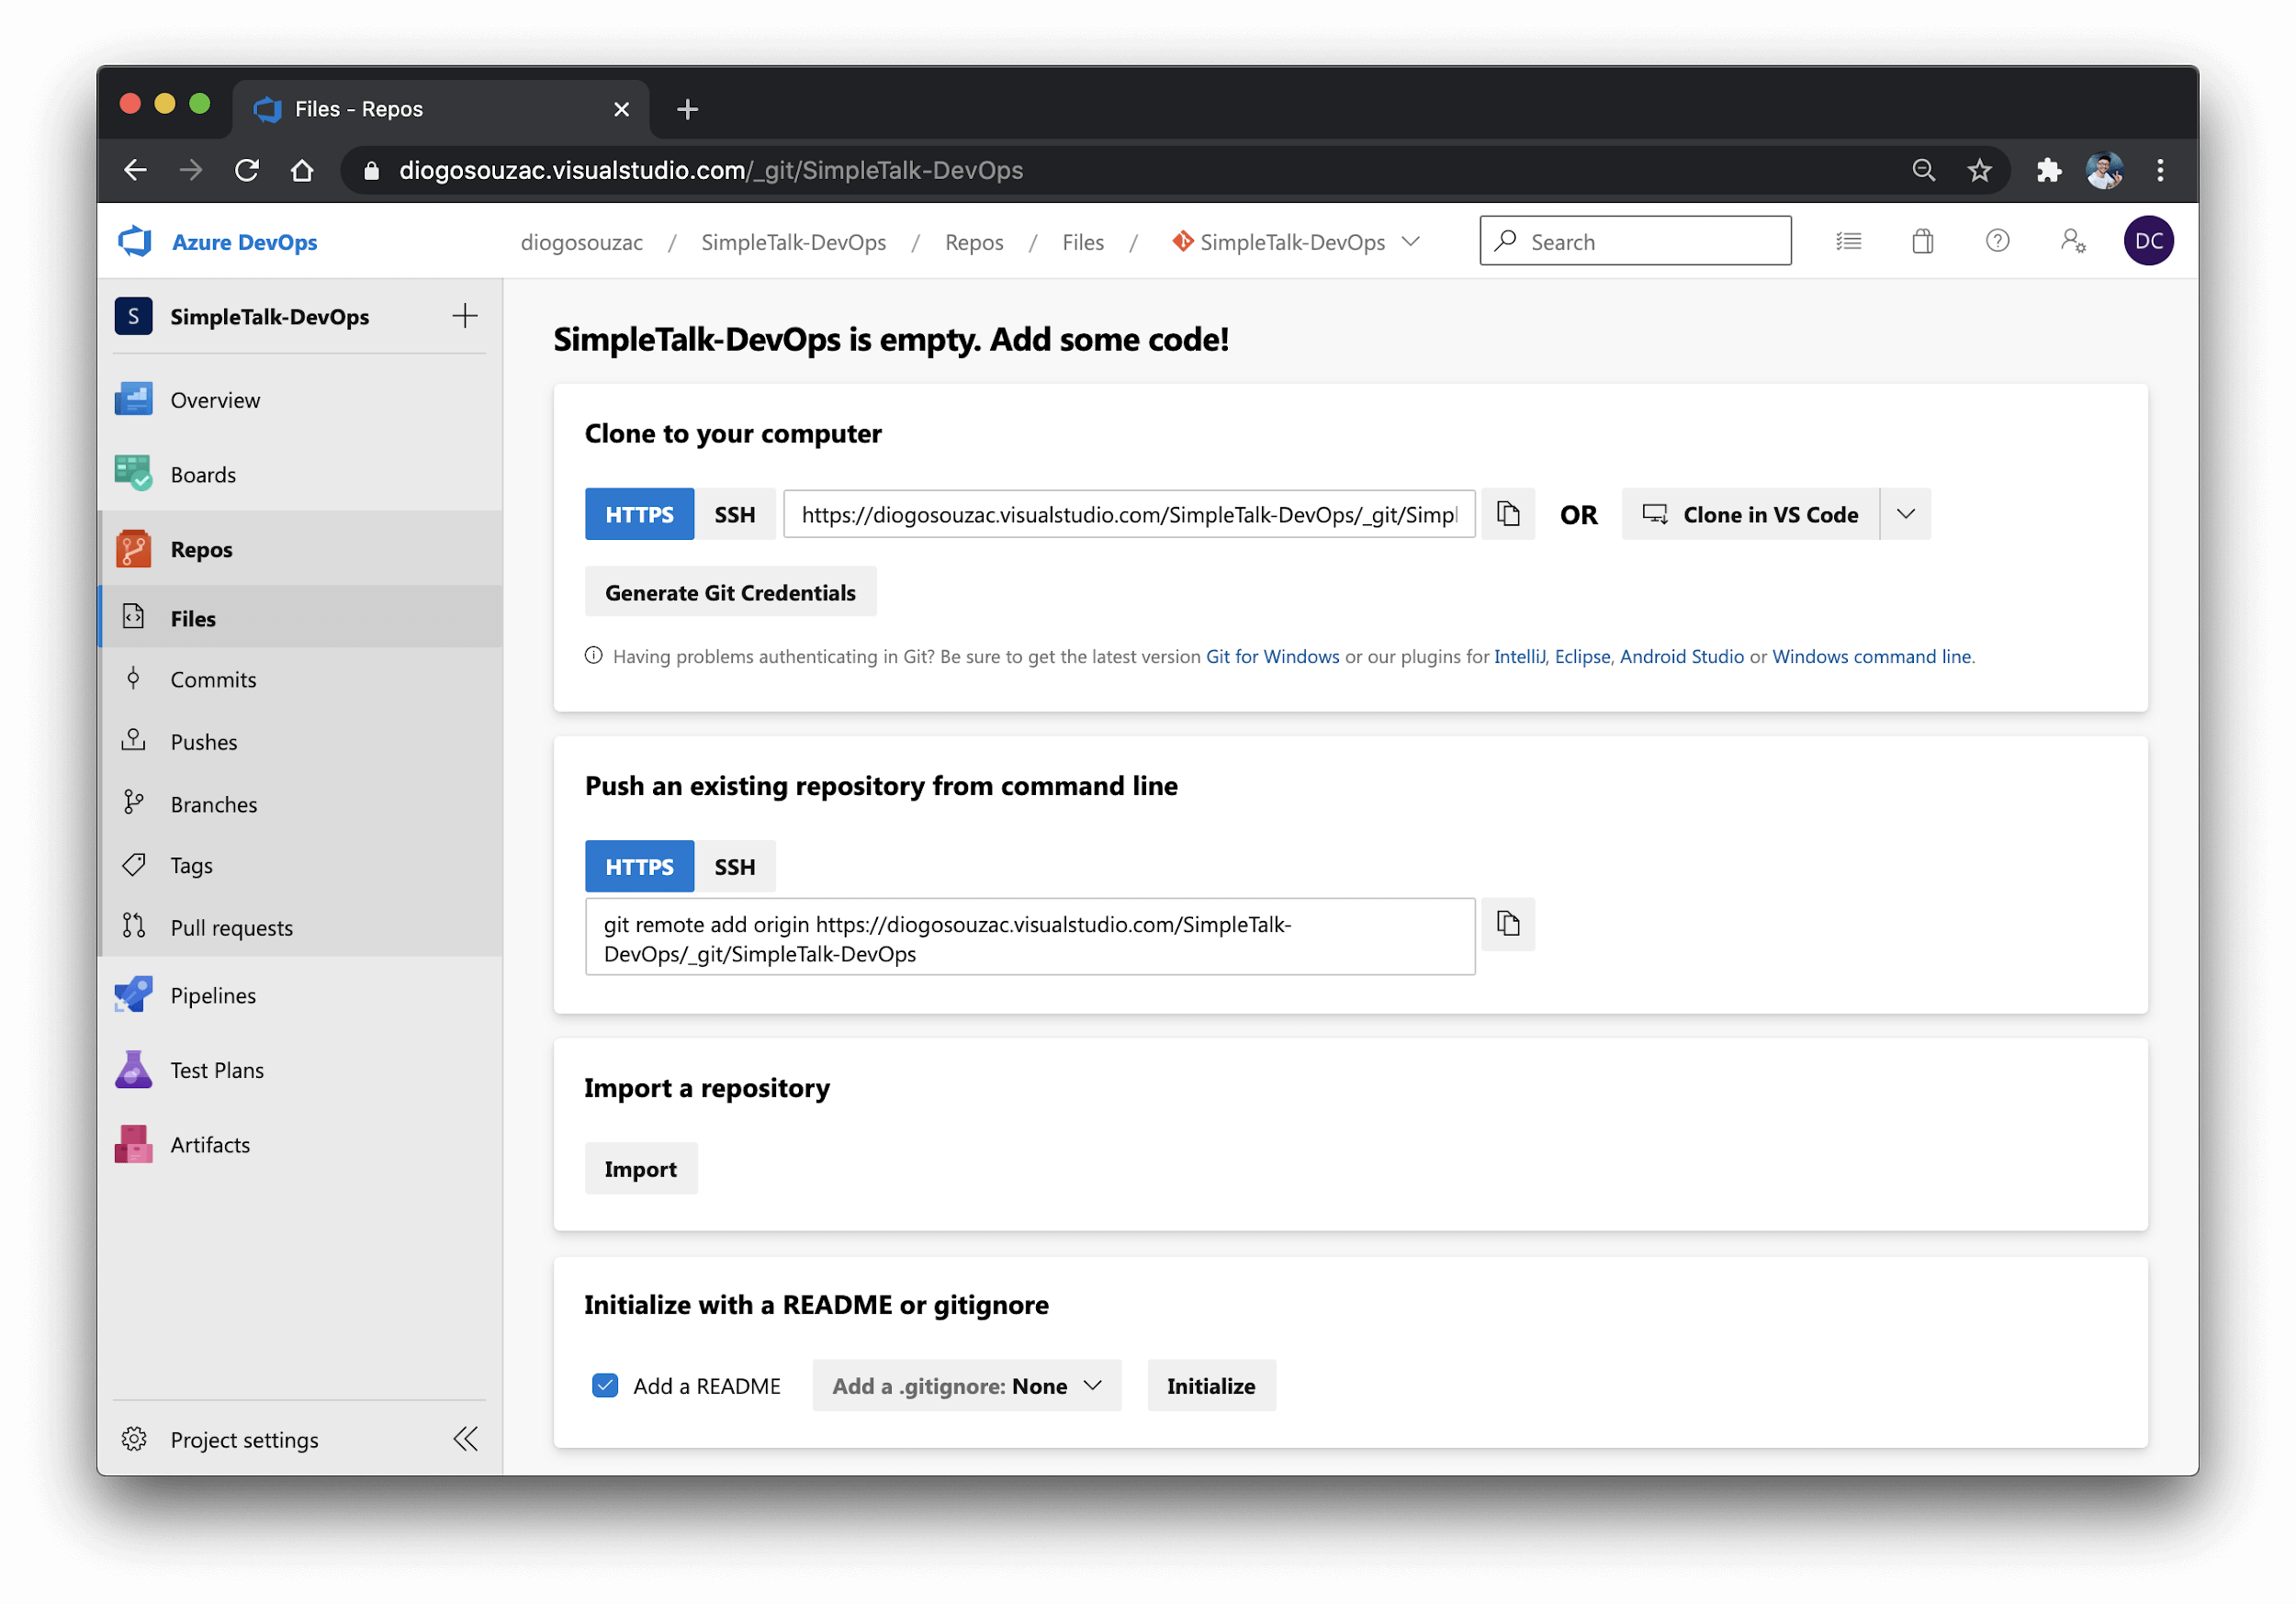
Figure 3. Adding some code to the project.
As you can see, there’s more than one way to add some code to your project. You can clone it to an empty folder in your computer, push some existing repo to this project via command line or even import a repo that already exists.
For now, simply initialize the project with a single .gitignore file. At the bottom of the page, change Add a .gitignore to Add a gitignore: VisualStudio by searching for Visual Studio in the dropdown. Then click the Initialize button.

Once complete, you’ll be redirected to the Files view shown in Figure 4, in which you can see the project’s contents just in GitHub web.

Figure 4. The files in the repo
The Local Version
Now that your Azure DevOps project is set, you can move on to its importing into the Visual Studio local environment.
For this, open Visual Studio and click the Clone a repository option, right below the Get started column. The next screen asks for the Git’s repo location, which could be in any Git address or even locally. However, you should use the Azure DevOps option placed at the bottom of the screen (Figure 5).
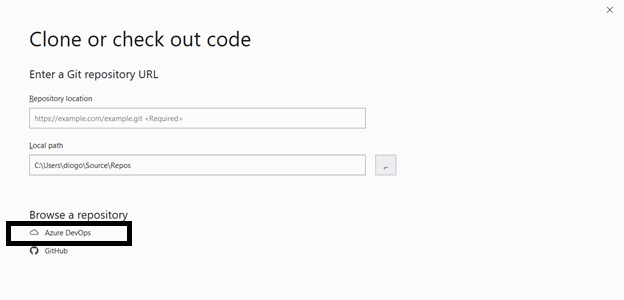
Figure 5. Checking out code.
For this option to work, you must be logged in to your Microsoft account at Visual Studio, the same account you used to create the Azure DevOps project.
Once the second window opens, you’ll be able to see the list of available projects, including the one you just created as shown (Figure 6).

Figure 6. Connecting to the remote project.
Select a folder path of your preference and click Clone. Once the command is finished, the project opens up in the IDE. Now you can see the files of your projects under the Solution Explorer window. Remember, however, that it is not yet a recognizable .NET project, and neither is it inside of a solution.
The second tab, Team Explorer, shows almost all the options needed to locally manage a project and coordinate with a team. You’ll see options for pulling requests, synching branches, and seeing the changes.
Now transform the project into a real .NET project. Run the following commands via command line:
|
1 2 |
dotnet new sln -n SimpleTalk-DevOps dotnet new webapp -o src/SimpleTalk-DevOps |
This code creates both the solution and a web app for testing purposes. Then, run the following to add the web project to the solution:
|
1 |
dotnet sln add src/SimpleTalk-DevOps/SimpleTalk-DevOps.csproj |
To refresh the new structure into Visual Studio, double-click the .sln file and wait for the IDE to reopen the project. When you check the Solution Explorer, you’ll see the solution and project as shown in Figure 7:
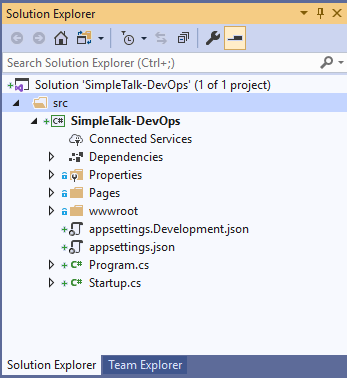
Figure 7. The solution
Pushing to Azure DevOps
Now’s time to push things up to the cloud. For this, you simply go to the Team Explorer view again and click Changes.
All the project changes are listed, which in this case are all the project files. Enter a message into the commit field and hit the Commit All and Sync button, as shown in Figure 8.
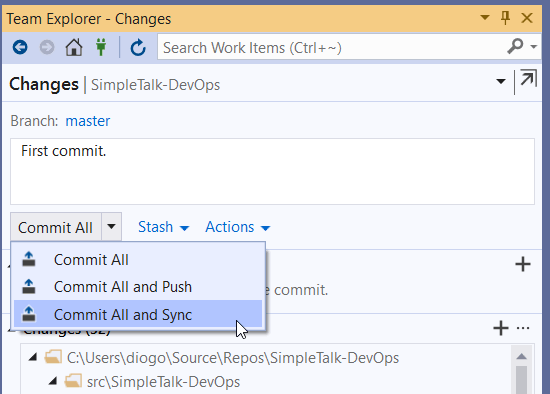
Figure 8. Committing changes to Azure DevOps repo.
This command combines the commit and push to the remote repository in one step. When you go to the Azure DevOps web portal and refresh it, you’ll see the changes there as shown in Figure 9.
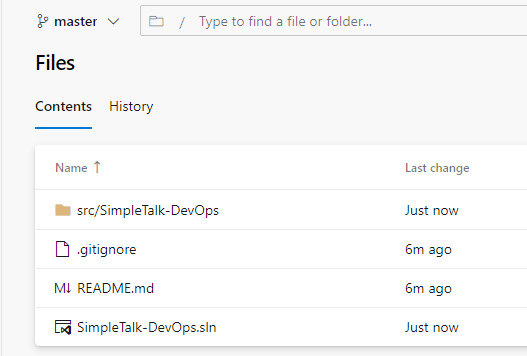
Figure 9. The changes
Creating Your First Pipeline
A pipeline, as the name suggests, is the tube in which your software delivery process is automated. In other words, it is a sequence of automated steps to build code, run your test suites, create tagged versions of your code repository, and, most importantly, deliver everything to production.
Now that you have a repo with code synched to the local project, move on to your first pipeline creation.
Go back to the SimpleTalk-DevOps project in Azure DevOps. Click the Pipelines menu option in the sidebar menu and then click Create Pipeline as shown in Figure 10.
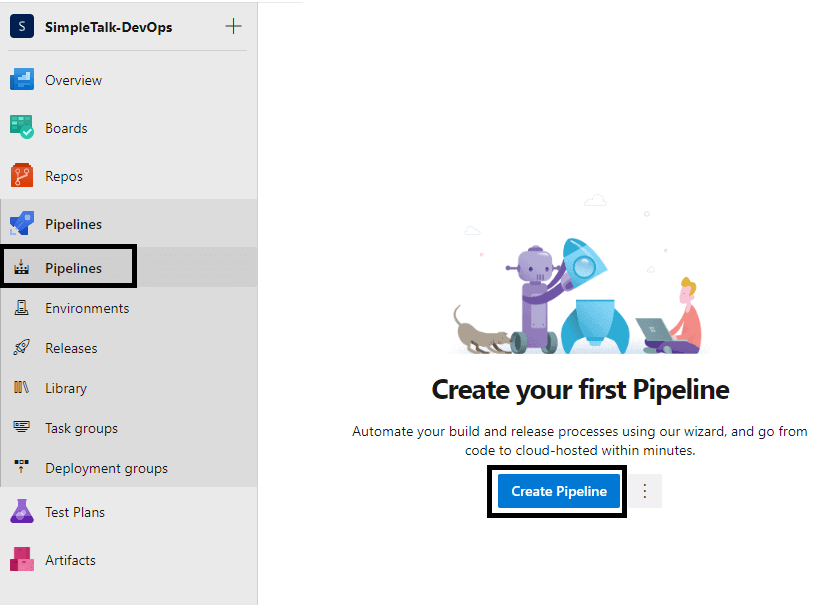
Figure 10. The pipeline
There are four steps to finish a pipeline creation, and the first one is creating the repository connection. The next screen asks about the location of your code. Take a look at Figure 11. Azure DevOps allows several repository vendors such as GitHub and Bitbucket.
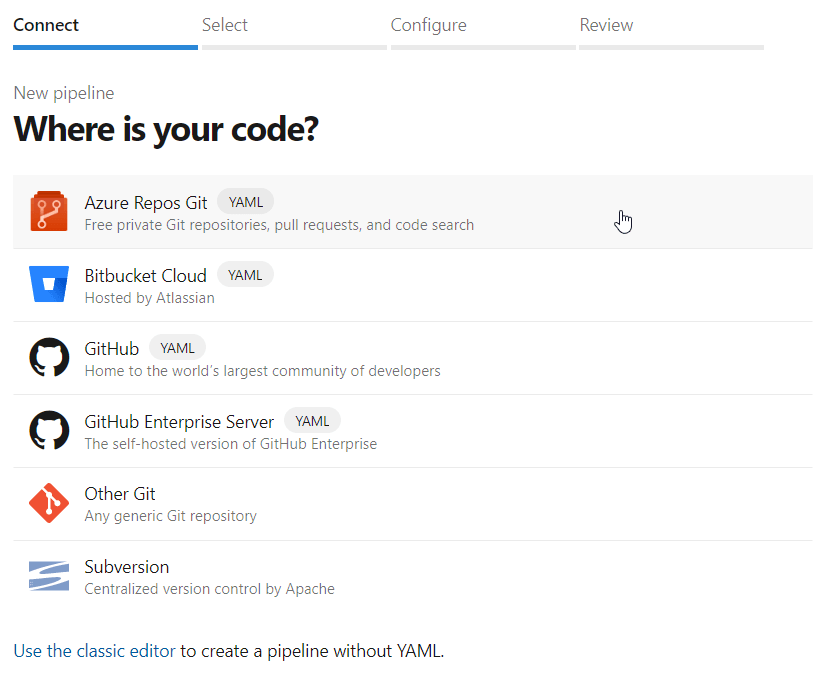
Figure 11. Selecting the repository system.
As you may have guessed, you should select the first option, Azure Repos Git. The following screen shown in Figure 12 retrieves the Azure DevOps repo that you created before.
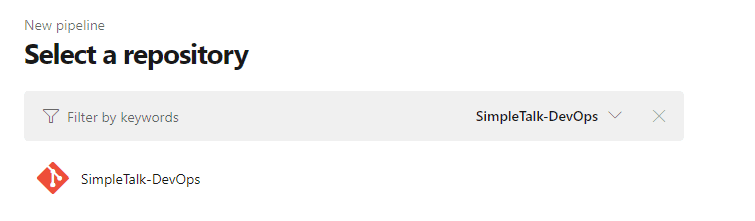
Figure 12. The repo
Select it, and the wizard setup automatically moves to the next step, which is the pipeline configuration (Figure 13).
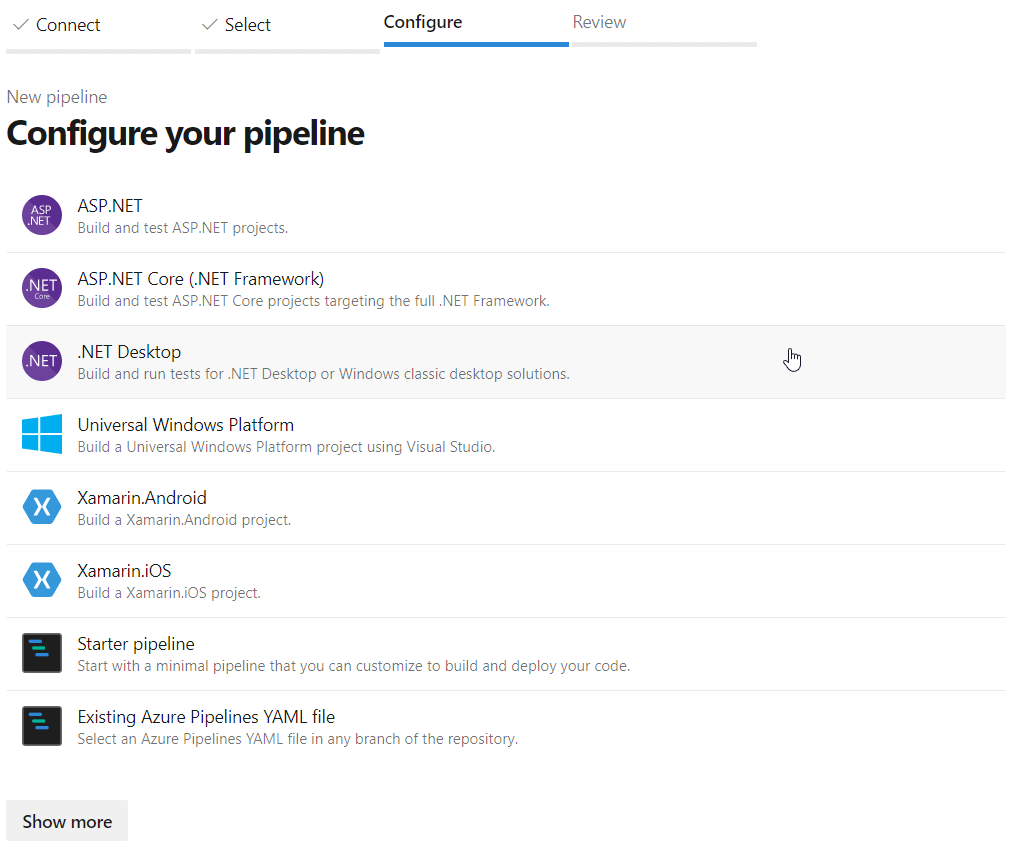
Figure 13. List of available pipeline configs.
Azure DevOps allows creating pipelines for many different technologies, some of them out of the Microsoft world (like Android, Gradle, Node.js, Python, and many more). That’s one of the main benefits of using Azure DevOps. With a few steps, you can quickly get anything you want up and running.
Click the Show more button and search for the ASP.NET Core option shown in Figure 14, which is the right type for the project we’ve created.
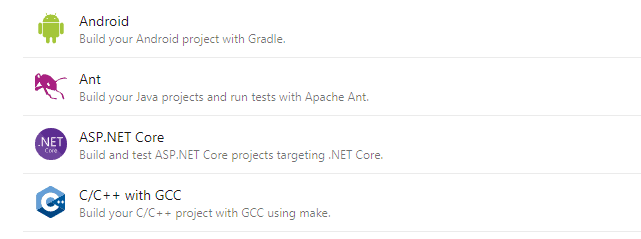
Figure 14. Choose ASP.NET Core
Click on it, and you’ll be redirected to the final step: the reviewing of your pipeline YAML. Yes, that’s the default configuration format Azure DevOps uses shown in Figure 15.
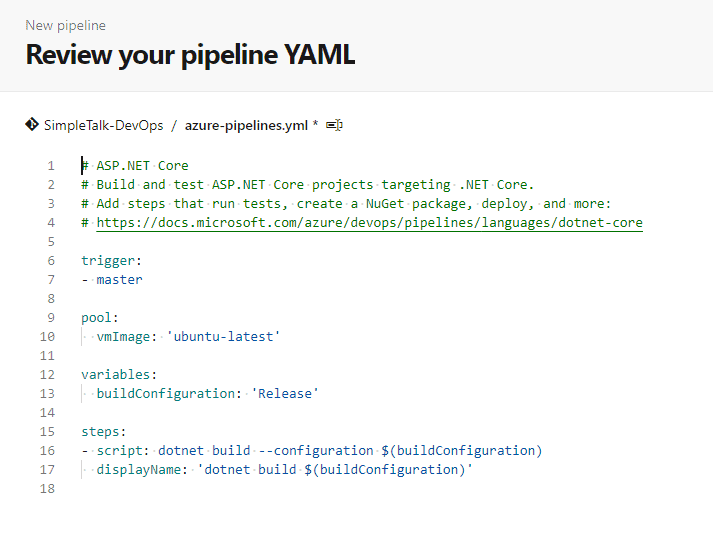
Figure 15. The pipeline YAML
It’s important to note also that this YAML file must be within the same project folder, which means that it needs to be committed there as well. But don’t worry, Azure DevOps does that for you.
Click the Save and run button, fill in with an optional description for this action and click Save and run again.
After that, Azure DevOps is going to commit the changes, push them, create the pipeline and execute it right away. In the screen that follows, you may wait a while until the execution completes and should see something like Figure 16.
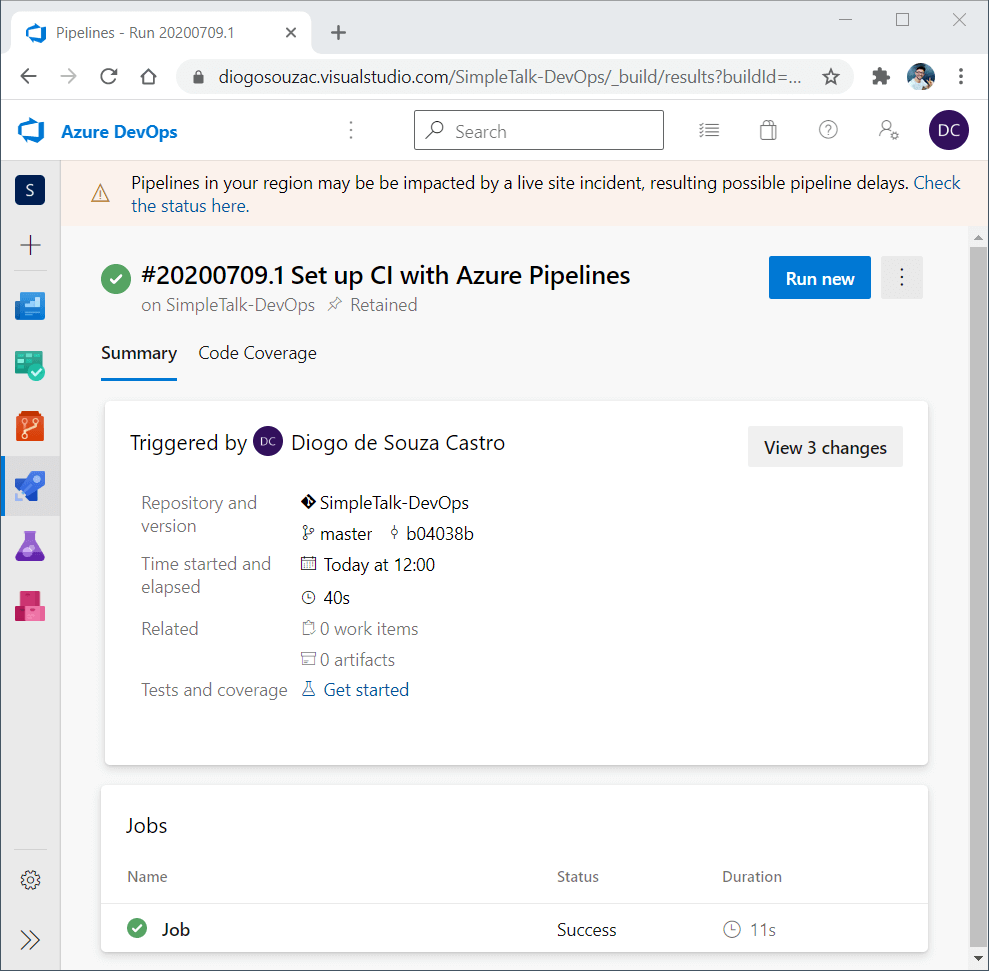
Figure 16. Pipeline execution results.
If you click in the job that successfully finished, you’ll be led to the details execution page (Figure 17).
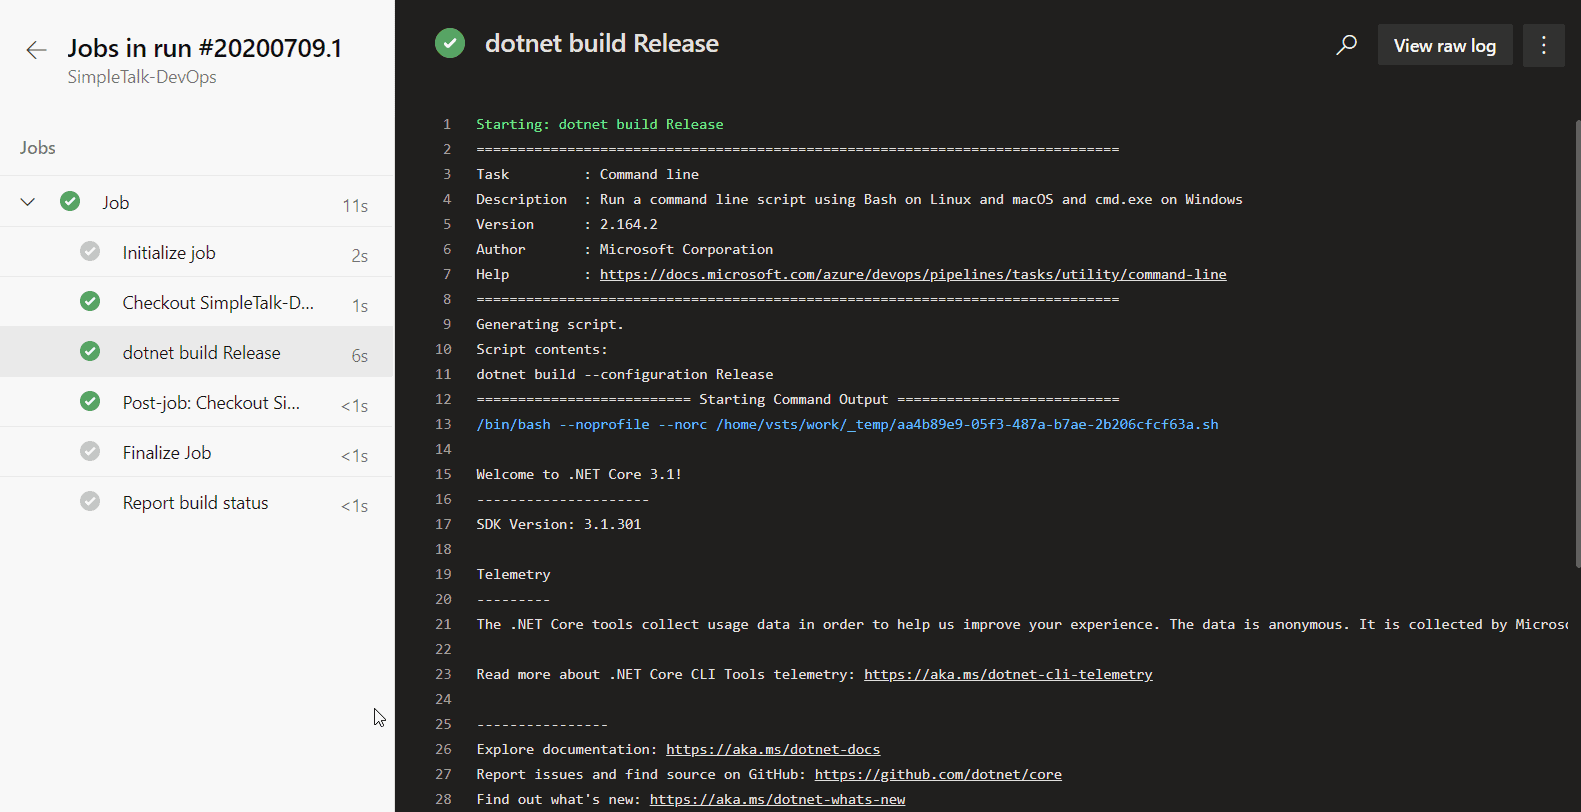
Figure 17. Job execution details.
You can review the detailed logs of each step as well as the status and any errors.
In case your project uses any NuGet dependencies, they need to be addressed in the Azure DevOps project as well. To change this, you can go the Pipelines menu option again and mouse over the created pipeline. You may see a menu option hovering at the end of the row item, so click it and select the Edit option.
In the right-side panel, under Tasks, search for NuGet and click the “NuGet” option. Figure 18 shows how the screen looks.
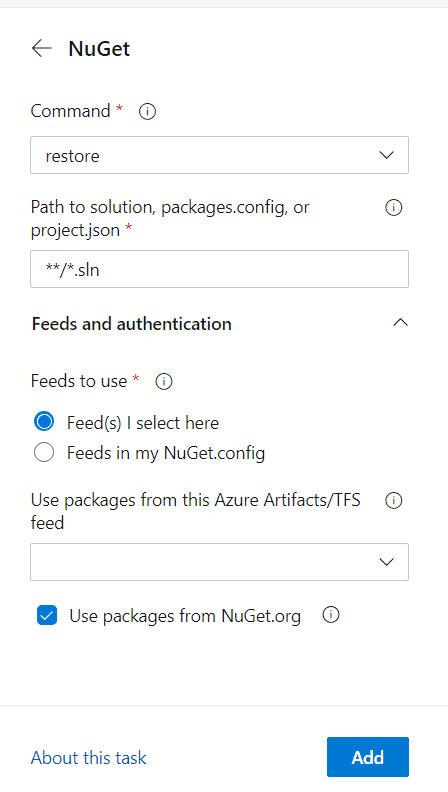
Figure 18. Setting up NuGet.
You can select from the NuGet command to execute within this task, the path to the solution (leave it as it is), and what feed to use (the one you’d explicitly insert there or a feed stated in your repo’s NuGet.config file).
Let’s test it out, click the Add button and see how your yml file gets updated. Now, every time this pipeline executes, one extra step will be added to the end of it, the NuGet restore command.
For instance, this command restores all the NuGet packages and install the ones that are missing, but in fact it’s not necessary in a real-world scenario, since we’re already running the dotnet build, which takes care of this alone. But we’ll keep it for testing purposes.
Click, now, the Save button in the right top of the screen, and then Save again in the screen that follows it, like in Figure 19 below.
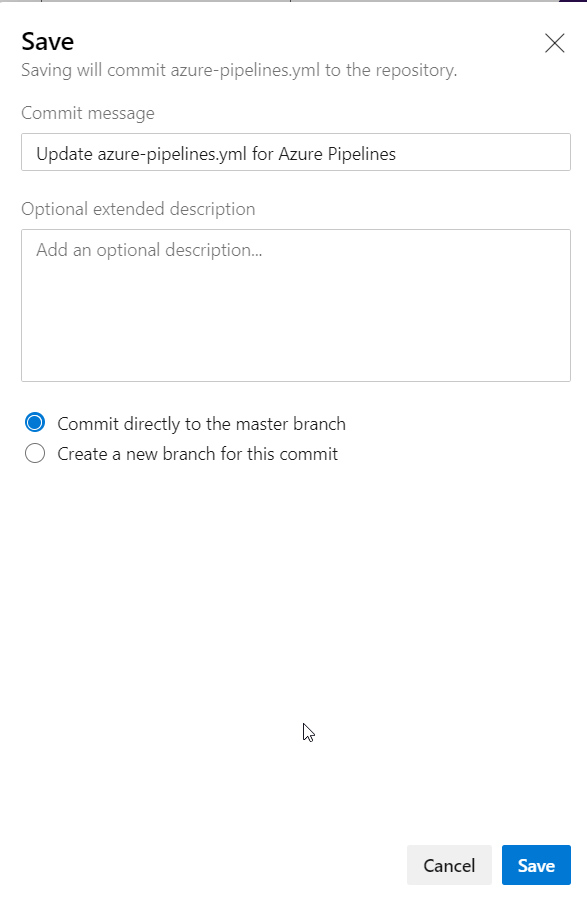
Figure 19. The save screen
After that, you can click the Run button in the right top side of the screen. That will trigger another pipeline execution. Wait for it to complete, and you’ll have the following execution outputs shown in Figure 20:
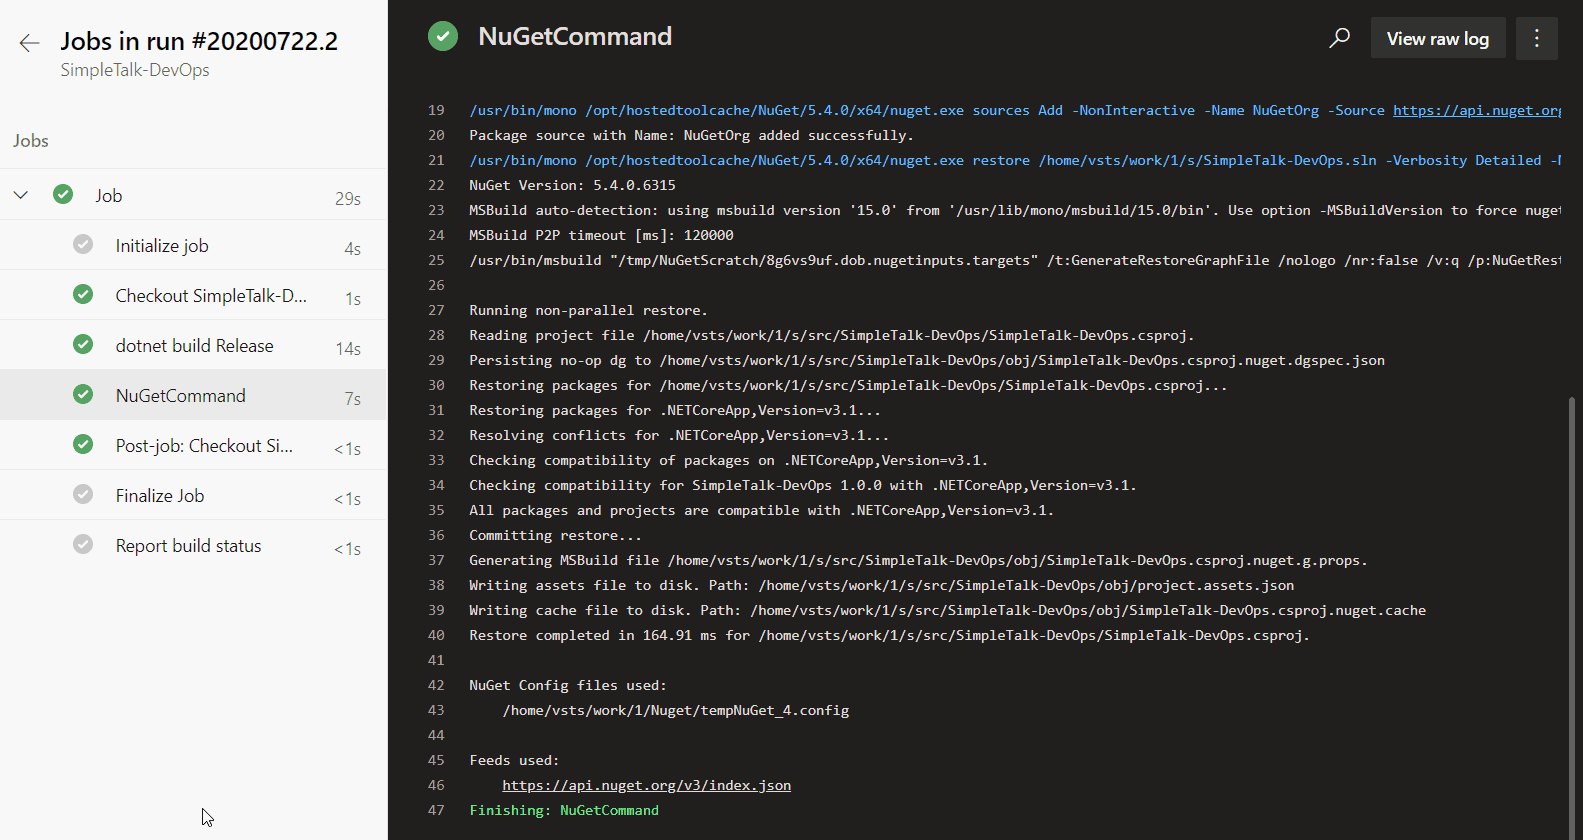
Figure 20. The NuGetCommand
Look, a new step NuGetCommand was added with a successful execution. This is how you must face Azure pipelines, as a bunch of sequenced steps to achieve an overall execution.
Creating Your First Release
Another essential step of a building process is releasing. After you have a project repo set and a pipeline created and successfully executing, now you must release it.
For this, click the left-side panel’s menu option Pipelines > Releases. Click the New pipeline button.
The next screen automatically displays a list of template options for your release pipeline. When you get ready to send your code for production, with an ASP.NET project in hand, you should select the option Azure App Service deployment. However, since this configuration requires a paid Azure subscription plan, you’ll use an Empty job template to demonstrate the steps. Make sure to select the Empty Job option as shown in Figure 21.
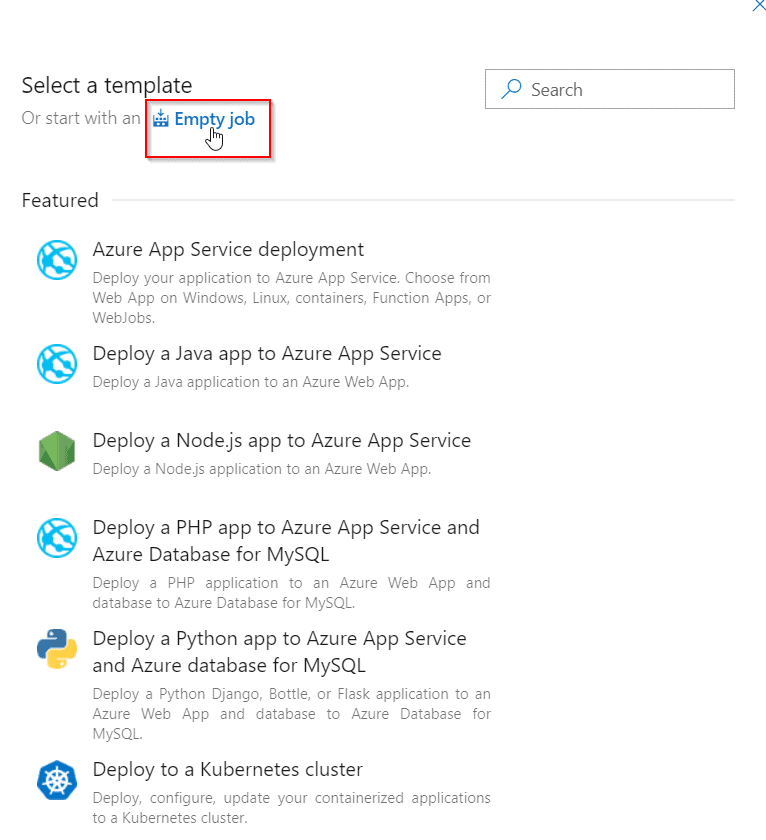
Figure 21. Selecting an empty job template.
Next, you can leave the stage name as it is and close the Stage window.
Now, you need to add an artifact to handle the triggering of the stage job execution right after any pipeline build happens. It is going to be an automatic process.
Click the + Add an artifact button and, then, keep Build selected. Right below, you should fill in the project and source (build pipeline) for this artifact. Make sure to select everything, as shown in Figure 22.

Figure 22. Adding an artifact.
Click the Add button. There’s only one more step. Click the lightning icon above the created artifact and enable the first toggle button that appears, the one related to the Continuous deployment trigger. That’s the config which allows the deployment to occur right after every build in the project.
Finally, click the Save button, at the top of the page, to guarantee all these changes are persisted.
To test, go back to the build pipeline and click Run pipeline. Once the build is successfully finished, go to the Releases view again and check for stage completion (Figure 23).
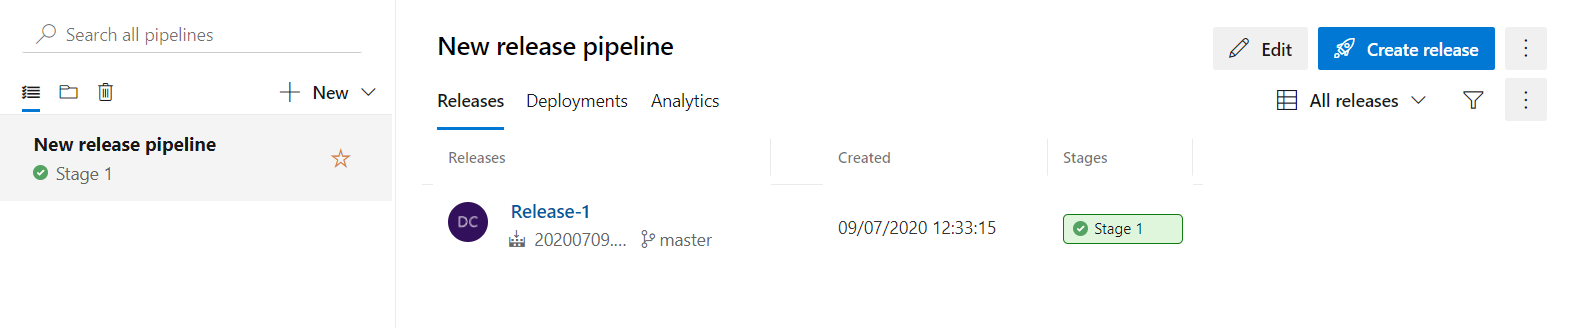
Figure 23. Release pipeline successfully triggered and finished.
Summary
Congrats! You’ve covered the basics of Azure DevOps. My job here was simple since the platform is so clean and straightforward. Once you understand the core concepts behind the repositories, pipelines, deployments, and releases, automating the whole thing gets pretty easy.
For additional reading, I’d highly recommend the official docs, which are rich in details over each of the steps covered so far.