
In my first article, I introduced you to Windows Azure and explained why you should invest time and money in learning the ins and outs of the platform. I then walked you step by step through deploying your first Azure virtual laboratory environment, using the powerful template based technology built in to Azure. Hopefully in the days since, you’ve gotten a chance to poke around and start playing with things, because in this article we’re going to start going into more depth. Specifically, we’re going to talk about Azure Storage, a critical part of the platform.
Why storage first? In my opinion, it is the most important part of the Windows Azure platform for a DBA to understand. SQL Server relies on storage for performance and reliability; if you have slow storage, no amount of RAM or CPU will help speed up your workload, especially for write-intensive applications (ever try working with a server where the transaction logs were on 7.2K SATA drives?). Additionally, Azure Storage has a number of complexities that you will need to consider if you are going to maximize your performance.
Basic Terminology
Before we dig in further, we need to define a few key terms.
Storage Account
According to Microsoft’s documentation, a storage account is “a secure account that gives you access to services in Azure Storage.” Storage accounts provide various mechanisms for accessing content that is stored in the Azure Storage platform, including authentication, auditing, and management of performance levels.
Storage accounts come in two flavors: standard and premium. Standard storage accounts store data on regular magnetic hard drives, whereas premium accounts use solid state drive technology to ensure maximum performance. Accounts offer different ways to access content; standard accounts provide access both via what Azure calls the “blob” endpoint (think of individual blobs as files or chunks of data), as well as a “file” endpoint that acts very similarly to a Windows file residing in the cloud. Standard accounts also have a “table or queue” endpoint that allows reading and writing of simple tabular data. For the purposes of this article, we’ll focus only on the “blob” model of storage.
Containers
In the blob storage model, a container acts in a similar manner to a folder on a regular file system; it’s a logical unit at which you can set access policies and other metadata. At this point in time you cannot have nested containers.
Blobs
In Azure storage, a “blob” is really just a hunk of data, stored as a file. Virtual machine disks are stored as individual blobs within containers in an Azure storage account.
How Storage Accounts Work With Azure Virtual Machines
In Azure, all virtual machine disks are stored as VHD (Virtual Hard Disk, the same format that is used by Microsoft’s Hyper-V technology) files within blob containers in Azure storage accounts. Let’s take a look at how we can view these files.
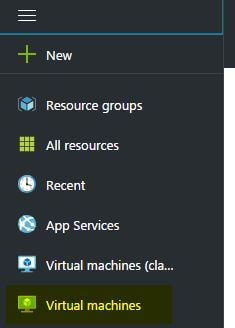
After logging into the Azure portal, find one of your lab’s two virtual machines. As a reminder, you can do this by selecting “Virtual Machines” from the left hand navigation bar.
Once you have the virtual machine selected, click on the “Disk” selector on the left hand navigation panel. You should see a screen that looks like this.
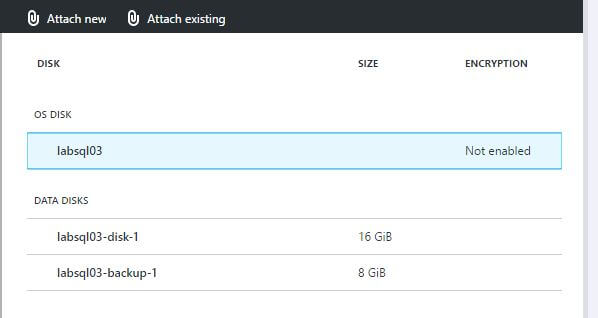
Click on one of the lines under the “DATA DISKS” section. You’ll see a screen that shows you various attributes of the disk, such as this one.
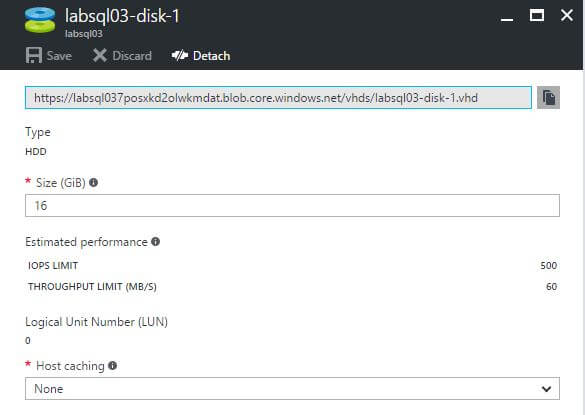
A few fields are worth explaining:
|
Field Name |
Description |
|
Type |
Tells you what kind of storage account the disk file is stored on. In this case, it reads “HDD”, which means the disk is stored on a Standard storage account, backed by magnetic disks. If this disk were on a Premium account, you’d see “SSD” here. |
|
Estimated Performance |
Tells you the maximum performance you should expect from the disk, in terms of IOPS and total throughput. Note that this is not necessarily what you’ll actually get; that depends on other factors that we’ll cover later. |
|
Host Caching |
This indicates if the disk is configured to use local cache available on the physical hosts where Azure VMs reside. Microsoft recommends that disks for data files should be set for Read caching, and that disks hosting log files have caching set to ‘None’. |
Also, if you look at the very top of the screen, you’ll see a text field that contains a long URL in it, probably something like “https://labsql03ca213vax.blob.core.windows.net”. This is the unique URL to the disk file; all Azure disks are referenced using this format, which is <storage account name>.blob.core.windows.net/<container name>/<disk file name>. When working with these files (and files in Azure storage in general), you’ll use this quite a bit.
Storage Performance in Windows Azure
As any good DBA will tell you, consistent good performance from the storage subsystem is critical for ensuring a well-performing SQL Server instance. And while it’s certainly possible to get some very impressive performance out of an Azure virtual machine’s storage, we can achieve this only if we carefully evaluate and plan for our requirements within the constraints of the platform.
Firstly, if you are looking for high performance from storage in Azure, you must use Premium class storage accounts. This is most critical for drives that host SQL data and (especially) transaction log files. Personally, I use standard storage accounts for backup files, however you should only do so after testing to ensure your backups complete in an acceptable time frame.
Secondly, you must account for the various places where Azure storage can be throttled, so that your performance is not hindered at any level of the infrastructure. Bandwidth in Azure storage is constrained at three levels:
- Individual disk
- Virtual Machine
- Storage Account
We’re not going to directly consider the storage account level performance limit, since (at least at this point in time) it is so high (at 20,000 IOPS and approximately 50 GBps) as to not come into play except in extreme cases.
Disk level performance
A “disk” in this sense means a single VHD file stored in Azure storage. For example, if you have three different VHD files attached to a single virtual machine, that counts as three disks.
Depending on the size and type of disks, you may max out the available performance of a single disk. At the time of writing this, all Standard disks have a maximum throughput of 60 MBps, and a maximum sustained IOs Per Second of 500, no matter their size. Contrastingly, Premium disks come in three sizes, each of which has different performance targets. For example, a disk with a size of 128GB (or what Azure documentation refers to as a “P10” disk) has a maximum bandwidth of 100 MBps and a maximum sustained IOs Per Second of 500; the largest disk (at 1024GB and referred to as a “P30” size) by comparison has a maximum throughput of 500MBps and a maximum IOs Per Second capacity of 5,000.
Now if you have any knowledge of the kind of performance you can typically expect from solid state drives, your reaction to this is likely to be “That’s outrageous! I can get better performance from my commodity solid state drive in my laptop!” This is absolutely true, and my own experience and testing (using the consumer grade solid state drive in the computer on which I am writing this) support this. That being the case, this is how Microsoft has chosen to allocate resources in their cloud environment, and we must be aware of and work within the constraints of the system. Practically speaking, this means that we must often either (a) create a disk larger than our actual storage requirements or (b) attach and stripe multiple disks (we’ll go over how to do that in a later article) to the same virtual machine, simply to achieve the level of performance we require. For example, if you required a disk capable of around 10,000 IOPS, you would have to allocate and stripe two of the largest disks available, simply to support that kind of performance at the disk level.
However, the complexity does not end there, as we must also consider that individual virtual machines themselves have limits.
Virtual Machine level performance
Depending upon the size of your Azure virtual machine, the VM itself may become a bottleneck in terms of storage performance. For example, at the time this is being written, a DS1_V2 sized virtual machine (the same size we used for the two SQL Server virtual machines when we created them in my last article) has a maximum storage throughput of 48 MBps, and a maximum IOs Per Second of 3,200, across all disks attached to the machine. To continue our previous example of building a system capable of 10,000 IOPS, this means that even if the disks we allocate have enough capacity to support this target, we would see far lower performance due to the maximum capabilities of our virtual machine. In fact, we could well hit the ceiling of possible performance with a single Standard disk, since the throughput limit of the disk (50 MBPs) is higher than that of the virtual machine (48 MBps).
To determine the true performance capacity of a given configuration then, we must consider the lesser of two values: 1) the maximum combined performance of all disks that will be attached to the virtual machine, and 2) the maximum performance of the virtual machine they will be attached to.
To flesh out our example further, we require a system capable of 10,000 IOPS. We know from previous discussion that two P30 sized disks will facilitate this, given that each has a capacity of 5,000 IOPS. We can then look at this chart that shows the performance targets of the DSv2 series virtual machines, and not that the first VM size to support our target is a DS3_V2 virtual machine (which supports up to 12,800 IOPS).
However, even here, there is one more complexity to consider. Because storage in Azure is throttled at both the IOs Per Second and the disk throughput (MBps) level, we have to consider both in terms of performance targets. For example, let’s say for the sake of argument that SQL Server generally reads and writes data in 64kb increments (the size of one extent, or 8 8kb pages). Whether this is actually the case is debated, as Microsoft has stated that the IO size used by SQL varies, but for simplicity’s sake we’ll use this number for now. This being the case, if we are targeting a system capable of supporting 10,000 IOPS at an average size of 64kb, we must not only have capacity for the IO operations themselves, but the bandwidth they require. In other words, the system must support a total bandwith of 640,000 KBps (10,000 IOPS x 64kb per IO), or roughly 640 MBps.
Looking at the maximum storage bandwidth available for the DS3_V2 virtual machine, we see that we will max out at 192 MBps, well below our target. In fact, we’ll only be able to manage around 3,072 IOPS (or 192 MBps / 64kb per IO). That’s less than half of the performance capacity we are paying for with our two top level Premium disks. To get the full performance requirement, we would need to upgrade the size of the virtual machine to at least a DS5_V2 level, which supports a maximum of 768 MBps of storage bandwidth. That’s a big jump, and one that comes at significant difference in cost (at the time of writing this, the upgrade would increase monthly costs by almost $2,000).
But wait, there is yet one more place where we could find ourselves unexpectedly throttled, and therefore robbed of our required performance. Before I tell you what it is, I want to remind you of the levels at which performance is checked:
- Disk level
- Virtual Machine level
- Storage Account level
Recall that we are not considering the Storage Account level at this time. Given that we’ve just determined the needs from the perspective of the virtual machine level, that leaves: the disk level.
I can hear your objection now. “But, didn’t you just say that we took care of that by striping two of the largest tier Premium disks together?”
Well, yes, we did, but only partially. Remember, storage in Azure is throttled in two ways: 1) IOs per second, 2) bandwidth / throughput. So while two P30 disks satisfy our requirement for a maximum capacity of 10,000 IOPS, when we calculate the total throughput required (640 MBps), we sadly find that we will exceed the capacity of the two disks. Each disk gives us a throughput allocation of 200 MBps, for a total capacity of 400 MBps. This being well under the requirement, we will yet again find ourselves below the performance we are seeking.
This is one clear example of how very important it is to understand how the Azure platform functions. There are many ways in which resource usage is throttled; if we don’t consider each and every one, the result can range from poor performance to huge unexpected increases in cost. This is why it’s crucial that when designing cloud based environments that we (a) carefully define our requirements, (b) build our proposed architecture in a test environment, (c) verify that all targets are met.
Considerations For Allocating Virtual Disk Files
In addition to performance, you need to be aware of one more limitation to how Azure virtual machines interact with storage: Azure virtual machines have a limited number of disks that can be attached to them. For example, a DS3 sized virtual machine only supports up to a total of 8 data disks. This means that in some cases you might not be able to have the same kind of disk configuration that you would in a regular on-premise or hosted environment.
Here’s an example: when I give recommendations to customers about how to size and allocate disks for SQL Server virtual machines, I generally give them the following list:
- 1 GB disk for mount point drive letter (i.e. E:\).
- 8-10 GB disk for mount volume for system databases, to be mounted as E:\SYSTEMDB
- 16 GB disk for TEMPDB data files, mounted as E:\TEMPDBDATA
- 8 GB disk for TEMPDB log files, mounted as E:\TEMPDBLOG
- One disk for user database files
- One disk for user log files
- One disk for database backups
This accounts for 7 disks, which means that you can only attach one more before reaching the limit of the aforementioned virtual machine size. This has several implications, such as:
- If you must have more than one disk in order to achieve desired performance targets, you will no longer be able to attach any additional disks. In addition, you can have this configuration for only one virtual disk at the operating system level.
- Attaching new disks in order to increase space becomes problematic, since there is only one free slot. New disks must be attached one at a time, and only after old disks have been detached from the virtual machine.
For this reason, in general it is a good idea to pool together IO workloads. For example, you might store log files from both user and TEMPDB databases on one virtual disk, and combine all data (MDF or NDF files) files on another. Really, though, this depends heavily on your IO requirements. For example, if you’ve got a application that requires a great deal of TEMPDB IO capacity (temp table overload anyone, because that never happens), but the rest of the database files are relatively quiet, you might put TEMPDB files on their own virtual disk, then put everything else on another. We won’t get in to this in the current article, but I also believe that is an excellent middle way of making use of Windows Storage Spaces to pool together all virtual disk files and then carving out disks at the OS level
Conclusion
As you can see, there are a lot of potential complications and barriers when it comes to using Azure storage with virtual machines. SQL Server is so dependent upon good storage performance that it’s essential to understand and fully take these into account when building cloud based environments. It’s also important that you understand your requirements going in, so that you don’t over or under-provision the environment.
Fortunately, we can make use of our lab environment to help us better gauge how to properly size and build our ultimate production cloud environment. In the next article in the series, we’ll look at how to add (and remove) virtual disk files to existing virtual machines, how to create and maintain storage accounts, and how to manage disks in the operating system using Windows Server Storage Spaces.