Micorosoft has introduce an amazing benefit to organizations of all sizes with its Stretch Database offering in SQL Server 2016. Stretch Database allows companies to use on-premises instances of SQL Server to "stretch" their data into the Microsoft Azure SQL Database. Stretch DB is relatively simple to configure and implement on your environment. It may be a viable and cost-effective option to off-load cold data remotely to minimize costs with maintenance, storage, etc. Your decision to implement Stretch DB will likely be based on Azure pricing compared to the cost of upgrading your storage capacity. You may also consider how often the cold data needs to be accessed since performance will be impacted by the latency created by accessing the remote data. For information on Azure Stretch Database pricing, you can read SQL Server Stretch Database Pricing.
The article will show you how to migrate the historical data transparently and securely to the Microsoft Azure cloud, which provides for cost effective availability of cold data while keeping it safe and unchanged. You will see how to stretch your on-premises data to the cloud but still have the ability to query the fully accessible and online table and to monitor and manage the stretched tables.
To implement a stretch database,you must enable the feature on both the instance and database. Let's enable the Stretch Database feature on the Instance by running the below command.
--enable instance for stretch
EXEC sp_configure ‘remote data archive’, ‘1’
GO
RECONFIGURE
GO
After enabling the Stretch Database feature on the Instance, you need to enable the feature on database, as shown in Fig. 1. From SQL Server Management Studio (SSMS), right click the database that holds the table(s) you want to stretch to Azure and select Tasks > Stretch > Enable.
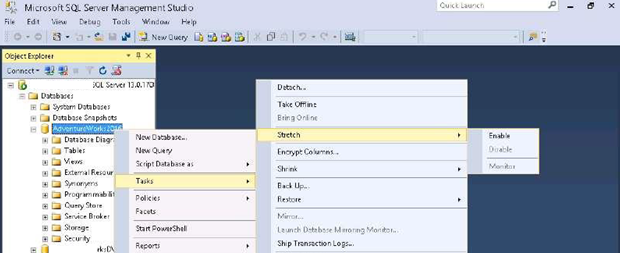
Fig. 1 - Start the stretch wizard
Enabling this will open the Enable Database for Stretch Wizard, as shown in Fig. 2. You can select the entire table contents or you can select specific rows to stretch.
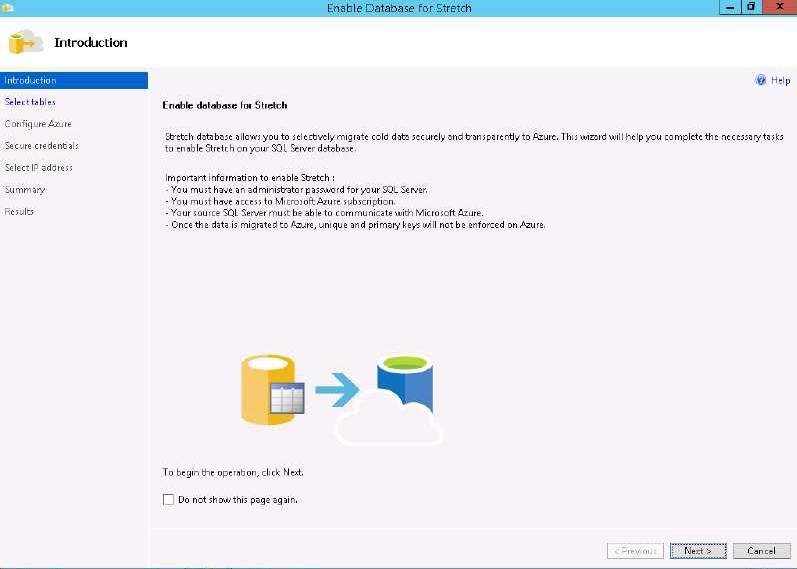
Fig. 2 - The Stretch Database wizard
For this example, we have selected the entire OrderTracking table to be stretched, shown in Fig. 3.
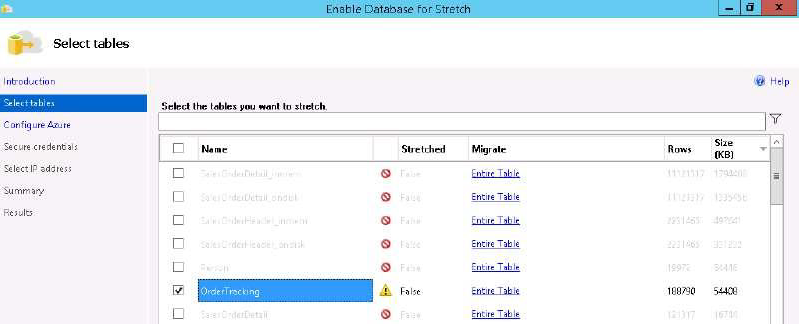
Fig. 3 - Select the contents to stretch
The next step is to Configure Azure. Sign in to Microsoft Azure with a Microsoft account and select the existing Azure subscription and Azure region to use for Stretch Database. Specify whether you want to use an existing server or create a new Azure server. We have selected an existing server in this example.
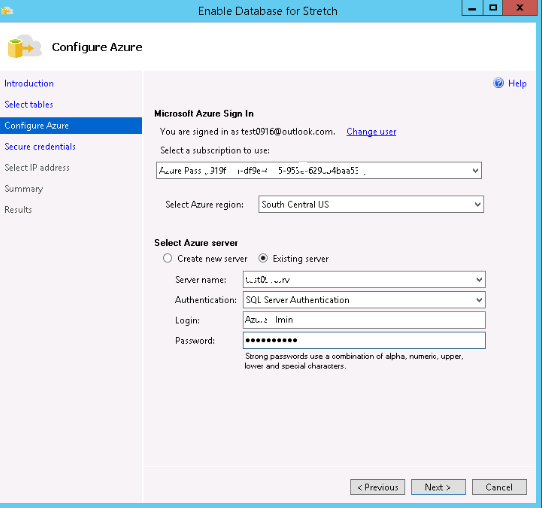
Fig. 4 - Enter credentials for Azure and choose a server
In order to stretch a database table to Azure, the database must have a database master key (DMK). Specify (and save) the password for the DMK by creating the credential in the Wizard as follows on the Secure Credentials page as shown in Fig. 5.

Fig. 5 - Set a password for the DMK
On the Select IP Address page, you can select the subnet IP address range, or the public IP address of your SQL Server, to create a firewall rule on Azure that lets SQL Server communicate with the remote Azure server.
The IP address or addresses that you provide on this page tell the Azure server to allow incoming data, queries, and management operations initiated by SQL Server to pass through the Azure firewall. The wizard doesn't change anything in the firewall settings on the SQL Server.
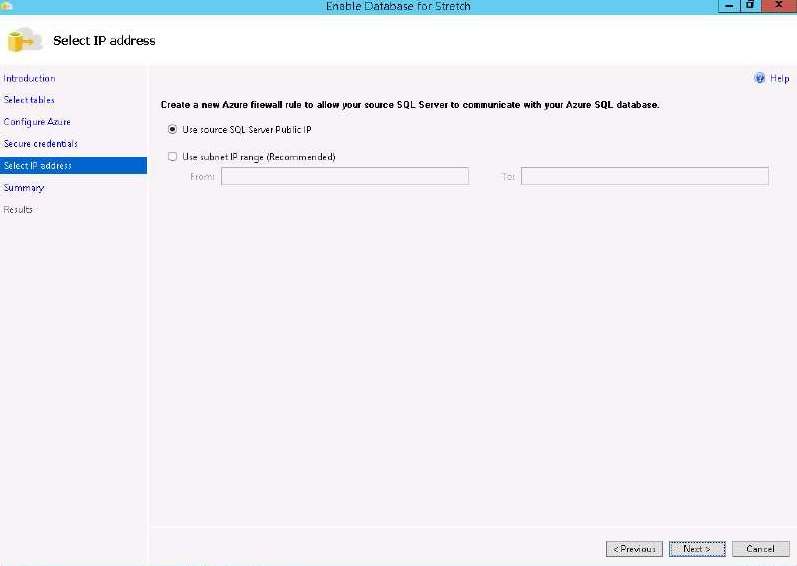
Fig. 6 - Choose an IP address
After specifying the IP addresses, click next for the Summary and Results pages as shown in Fig. 7.
In the Summary page, review the details, and then click Finish. This will start provisioning the database to the Azure SQL Stretch database server. When complete, the summary page will show a list of tasks and their status. Make sure that all tasks have Passed status, and then click Close to complete the setup and close the wizard. You have successfully completed the tasks to set up Stretch.
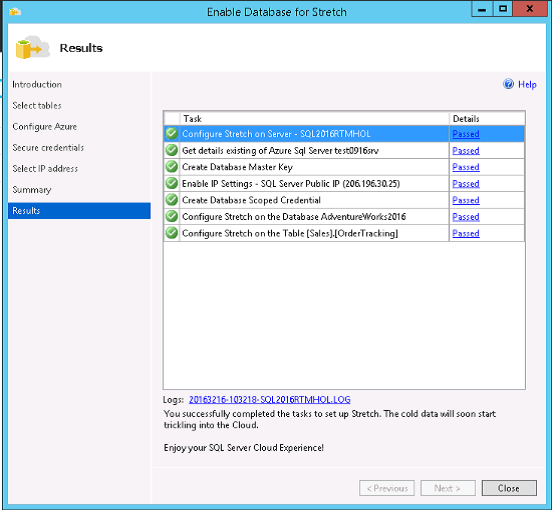
Fig. 7 - Confirm the settings
Manage and Monitor Stretch Database
You have just enabled a SQL Stretch Database for the AdventureWorks2016 database. You can now manage and monitor its activities using the monitoring option in Stretch Database. This provides a dashboard view of information on the remote Microsoft Azure SQL Stretch database and tables where your cold data is stored. You can also check how many batches and rows of data have migrated. Finally, you can access details about the Stretch configured tables, such as how many rows are locally stored and how many have stretched to Microsoft Azure.
Open Stretch Monitor for the Stretch Database Monitor option, right-click Database AdventureWorks2016. Select Task and Stretch, and then choose Monitor as shown in Fig. 8.

Fig. 8 - Monitoring status
Selecting the monitor option from the stretch task will open the dashboard view of the database that has been stretched to Microsoft Azure. It provides details such as Microsoft Azure SQL server name, database name, and database size as shown in Fig. 9.
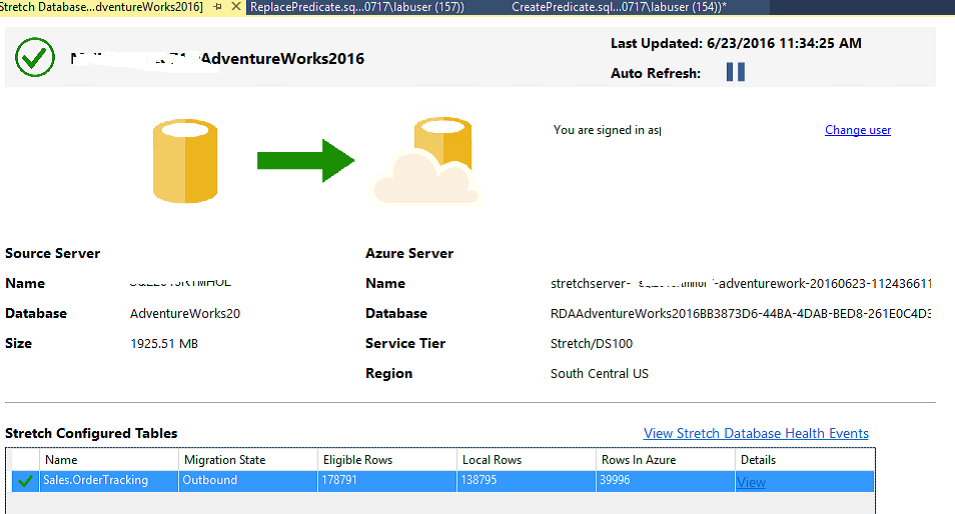
Fig. 9 - Viewing a report on your data
You can also check the status of the Stretch-enabled table (such as stretch eligible row, number of rows on-premises, and Azure SQL Stretch database) and view the event health by clicking View Stretch Database Health Event, or check event details for troubleshooting as shown in Fig. 10. Event details includes the error details and state. You can use this information to diagnose the error.
For more information and documentation on how to monitor or troubleshoot Stretch Database, go to the MSDN site: https://msdn.microsoft.com/en-us/library/mt484151.aspx.
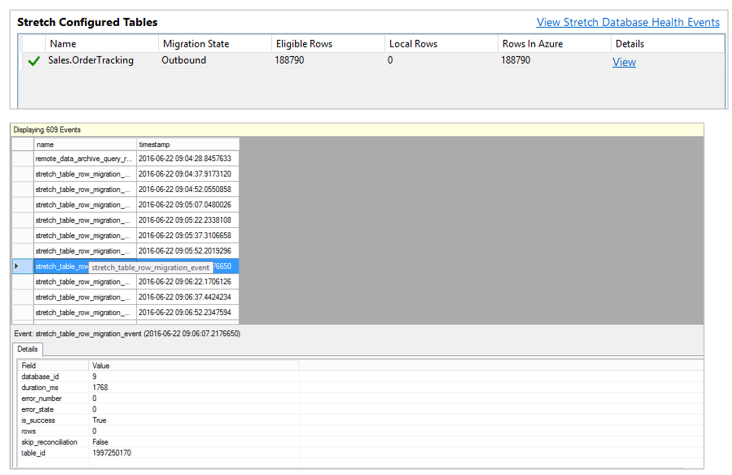
Fig. 10 - Viewing health of the feature
Summary
This article covered very basic information on how to set up a Stretch Database.Its an easy way to migrate archive data to Microsoft Azure and lets you dynamically stretch warm and cold transactional data from Microsoft SQL Server 2016 to Microsoft Azure. Straightforward implementation, convenient monitoring are characteristics that makes it a preferable solution for institutions that are required to keep old data for a long and even indefinite period of time.