
As we’ve seen in the previous levels of this Stairway, SQL Server Agent jobs are made up of a series of job steps, with each step being a distinct type of work to be performed. Each of those job steps are technically independent, but you can create a flow of work through a job using the job steps as distinct work items. In this article, you will learn how to use workflow between job steps to change what operations are performed, and have multiple conditions handled by a single job. You will also examine more details on job step security and the various job subsystems.
SQL Server Agent Job Steps
SQL Server Agent jobs, as mentioned in step 2, are containers holding one or more job steps. Each job step is a completely independent operation, containing its’ own logic for error control, logging, and workflow. When a job consists of more than one step, new issues arise in understanding the flow of work through a single job. A job does nothing by itself without containing a job step (with a couple of minor caveats).
SQL Server Agent Job Step Workflow
To examine Job Steps and their workflow, create a new job in SSMS. Right-click on the Jobs folder under SQL Server Agent, and select New Job. On the General page, give the job a name (“Steps Example” will be used for this article). Select the Steps page, and then click the “New…” button to create the first job step. The New Job Step dialog appears, as shown in Figure 1.
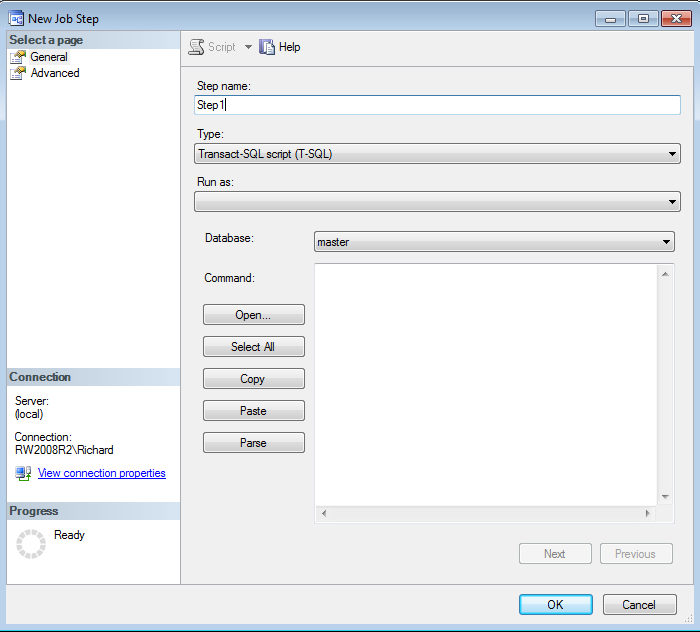
Figure 1: New Job Step Dialog
Give your job step a name (“Step1” for this example). Select the type, also known as the job subsystem (we’ll stick with the default, T-SQL, for this example). Type in a simple command which will work in master, such as SELECT * FROM sys.tables. Verify you have typed in valid T-SQL by clicking the Parse button, which should return a dialog like Figure 2. If you’ve made a mistake, you’ll get an error as shown in Figure 3. Although the error looks complex, the actual error is at the bottom of the dialog, incorrect syntax. You can click the 3rd button from the left to get additional technical details, but this will give you the SQL Server Management Objects (SMO) .net error diagnostics, with no additional help on your syntax error.
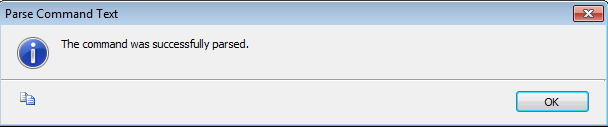
Figure 2: T-SQL successfully parsed
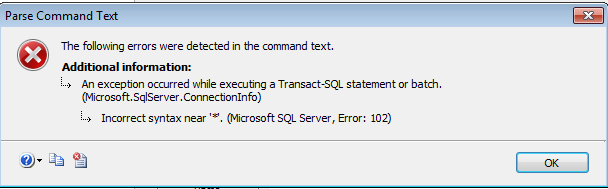
Figure 3: T-SQL parsing with a syntax error
Once you have successfully parsed your T-SQL command, click on the Advanced page of the dialog, and you will see Figure 4.
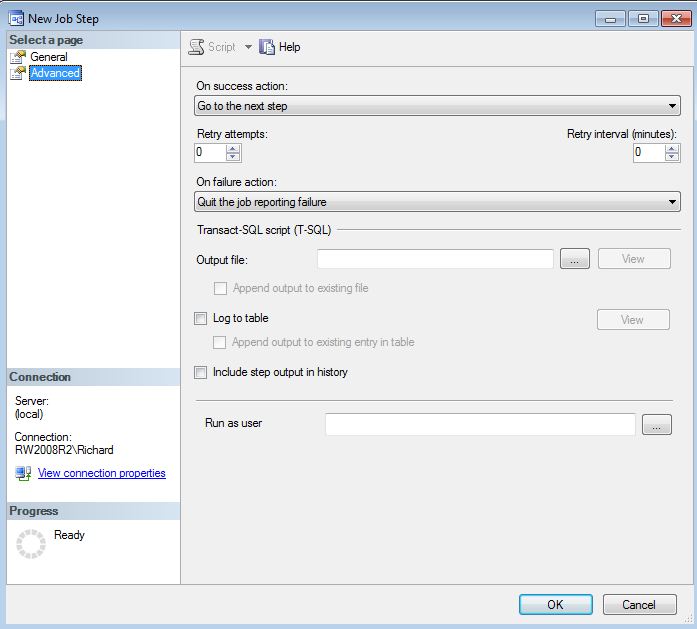
Figure 4: The Advanced Page of the Job Steps dialog
The advanced page of the job step dialog is where much of the “workflow” of SQL Server Agent occurs. You have to choose what should happen if the job step succeeds (“On success action”), as well has what happens if the job step fails (“On failure action”). For job step success, you have three options:
- Go to the next step
- This is the default behavior. If everything works in this job step, go on to the next step. If this was the last step of the job, exit the job reporting the cumulative results of the steps (i.e. if one failed earlier but workflow said to keep going, still report that failure).
- Quit the job reporting success
- If this step is successful, exit the job immediately reporting that it completed successfully. For example, if this job was executed because of a SQL Server Agent alert, and the fix may take multiple job steps, if an early step works you would choose this option to exit the job and report that the automated fix worked.
- Quit the job reporting failure
- If for some reason you want to exit the job immediately and report that the job failed (i.e. this is a negative test condition), you would choose this option. You would typically also have some kind of alert condition set for the job for any necessary follow-up.
Next, you have the option to retry the job step if it fails (without reporting the failure). For example, if you know that some blocking conditions may cause transient failures in your job step, you can specify that the step is to be attempted again 2 times, once a minute (Retry attempts: 2, Retry interval (minutes): 1).
For “On failure action”, you have the same choices as On success action as noted above, but the default is to Quit the job reporting failure (as expected).
Because this job step is defined as T-SQL, you can specify an output file where you would like to store the results of this query. You may also want to check the option to “Append output to existing file” so you don’t lose previous results, but then you’ll need to create a process to periodically truncate the file so it doesn’t consume all of your disk space. Alternatively, you can store the query results into a table in SQL Server. As a third choice, you could simply append the output to the job history, which would be stored in the sys.sysjobstepslogs table in msdb. Ignore the “Run as user” option, we’ll look at that shortly.
Click OK, and you’ve now added a job step. Click OK, and you’ve now got a single step job. Re-open the “Steps Example” job (i.e. right-click on the job in the menu and select properties), navigate to the Steps page, and now click New… to add a second job step. For this step, call it “Step2”, make it a “PowerShell” job type, and then enter the following PowerShell script to look at the properties of the msdb database on your server.
Set-Location SQLSERVER:\SQL\localhost\DEFAULT\Databases\msdb
Get-Item . | Get-Member -Type Properties
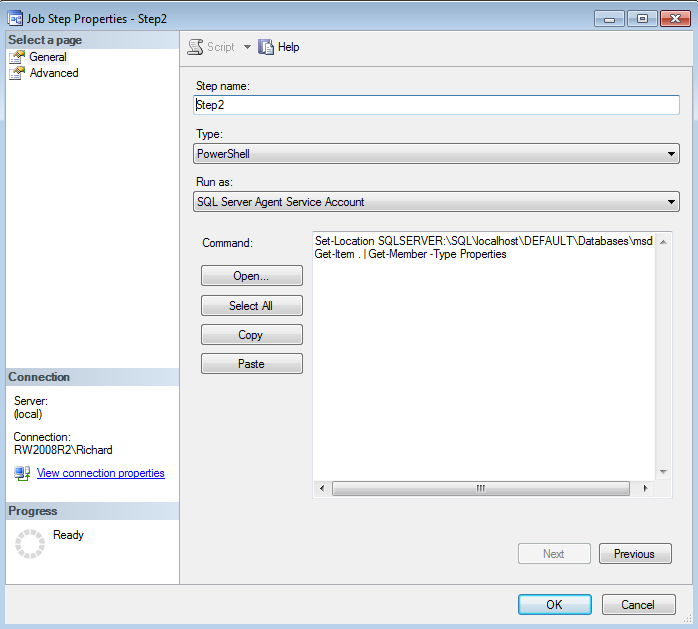
Figure 5: Adding a PowerShell step to the job
For this job step, click on the Advanced page and check the option to “Include step output in history” so you can see that the PowerShell script runs and review the results. Click OK, then click OK again, you’ll see Figure 6. As the job stands, step 1 will run and then always quit the job reporting success, so your step2 will never run.
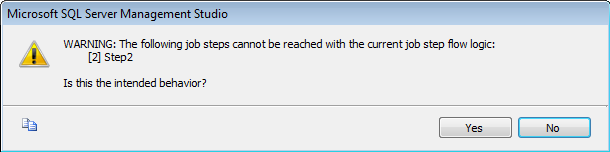
Figure 6: Warning that the job flow logic may have issues
Select No, navigate to the Advanced page on Step 1, and change the “On success action” to “Go to the next step”. A couple of things may get your attention, however. First, you never selected the option in the first place to Quit the job reporting success – how did that happen? When you created the first job step, and then created the job, there was only a single job step, so SSMS helped you out and changed the On success action. When you go in to add the second step, you need to manually adjust the workflow. This will be true every time you go back and edit a job to add additional steps.
The second thing to get your attention in this dialog is that you can also navigate directly to individual steps. You don’t have to go to the next step. You can imagine having a 10 step job, and depending upon the results of your job steps, skipping ahead to a different step. This is how you can set up more complicated workflows within your jobs.
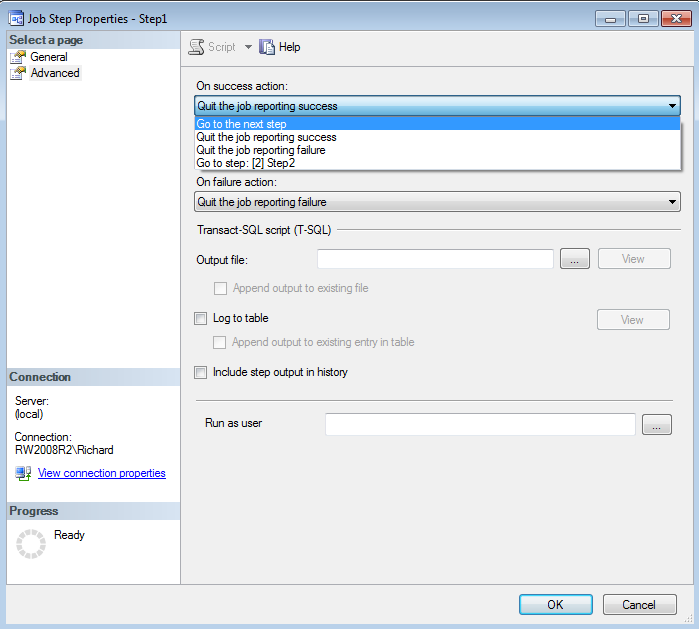
Figure 7: Adjusting the workflow of Job Step1 to flow to the next job step
Click OK, and now your second job step will actually be executed when you run the job.
Now, run the job (right-click on the job in SSMS and select “Start job at step…”, then click Start. Once the job completes successfully, right-click on the job again and select “View History”, and you can see the output of the job step results in the history of your job step (as shown in Figure 8).
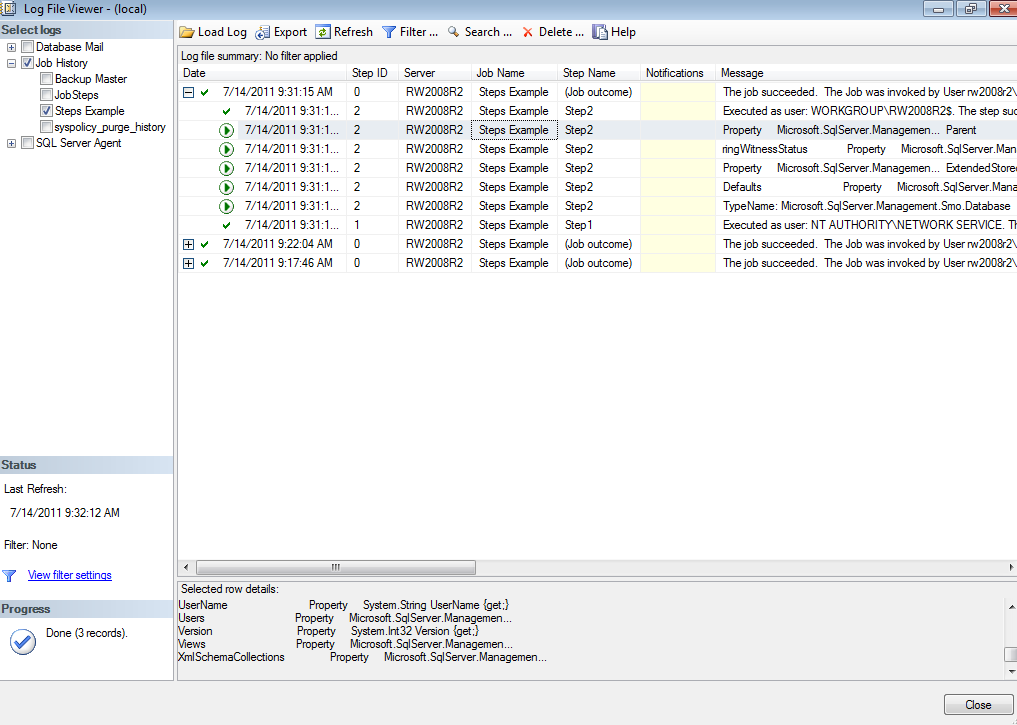
Figure 8: Viewing Job Step history in the SQL Server Agent job history log
SQL Server Agent Job Step Security
A mention of security is in order here. When you created Step2 as a PowerShell script, you may have noticed that the “Run as” option on the job step General page became available, and the “SQL Server Agent Service Account” was selected. When a T-SQL job connects to SQL Server, it’s done as part of the SQL Server Agent service, and will run as the service account. When some other subsystems run their jobs (such as PowerShell, Operating System (CmdExec), ActiveX) they actually create a separate process in Windows, which then connects back to either SQL Server or the operating system. That process needs to have a security context to run in within Windows, and you’re selecting that security context with the Run as option. In Step 10 of this article series we will examine proxy accounts, and go into details on how to select different security contexts for these job steps.
You might ask, however, about the option to “Run as user” on the advanced page of the T-SQL job step. If the owner of a SQL Server Agent job is a sysadmin server role member, then a T-SQL job step can be run in the context of a different database user, and you would select that user here. If the owner of the job is not a sysadmin server role member, this option will not be available and the job step will run in the security context of the owner of the job. This option is only available for the T-SQL subsystem, and proxy accounts must be used for other job subsystems.
What’s Next
SQL Server Agent job steps can provide complex workflow within a single job. You can navigate forward, skipping over job steps, or exiting the jobs with success or failure conditions identified. Each job step can be a completely different kind of work item than the other steps in the job, and there are several options for logging the results of any given job step.
Now that you can create interesting jobs and run them, a logical next step will be to monitor the jobs that are running and have run historically. Therefore, our next step will be to review the Job Activity Monitor.