
Level 1: Introduction to SQL Server Replication
Main Entry: rep-li-ca-tion
Pronunciation: \?re-pl?-'ka-sh?nFunction: noun
Date: 14th century
The word replication comes from the Latin word replicare which means to repeat. Replication describes the process of reproducing or duplicating (www.merriam-webster.com).
Replication in SQL Server does exactly that; it reproduces or duplicates data. Any time you need to create a copy of your data, or to reproduce a change to that data, replication can be used. That copy can be created in the same database or at a remote location on a separate server.
The copy can be continuously kept in sync with the source data, or synchronized at scheduled intervals. One-way synchronization, as well as bidirectional synchronization, is possible. Replication can even be used to keep several datasets in sync with each other.
In this first level, I'll tell you about the basic replication components and describe how they work together to allow you to replicate your data and your data changes. We'll also look at a detailed example of setting up a simple replication scenario.
Replication Components
SQL Server replication consists of three components: The Publisher, the Distributor and the Subscriber. These components act on articles that are defined within publications and subscriptions.
Article
For each SQL Server object that should be replicated, a replication article needs to be defined. Each article corresponds to a single SQL Server object, or a subset of an object. The objects that are replicated most often are tables, views and stored procedures. For a complete list of objects that can be replicated, check out Publishing Data and Database Objects in Books Online. The properties of an article determine whether the article contains the entire object, or if a filtered subset of the objects makes up the replicated article. With some restrictions, multiple articles can be created on a single object.
Publication
A group of articles that logically belong together can be combined into a publication. The publication has options defined that apply to all the articles in that publication. The main option defined by a publication is the type of replication that is to be used.
Publisher
The SQL Server instance that makes a publication available for replication is called the publisher.
The publisher monitors all articles for changes, and makes information about those changes available to the distributor.
Distributor
The distributor is the SQL Server instance keeps track of all subscribers and all published changes and makes sure that each subscriber gets notified of each change. Most of the changes are tracked in a distribution database. The distributor can be a separate SQL Server instance, but often the distribution service runs on the same machine as the publisher.
Subscriber
The subscriber is the SQL Server instance that receives all the published information through subscriptions.
Subscription
A subscription is the counterpart of the publication. A subscription defines which server (subscriber) is to receive the updates published in a publication. Each subscription creates a link between one publication and one subscriber. There are two types of subscriptions: push subscriptions and pull subscriptions. In a push subscription, the distributor directly updates the data in the subscriber database. In a pull subscription, the subscriber asks the distributor regularly if any new changes are available, and then updates the data itself.
Replication Types
There are three main types of replication available in SQL Server. They are snapshot replication, merge replication and transactional replication.
Snapshot Replication
Snapshot replication creates a complete copy of the replicated objects and their data each time it runs. It uses SQL Server's BCP utility to write the contents of each table into the snapshot folder. The snapshot folder is a shared folder location that has to be set up on the distributor when enabling replication. Each participant in a replication setup needs to have access to the snapshot folder.
Every time snapshot replication is run, everything is recopied from scratch, so it has high bandwidth and storage requirements. All other types of replication use - by default - a single replication snapshot to sync up all subscribers with the distributor only during the initial setup.
Transactional Replication
Transactional replication works, as the name suggests, on a transaction basis. Every committed transaction gets scanned for changes applied to replication articles. Scanning of the changes is done by a log reader agent, which reads through the transaction log of the publisher database. If there are changes affecting a published object, those changes get logged on the distributor in the distribution database. From there they make their way to the subscribers.
Transactional replication allows for close to real time synchronization and leaves only a small footprint on the publisher. While there are several options to allow for bidirectional data movement, transactional replication was originally designed to work one way only.
Merge Replication
Merge replication was designed from the beginning to allow for changes to the data to be made on the publisher as well as the subscriber side. Merge replication also allows for disconnected scenarios, where a subscriber might not be connected during the day. That subscriber would synchronize after reconnecting in the evening. If a row gets updated in two different places at the same time, a conflict occurs. Merge replication comes with several built in options to resolve those conflicts.
Setting up Transactional Replication
This section is a step by step guide, of how to setup transactional replication involving a single replicated table.
To setup replication, the distributor, the publisher and the subscriber need to be configured. Replication can be completely setup and controlled using T-SQL scripts. However, the necessary T-SQL involves the use of stored procedures which together have well over a hundred required parameters. So it makes sense to start out by using the SSMS-GUI. The example screenshots shown here were made on a single server (WIN2008A) with a SQL-Server instance (R2A) installed on it. This instance is a SQL-Server 2008R2 instance. However, you can follow the examples on SQL Server 2008 and 2005 as well.
Setting up distribution
The distributor is the core of transactional replication. It is required to be available when setting up all the other components, so it needs to be configured first.
Start out by opening SSMS and connecting to the SQL-Server instance that will contain your replication source data. While the distributor can be on its own SQL-server instance, in many cases it makes sense to have the publisher and the distributor live on the same machine, as will be assumed in this example.
After you connected to the server, right click on the "Replication" folder under your server and select "Configure Distribution..." as shown in Figure 1.
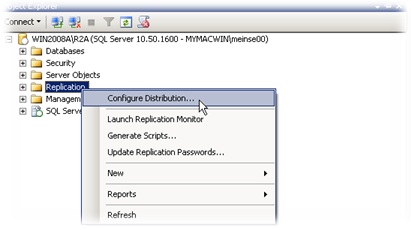
Figure 1: Configure Distribution
The Configure Distribution Wizard will greet you with its start-up screen as shown in Figure 2.
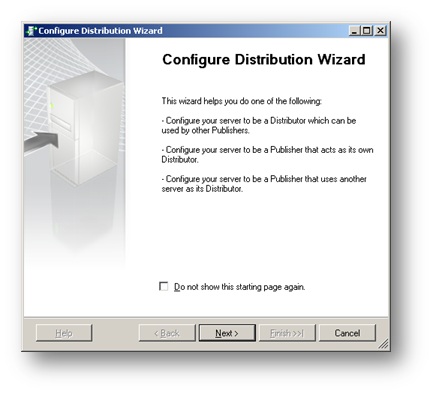
Figure 2: Configure Distribution Wizard
It is safe to ignore this screen and click "Next".
On the next screen (Figure 3) you will choose whether the distribution service should run on this server or whether you already have a configured distributor in your network. The machine on which the distribution service runs will also contain the distribution database. Leave this selection at the default, which is to install distribution on this server and click "Next".
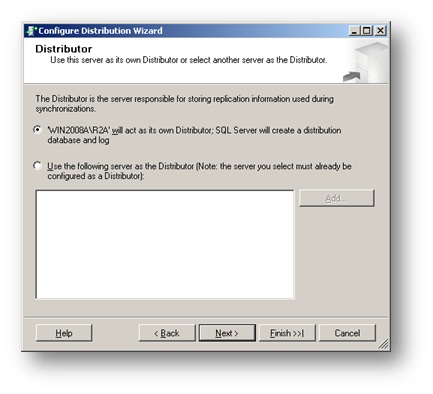
Figure 3: Selecting the server for Distribution
This brings up the dialog in Figure 4, asking you to select the location for the snapshot folder.
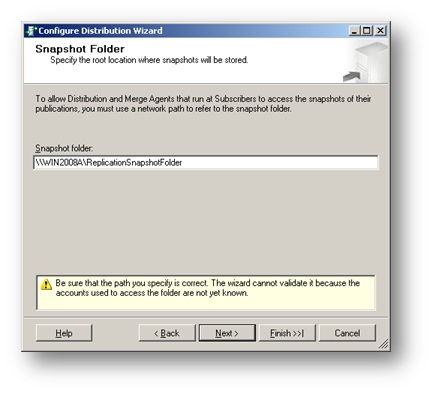
Figure 4: The Snapshot Folder
The snapshot folder can be any location on your machine or in your network. It makes sense to create a network share on the distributor for it. This example uses "\\WIN2008A\ReplicationSnapshotFolder".
The setup of the snapshot folder requires appropriate rights to be granted as well. Without going into too much detail right now, grant write access to "Authenticated Users" (Figure 5) on the folder itself and read access to "Everyone" (Figure 6) on the share. More information about how to tighten security in this area will be given in a later level in this Stairway.
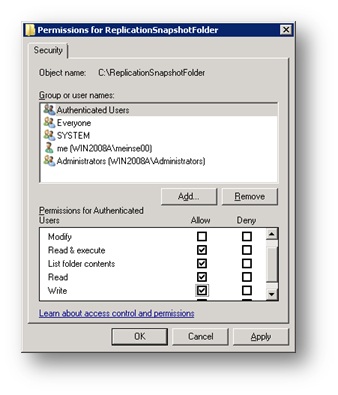
Figure 5: Granting access to the Snapshot Folder

Figure 6: Granting access to the Snapshot Folder Share
After you setup your share and put the network path into the wizard's input field, press "Next" to go to the "Distribution Database" form shown in Figure 7.
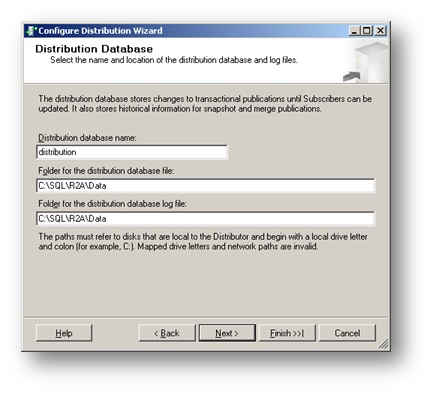
Figure 7: The Distribution Database
Here you specify the name of the distribution database and also where its data and log files shall be located. Leave the defaults and click "Next" to advance to the "Publishers" screen (Figure 8).
On the "Publishers" screen you prepare potential publishers to be able to use this distributor. We will install our publisher on the same instance, so you can leave the default and "Next" to the final question (Figure 9).
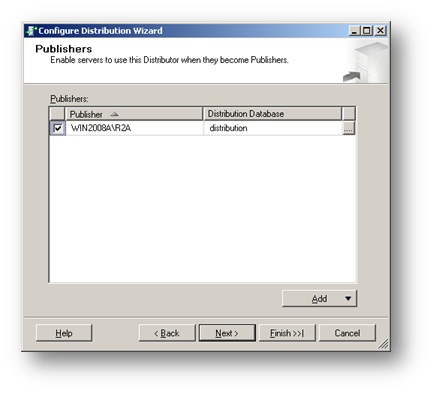
Figure 8: Preparing Publishers
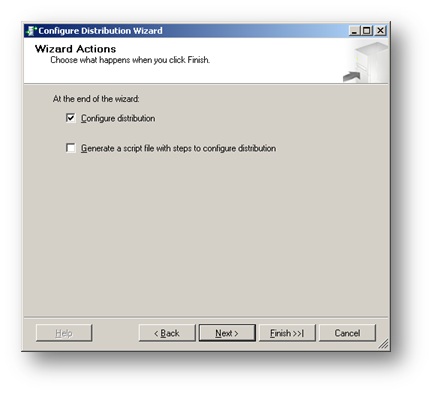
Figure 9: Wizard Actions
The final question is whether you want the wizard to execute your selections immediately or whether you want the wizard to create script that you will execute manually at a later time. Again, leave the default setting and click "Next" one last time.
Now you will see a list of actions as in Figure 10 that will take place. Click "Finish" to start the process.
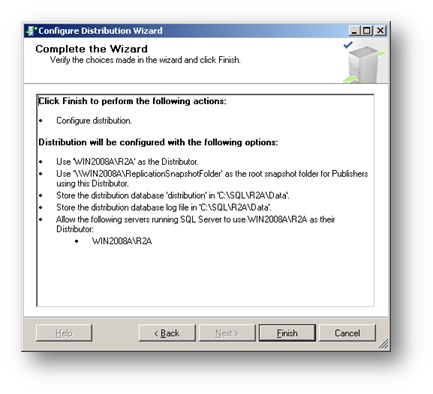
Figure 10: Wizard Summary
Finally, the screen shown in Figure 11 gives information about progress and success of the replication configuration.
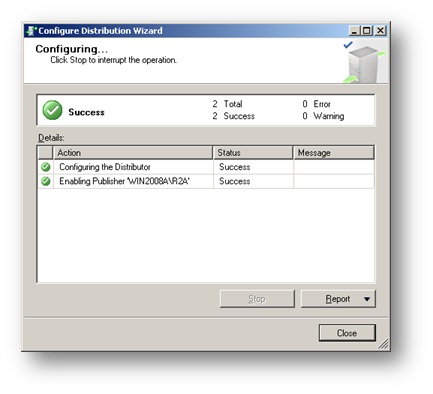
Figure 11: Execution Status
The First Publication
To create a publication, we need to first have a database containing a table to publish. Execute the SQL Script 1 to create a test database for the publication.
USE MASTER;
GO
EXECUTE AS LOGIN = 'SA';
GO
CREATE DATABASE ReplA;
GO
USE ReplA;
GO
IF OBJECT_ID('dbo.Test') IS NOT NULL DROP TABLE dbo.Test;
GO
CREATE TABLE dbo.Test(
  Id INT IDENTITY(1,1) PRIMARY KEY,
  Data INT CONSTRAINT Test_Data_Dflt DEFAULT CHECKSUM(NEWID())
);
GO
INSERT INTO dbo.Test DEFAULT VALUES;
GO 1000
USE MASTER;
GO
REVERT;
GO
Script 1: Create a test database for the publication
Now you are ready to setup a publication.
In the SSMS Object Explorer open the Replication folder and right click on "Local Publication". Select "New Publication..." in the drop down menu (Figure 12).
Figure 12: New Publication
The welcome page of the "New Publication Wizard" appears as shown in Figure 13.
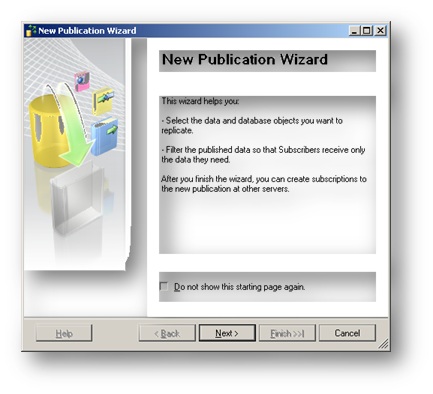
Figure 13: Configure Publication Wizard
Click "Next".
In the "Publication Database" box (Figure 14) select the database ReplA that you just created and click "Next". The "Publication Type" screen (Figure 15) lets you choose which type of replication you want to use. Select "Transactional publication" and click "Next".
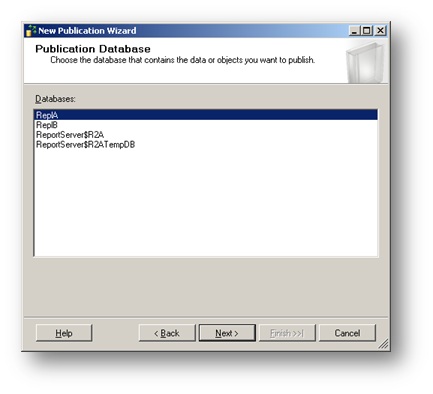
Figure 14: Select the Publication Database
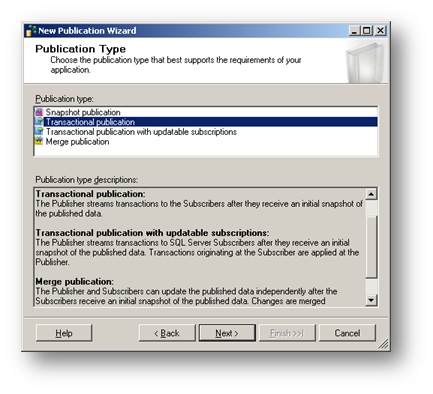
Figure 15: Publication Type
Now you get to choose which articles should be part of this publication (Figure 16). Select the table dbo.Test and click "Next" again to move on to the "Filter Table Rows" dialog (Figure 17). Filters are an advanced topic that will be covered in a later level in this Stairway, so for now just click "Next" without making a selection on this form.
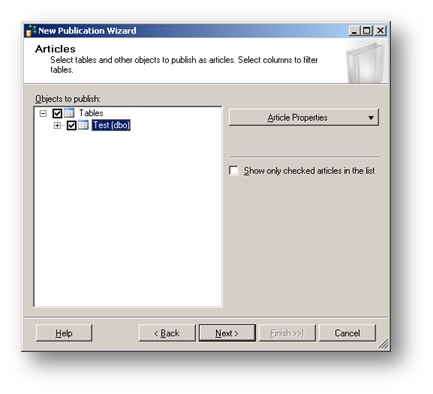
Figure 16: Articles
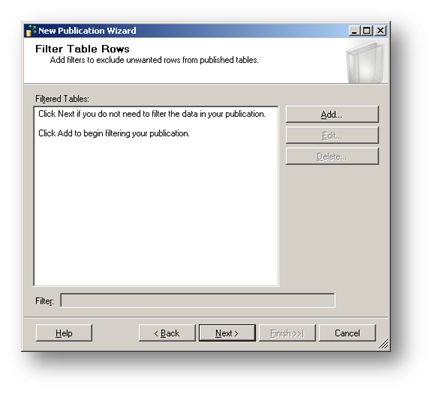
Figure 17: Row Filters
The next three screens deal with the snapshot agent. On the first screen (Figure 18) select "Create a snapshot immediately" and click "Next". On the "Agent Security" Screen (Figure 19) click the "Security Settings" Button and pick "Run under the SQL Server Agent service account" on the form that opens (Figure 20).
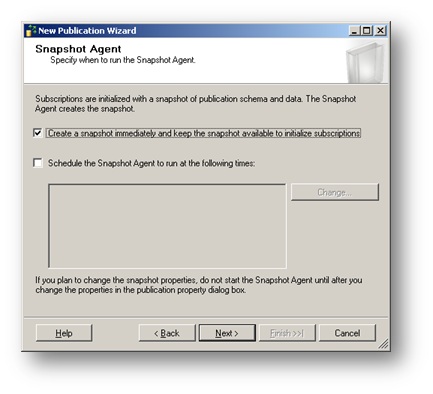
Figure 18: Snapshot Schedule
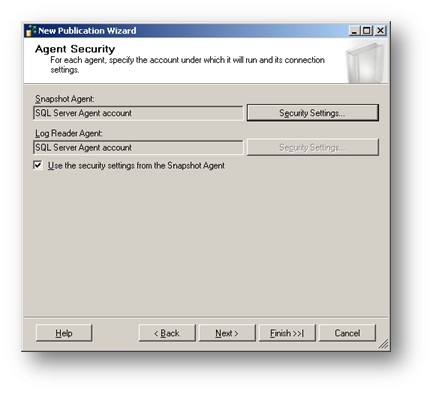
Figure 19: Agent Security
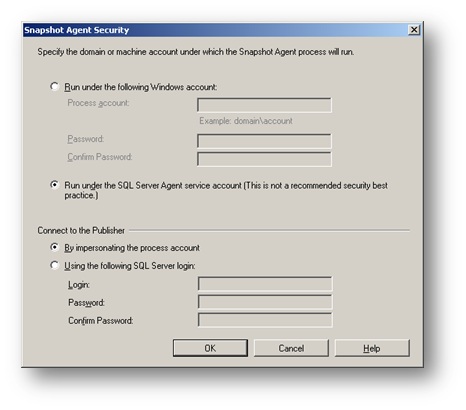
Figure 20: Select an Account
Click "OK" on the form and then "Next" on the Agent Security screen.
That brings up the "Wizard Actions" form (Figure 21) for you to select "Create the publication". One last time of clicking "Next" brings you to the summary screen (Figure 22).
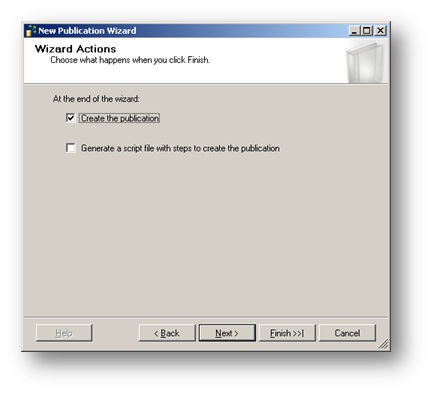
Figure 21: Wizard Actions
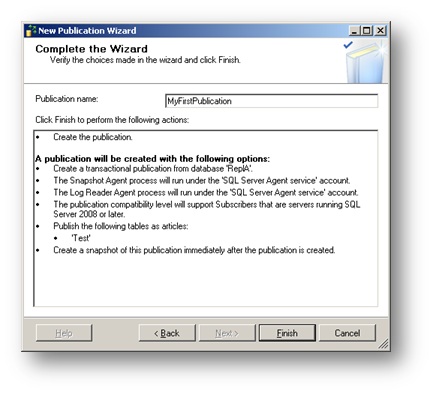
Figure 22: Wizard Summary
Here you need to pick a name for your publication. Type "MyFirstPublication" into the field and click "Finish" to start the process. Again, the last screen (Figure 23) shows progress information and a success status when the process is finished.
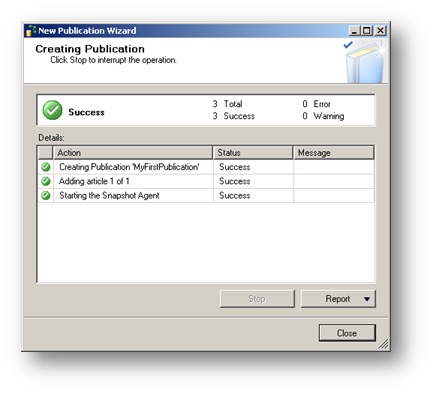
Figure 23: Execution Status
The first subscription
In most cases, the subscriber will be on a different machine but there are scenarios in which you want it to be on the same instance. To keep this example simple we are going to stay on the same instance as well. Use the code in Script 2: to create the database ReplB.
USE MASTER;
GO
EXECUTE AS LOGIN = 'SA';
GO
CREATE DATABASE ReplB;
GO
REVERT;
GO
Script 2: Creating the target database
We now go to the SSMS Object Explorer and right click on "Local Subscriptions" and select "New Subscriptions..." in the drop down menu (Figure 24).

Figure 24: Select New Subscription
The "New Subscription Wizard" (Figure 25) welcomes you and gives you another opportunity to practice pressing a "Next" button.

Figure 25: New Subscription Wizard
In the "Publication" form (Figure 26) select the publication you just created and click "Next". The "Distribution Agent Location" screen (Figure 27) allows you to select between push and pull subscription. Leave the default and move on to the "Subscribers" Screen (Figure 28).

Figure 26: Select the Publication

Figure 27: Push or Pull
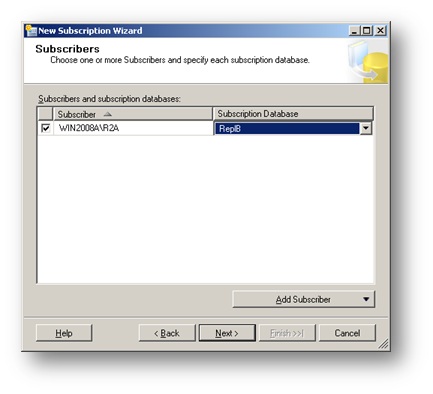
Figure 28: Target Database
Here you need to select your server and pick the ReplB database.
The next screen allows you to setup "Distribution Agent Security" (Figure 29).
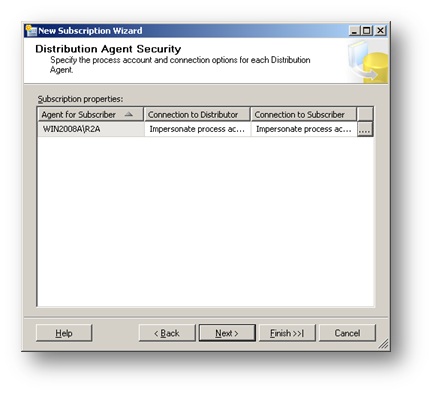
Figure 29: Distribution Agent Security
Click the small ellipsis button on the right side and select "Run under the SQL Server Agent service account" in the form that opens (Figure 30).
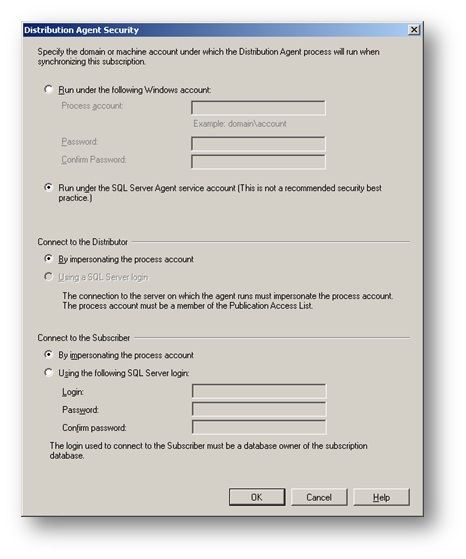
Figure 30: Select an Account
Clicking "OK" and then "Next" gets you to the "Synchronization Schedule" Screen (Figure 31). Pick "Run continuously" and move on to the "Initialize Subscriptions" screen (Figure 32). Leave the default, to initialize immediately and then "Next" to the "Wizard Actions" form (Figure 33).
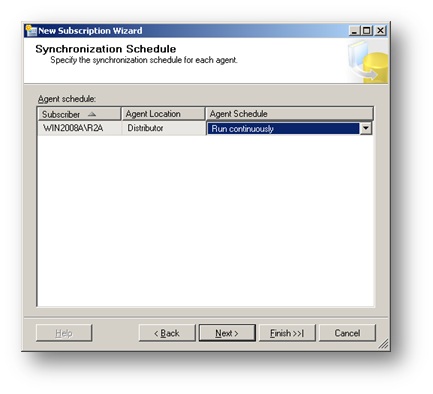
Figure 31: Synchronization Schedule
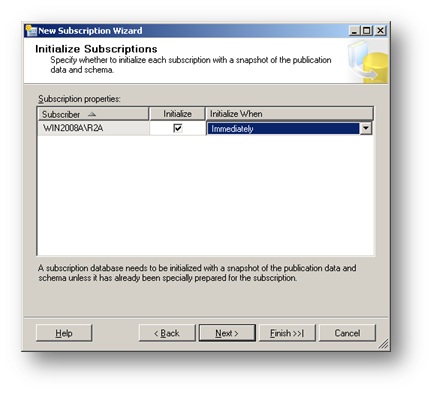
Figure 32: Initialization
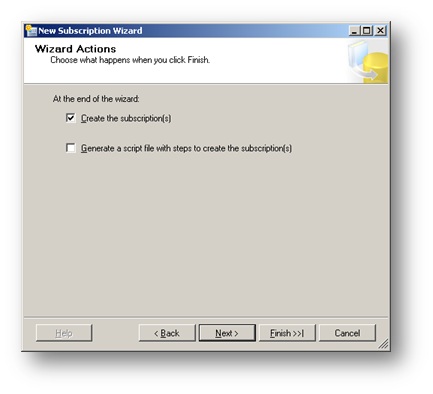
Figure 33: Wizard Actions
As before, leaving the default (Create the subscriptions) and clicking "Next" gets you to the summary screen (Figure 34) with a list of actions about to be performed. Click "Finish" to start the process and wait for the green success logo to appear on the final form (Figure 35).
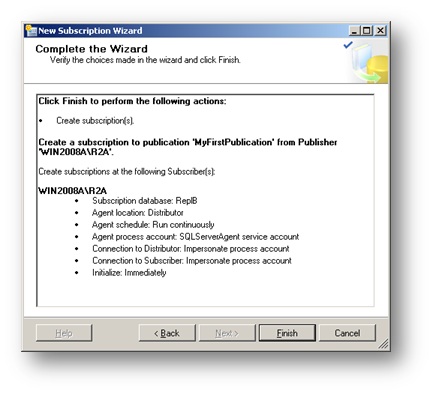
Figure 34: Wizard Summary

Figure 35: Execution Status
Success!
Script1 created the table dbo.Test in ReplA and inserted 1000 rows into it. After the initial snapshot was transferred over to the subscriber you will find the dbo.Test table also in ReplB with all 1000 rows in it. A couple of minutes after you finished the setup you can run Script 3 to verify that replication pushed all the data to the subscriber as expected. This script joins the ReplA.dbo.Test and the ReplB.dbo.Test tables together to show which rows got replicated correctly. You can now run further tests of your own, you can inserting and updating rows in ReplA.dbo.Test and watch those changes magically appear in ReplB.dbo.Test as well.
SELECT TOP(20) A.Id AS [ReplA.Id],A.Data AS [ReplA.Data],B.Id AS [ReplB.Id],B.Data AS [ReplB.Data]
FROM ReplA.dbo.Test A
FULL OUTER JOIN ReplB.dbo.Test B
ON A.Id = B.Id
ORDER BY A.Id DESC
Script 3: Compare Publisher and Subscriber
Summary
Objects in a database on a SQL Server instance referred to as the publisher that are marked for replication are called articles. Articles are grouped together into publications. The subscriber gets updated with the changes that occur to the articles through a subscription. The data flows through the distribution database which resides on the distributor. Publisher, distributor and subscriber can be the same instance or separate instances on the same or on different machines. The source and the target database can be the same (if publisher and subscriber are in fact the same SQL Server instance), but the distribution database has to be separate.