
In this fourth level we examine how to connect to the new instance, from different clients on Windows and Linux operating systems.
How to connect to the new instance
We have just installed a SQL Server instance on our Linux machine, so the first and obvious way to test if our installation works fine is to connect it is by using a client. We have a plethora of client tools, both on Windows and Linux. Let’s see an overview of them.
From the security point of view, the following examples uses SQL Server authentication, by providing a SQL Server username and password, but you can also join your Linux machine to a Windows domain and use Active Directory authentication as well.
This is not enabled by default and must be configured before being able to use it. You can find a detailed documentation and a tutorial about how to enable AD authentication for SQL Server on Linux here: https://docs.microsoft.com/en-us/sql/linux/sql-server-linux-active-directory-auth-overview?view=sql-server-2017 and here https://docs.microsoft.com/en-us/sql/linux/sql-server-linux-active-directory-authentication?view=sql-server-2017.
Sqlcmd
The good news is that you have already installed the client tools if you followed the instructions in the Level 1. This will allow you to connect to your Linux SQL Server instance using the sqlcmd command line tool.
This is the same command-line tool you have on a Windows machine after a SQL Server setup. On Windows, it is included in SQL Server Client Tools feature, available in the Features selection form in the Setup program. You can use it in the same way.
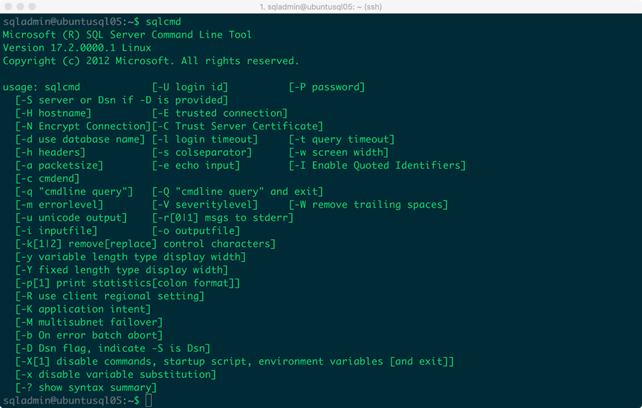
If you are not familiar with the tool, you can list all the available parameters by simply running sqlcmd at the command prompt. You can see this in the image below.
At the minimum, you should provide the -S parameter with the name or IP address of the SQL Server you want to connect with. You also need either the -E parameter if you are using Windows authentication or -U and -P to provide a SQL Server user and password. You can use the sa user or another user that you put in the sysadmin role, for example, if you have to administer this instance. You can also use the -Q parameter to provide the Transact-SQL command to execute on this instance. You can also use the -q parameter, which have the same effect of the -Q, but remain connected to SQL Server and displays an interactive prompt. If you want to provide a list of commands, you can avoid the -Q parameter and pass a file with the -I parameter.
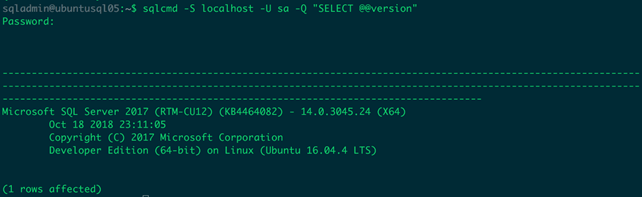
Let’s try to connect to our new instance locally by logging on the Linux server and running sqlcmd at the bash prompt. We will use the following command:
sqlcmd -S localhost -U sa -Q “SELECT @version”
By omitting the -P parameter, which is the SQL Server user password, sqlcmd will ask you interactively for the password, as you can see in the following screenshot. This is useful if you don’t want that anybody else behind you can see your administrator password. Obviously, this is not the case if you are putting this command in a script file.
Good work! Now with a sysadmin user you can use the sqlcmd utility to do almost everything you want on your SQL Server instance. Remember, in fact, that every single action you are doing with a GUI (SQL Server Management Studio, for example) is translated to a Transact-SQL command run behind the scenes by the program.
Mssql-cli
Microsoft released mssql-cli, a cross-platform command line client, with some cool features like auto-completion, query history and syntax highlighting. Microsoft released it under the open source BSD 3-clause license, and its source code can be found on GitHub. The tool is written in Python, based on the popular command-line interface projects pgcli and mycli.
Mssql-cli is officially supported on Windows, Linux, and MacOS, with a compatibility matrix that includes Python versions 2.7, 3.4, and above. This means that before installing mssql-cli you must be sure to have Python installed on your computer and check that you have a compatible version.
Then you can install mssql-cli using the binaries supplied by Microsoft or via pip, the python default installer utility. If don’t have the pip utility already installed on your linux machine, simply run this command:
sudo apt install python-pip
and wait for the installation to complete. Please note that if your Python version is 2.7, you have to upgrade pip to the latest version by running the command:
sudo pip install –upgrade pip
Finally, you can install mssql-cli with the command:
pip install mssql-cli

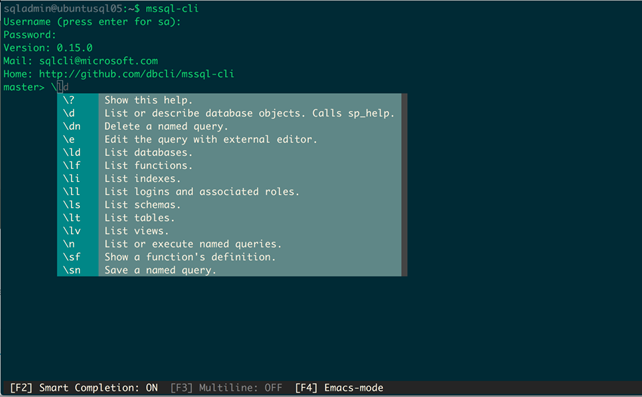
After the installation, it can be launched from the command line using the command: mssql-cli. As you can see, the tool connects to the local instance by default and requires a username and password. A number of options appear highlighted for you to use when you connect.
Mssql-cli provides the following key enhancements over sqlcmd in the Terminal environment:
- T-SQL IntelliSense
- Syntax highlighting
- Pretty formatting for query results, including Vertical Format
- Multi-line edit mode
- Configuration file support
The following screenshot shows the Intellisense feature in action while typing a new query over the AdventureWorks2017 database:

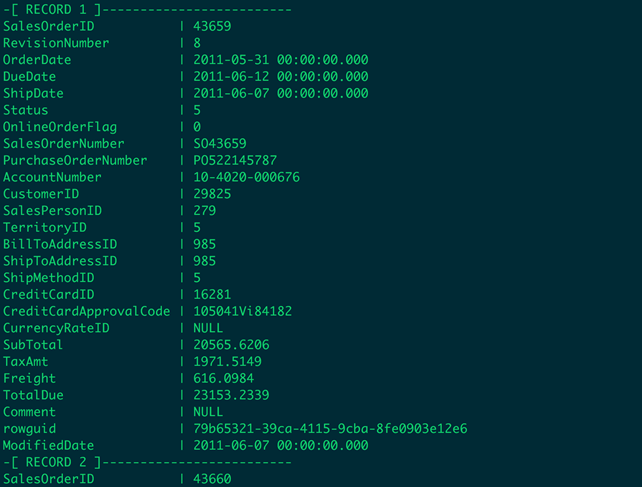
Another useful feature is the automatic vertical layout of query results when , that simplify the reading when you have a small resultset:, as shown in the following screenshot:
Azure Data Studio
Previously named SQL Operations Studio, Azure Data Studio is a cross-platform desktop environment that offers a modern editor experience, like intellisense, code snippets, source control integration and an integrated terminal. The tool is shown here:
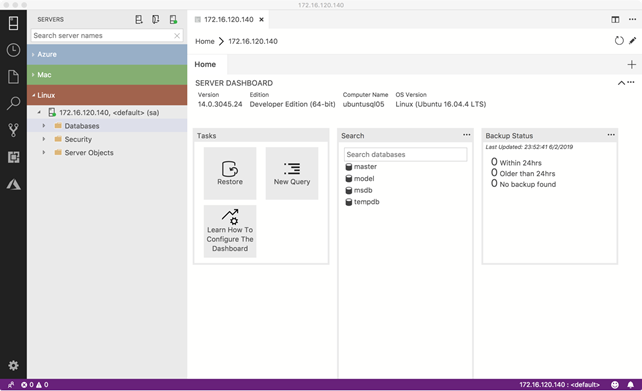
You can learn more about Azure Data Studio and how to install in Books Online. We also have a getting started article at SQLServerCentral.
Once you have installed Azure Data Studio, open it and click on the server icon on the upper left area of the window.

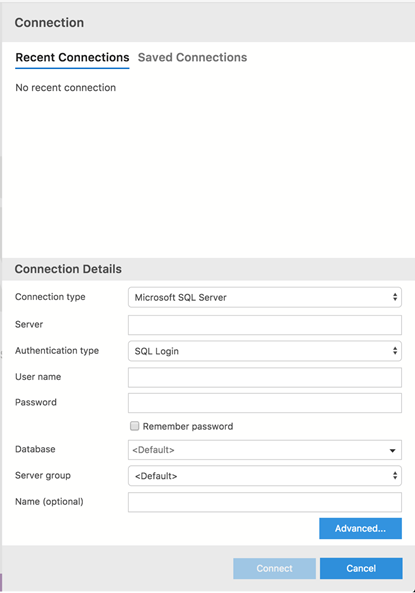
Now click on the “New connection” button on the SERVERS pane (the icon of the server on the left with the plus sign):

Complete the form with the required items (server name or ip address, authentication type, username and password, default database). You can organize your servers by grouping them into server groups and choosing a name to display instead of the ip address or the full domain name of the server. The middle icon in the Servers pane will create a new Server Group.
Once you are connected with the SQL Server instance, you can click on the New Query button, write and execute your own queries.
SQL Server Management Studio
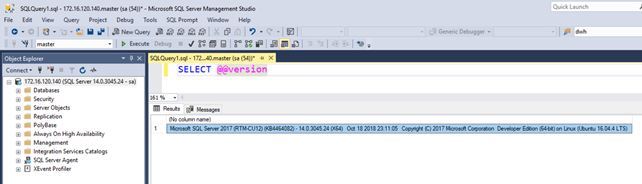
Last, but not least, you can connect to your SQL Server instance on Linux using the good old Management Studio. This is a Windows-only tool, so it is not available if you are operating in a Linux environment (well, you probably have a virtualization infrastructure, so you can still create a Windows 10 machine and put SQL Server Management Studio on it J).
Connecting to the SQL Server instance on Linux from SSMS is really straightforward. You have to provide the same data we’ve just seen for Azure Data Studio

and you should see your server in the Object explorer window:
That’s all for now. In the next level we’ll see how to install and use SQL Server Agent on Linux. Enjoy!
