
In this third level we’ll add a bunch of disks to our SQL Server machine and apply one of the well-known best practices: data files, transaction log files and tempdb database will be separated onto different disks. This allows for performance gains and flexibility.
How to add additional disks
In the first level we have installed a new Ubuntu 16.04 machine, choosing LVM (Logical Volume Management) as the storage device manager, because of its flexibility. Now we are going to use LVM to add new disks.
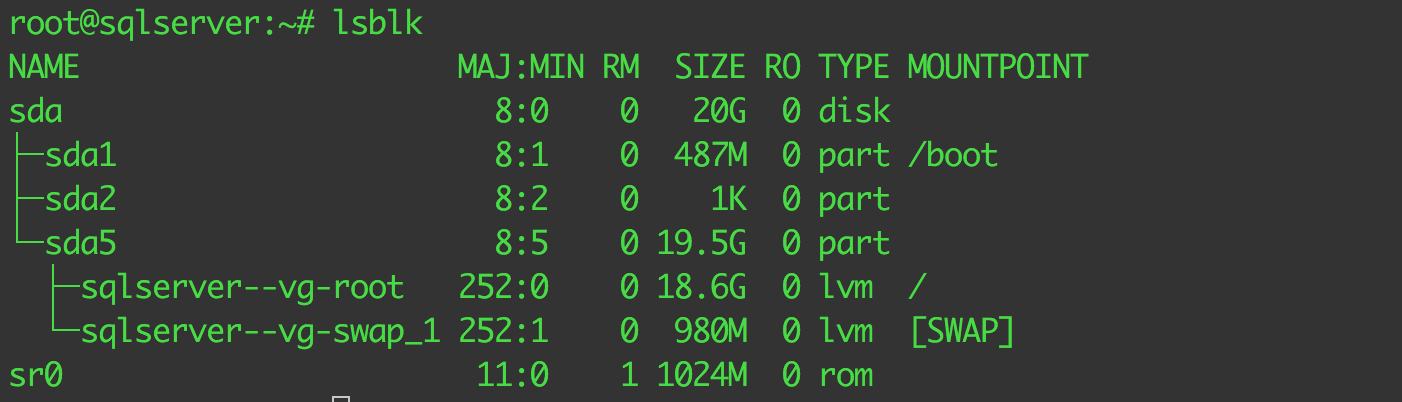
Once you have logged in the Linux machine, you can list all the block devices on this server by using the Linux command lsblk. This command requires to be issued by a privileged user account. You can see that I show a few volumes from my system below.
Turn off your machine and add three new virtual disks: one for user database files, one for the transaction logs and one for tempdb database. The procedure for adding new disks depends on the type of your server (can be physical or virtual) and, if virtualized, on the type of the virtualization manager you are using.
If you are using VMWare Fusion, for example, you have to choose Virtual Machine Library from Fusion’s Window menu, then select the virtual machine you want to add the new disks to and click Settings. Then click to Add device button -> New Hard Disk -> Add. Pick a location for the new disk, adjust the size and the type of the disk (IDE, SATA or SCSI). For SQL Server disks it is better to select SCSI for a better manageability and performance.
After rebooting the machine, you can check which disks LVM sees now by using the command lvmdiskscan, that scans the system, looking for any LVM volumes.
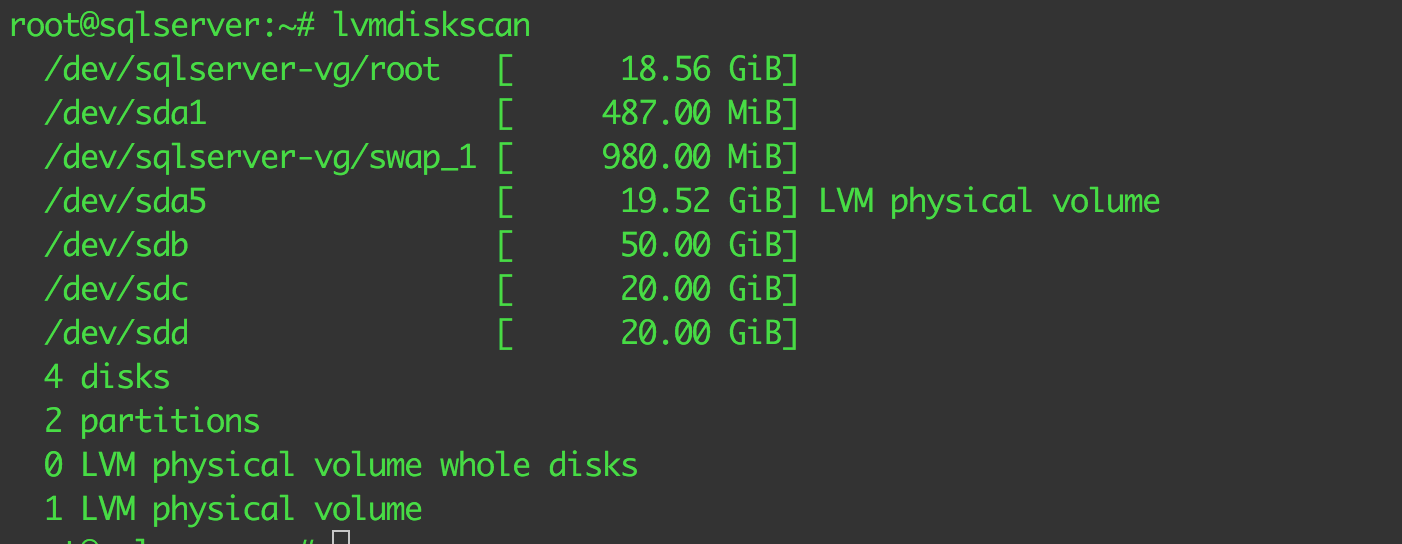
The new disks are labeled sdb, sdc and sdd, following the Linux drive naming conventions (https://www.tldp.org/HOWTO/Partition-Mass-Storage-Definitions-Naming-HOWTO/x99.html).
Logical Volume Manager (LVM) organizes storage space in Physical Volumes, grouped into one or more Volume Groups. Those Volume Groups can be sliced into Logical Volumes, that applications can use to store data. This is quite similar to those Windows Operating System does with drives, partitions and volumes.
The next step is to create the physical volumes on LVM, one for each physical drive. We can do this by executing the command, pvcreate, and passing the disk labels, one by one. We can also put all labels together in a single execution with multiple parameters (shown in the following example).

Let’s create one volume group for each physical volume with the command vgcreate (this way we have an independent control on every volume group):

And finally, let’s create a logical volume for each volume group with the command, lvcreate. A logical volume provides storage virtualization, giving us flexible capacity, re-sizeable storage pools, online data relocation, a convenient device naming, volume snapshots and a lot of features to manipulate disks.

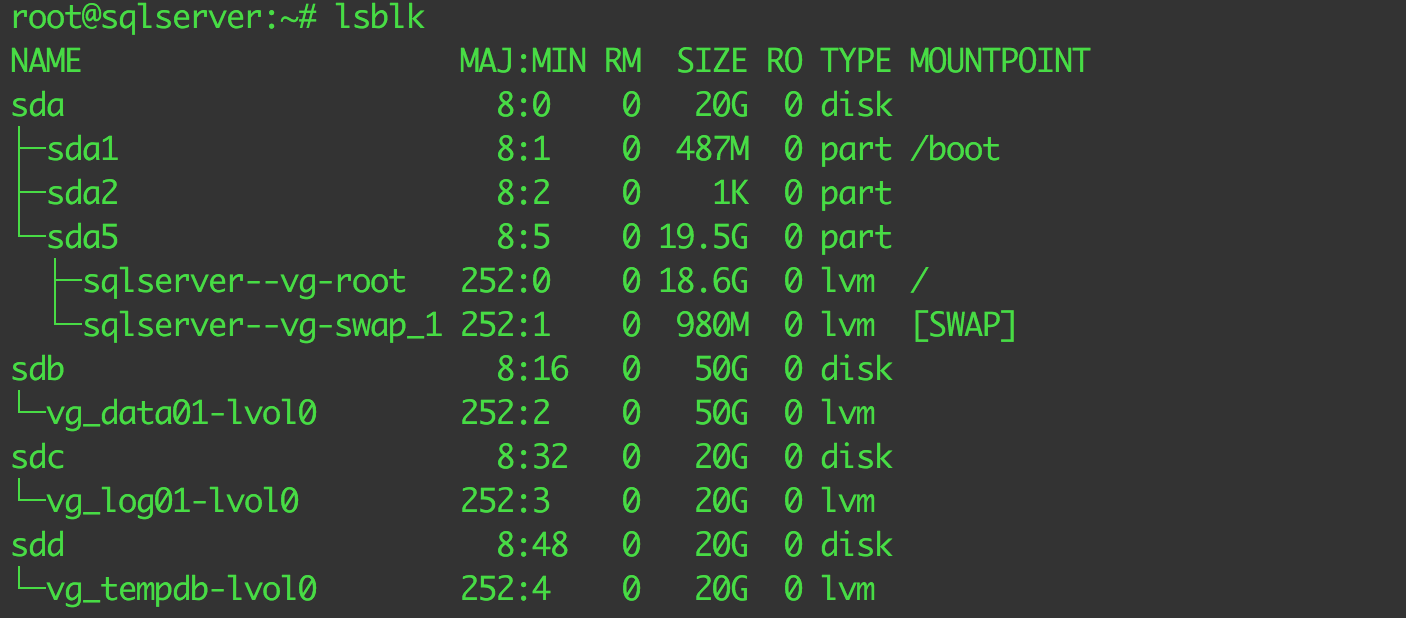
After Running the lsblk command, we now see all the attached volumes:
The last step is to format the new volumes with the file system of choice. SQL Server on Linux supports the etx4 and XFS file system types. Comparing the two file system types is out of the scope of this article, but in a few words, while ext4 is a stable, good enough standard file system type and slightly faster than XFS, XFS offer more server-oriented features, a better stability, advanced journaling and a better support for large files.
Let’s format our logical volumes using the mkfs.xfs command:
mkfs.xfs -f /dev/vg_data01/lvol0
mkfs.xfs -f /dev/vg_log01/lvol0
mkfs.xfs -f /dev/vg_tempdb/lvol0

These volumes are now available to the file system, but in order to use them from SQL Server, we need to place them in a container where we can get into them. The best way is to create a folder for each of these volumes into the /var/opt/mssql/data directory, the same way we do with mount points on Windows. We create them using the linux command mkdir.
mkdir /var/opt/mssql/data/data01
mkdir /var/opt/mssql/data/log01
mkdir /var/opt/mssql/data/tempdb
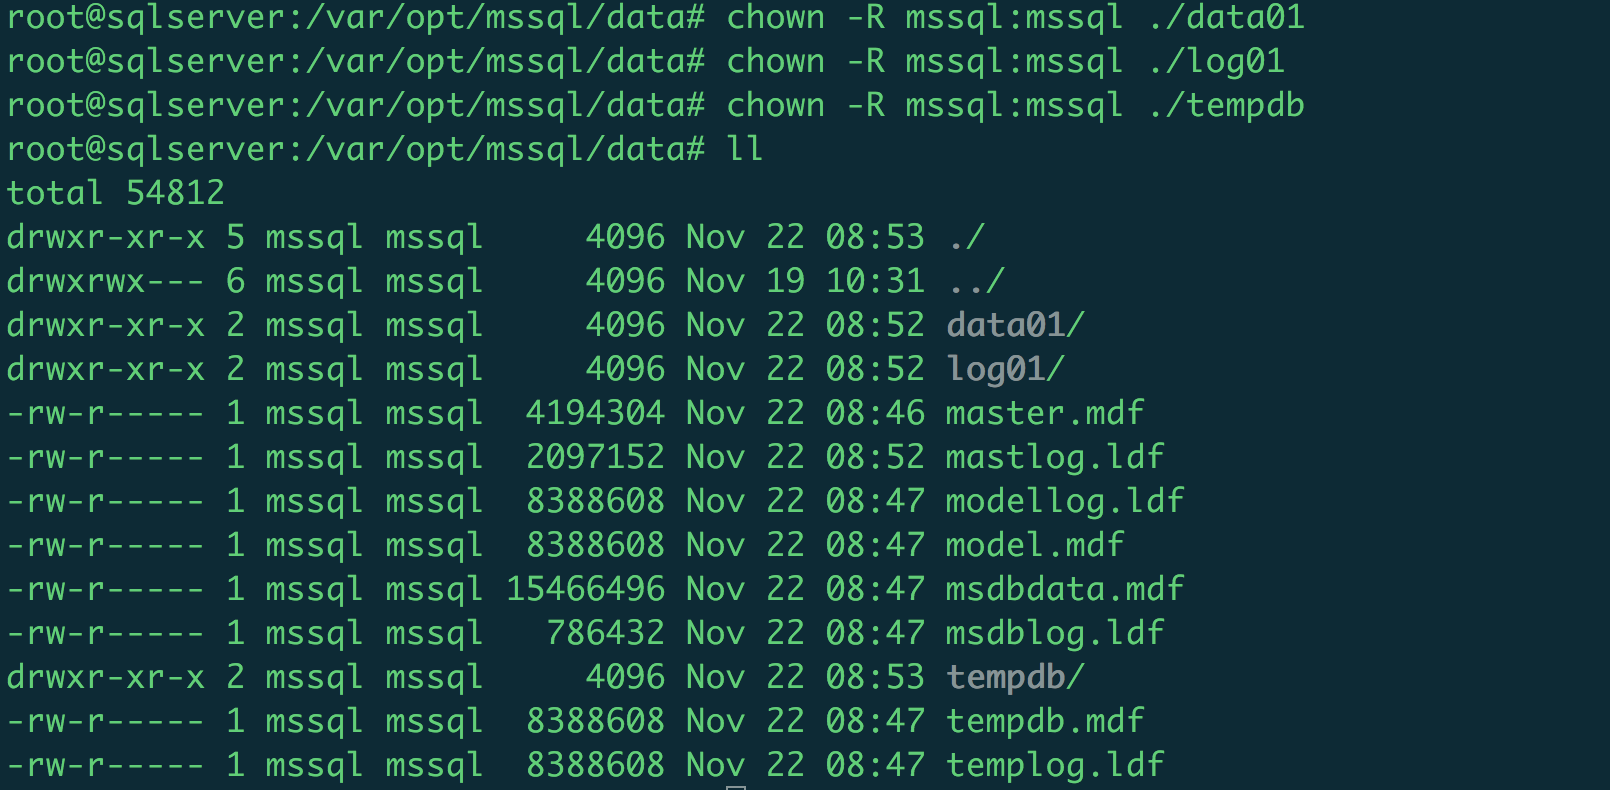
We need also to change the ownership and permissions, or the SQL Server instance cannot get access into these folders, so use the command chown to change owner and group to mssql user:
chown -R mssql:mssql /var/opt/mssql/data01
chown -R mssql:mssql /var/opt/mssql/log01
chown -R mssql:mssql /var/opt/mssql/tempdb
Now we need to mount the folders permanently, so they can be used every time the machine reboots, by adding the following lines to the /etc/fstab file:

Now you can mount the new disk manually (or reboot the machine) and then check the new disk are available using Linux df command:

Just to be sure that all is working fine, let’s create a new database using Azure Data Studio (or a SQL Server Management Studio if you are using a Windows client to connect to SQL Server on Linux). You can get the IP address of your Linux server by executing ifconfig command. Connect to the SQL Server instance using this IP address and SQL Server authentication, with the sa username and the password you provide during the configuration step of the SQL Server installation. Then create the new database with the following code:
CREATE DATABASE myDB
ON PRIMARY
(
            NAME=mydb_data,
            FILENAME=’/var/opt/mssql/data/data01/mydb.mdf’,
            SIZE=100MB
)
LOG ON
(
            NAME=mydb_log,
            FILENAME=’/var/opt/mssql/data/log01/mydb.ldf’,
            SIZE=100MB
)
GO
USE myDB
GO
-- List database files properties
SELECT * FROM sys.database_files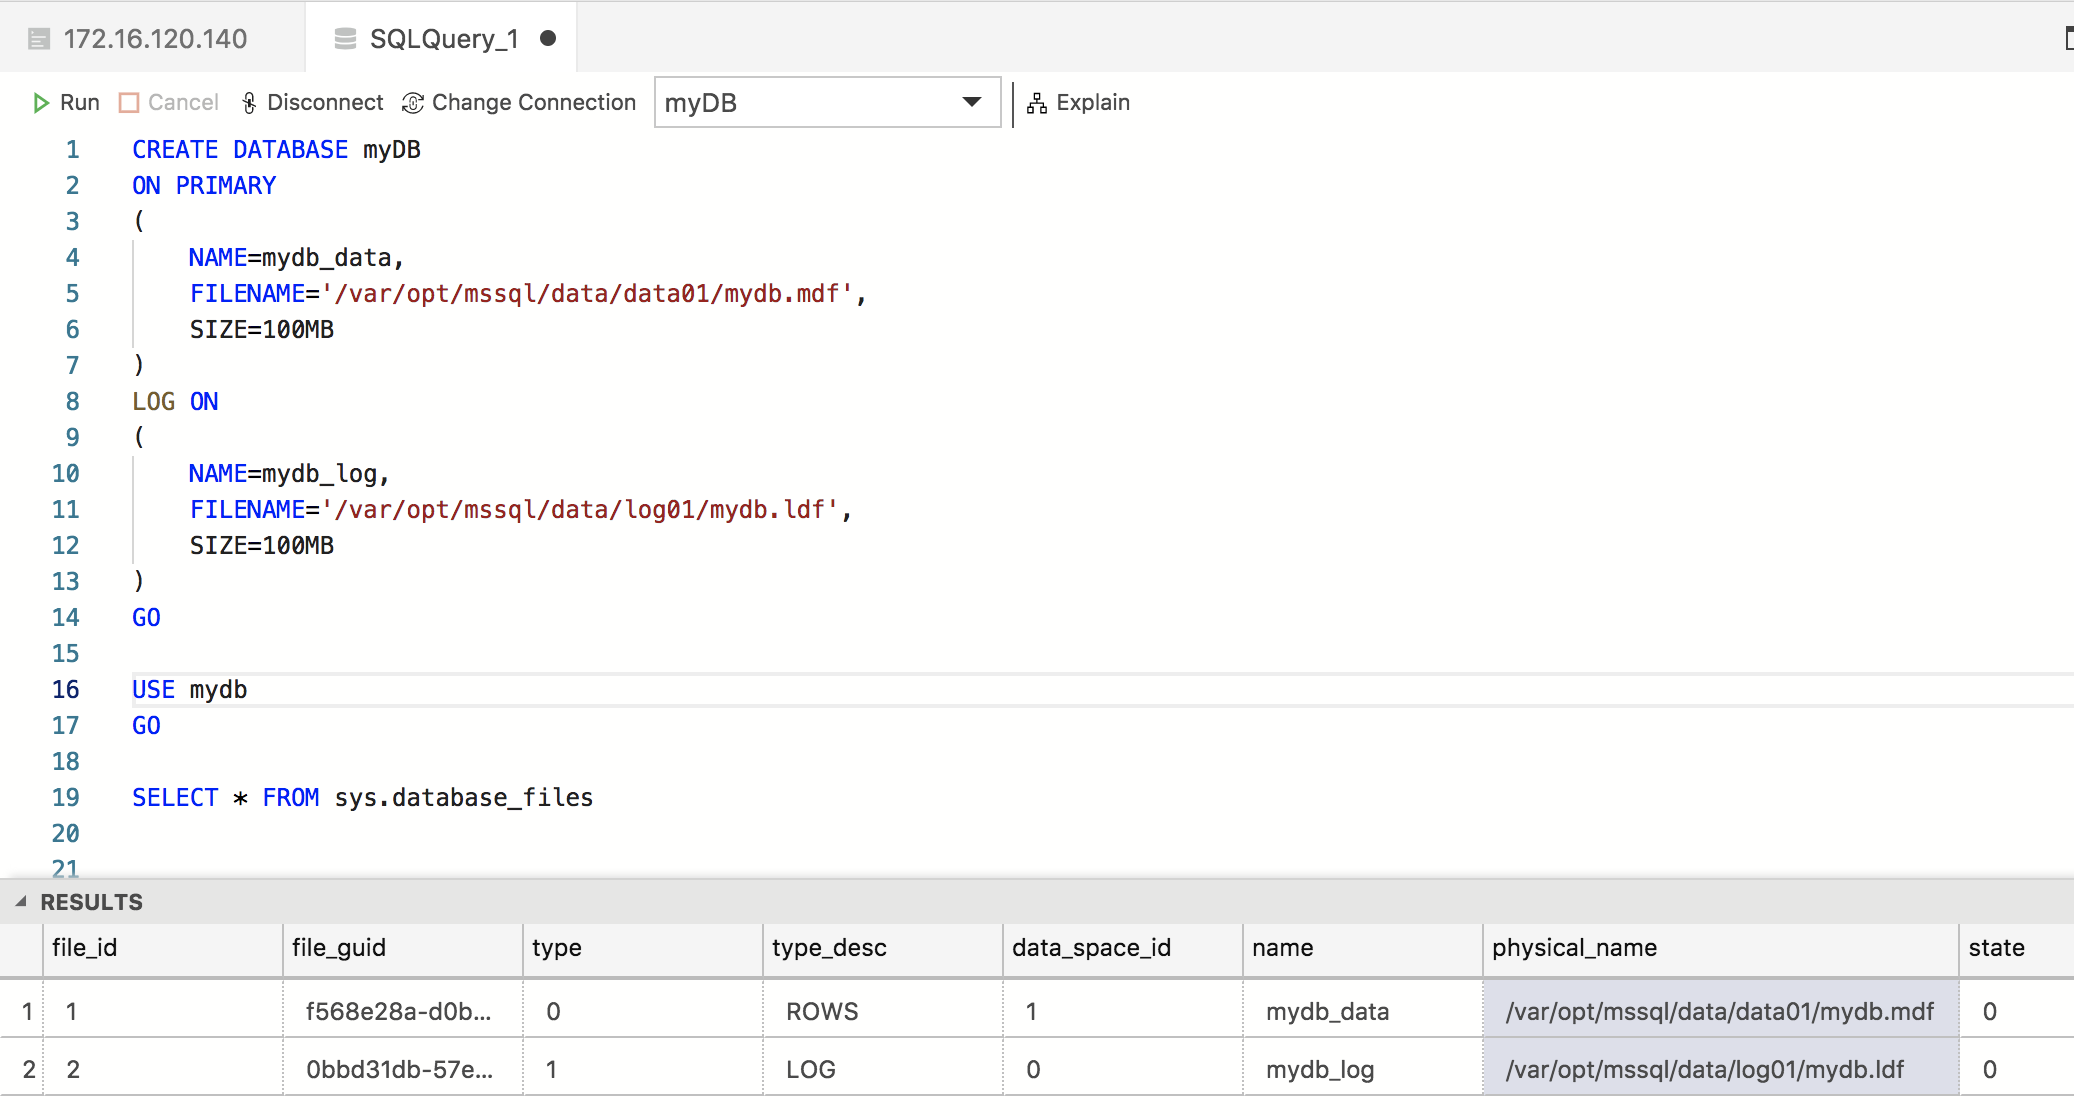
Well done! In the next level we’ll play with this SQL Server instance and examine how to connect, plus differences and limitations.
Enjoy!