

Introduction
Data Platform Studio is a free tool used to migrate from SQL Server on-premises to ASDW. In this article, we will show how to migrate multiple tables from SQL Server to Azure SQL Data Warehouse (ASDW) using this tool.
Requirements
- An Azure SQL Account.
- A SQL Server with 2 tables. In this example, we are using the Adventureworks database, but you can use any table.
Getting started
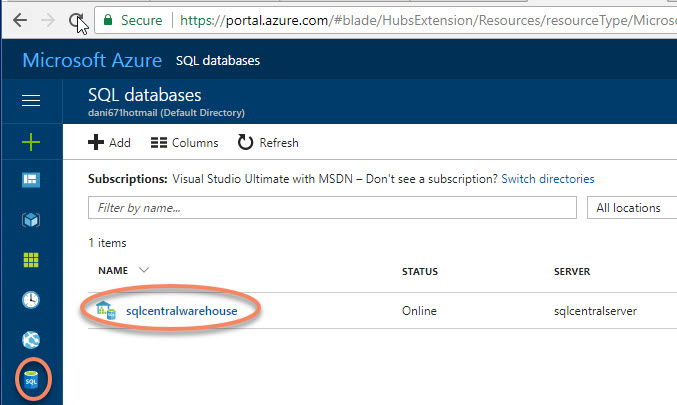
In your Azure Portal, go to Databases and click on your ASDW Database:
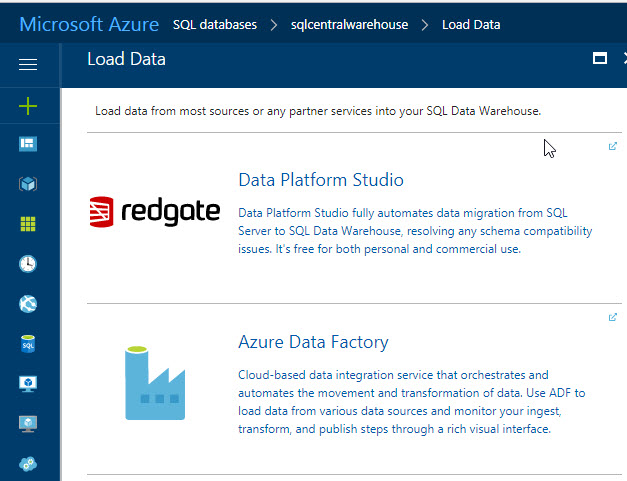
Click the option to load data:

There are two options in Azure. One is the Redgate Data Platform Studio, which we will cover in this article and the Azure Data Factory that we will cover in the future. Select the Data Platform Studio link:
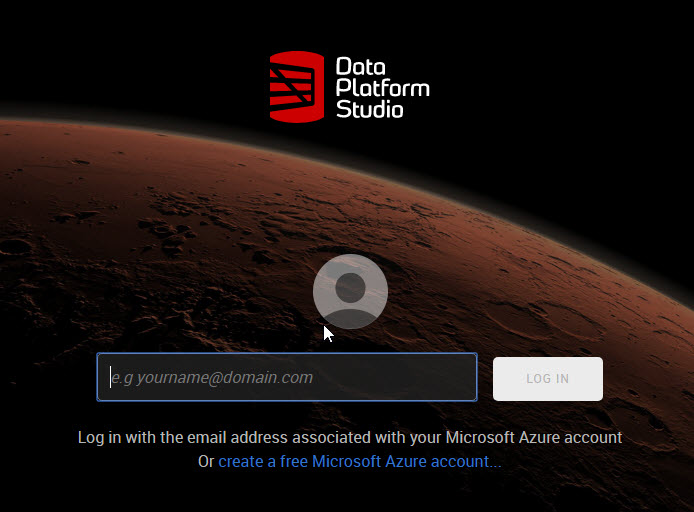
You will need to provide your Azure login and a new account will be created for you to login to the Data Platform Studio (DPS):
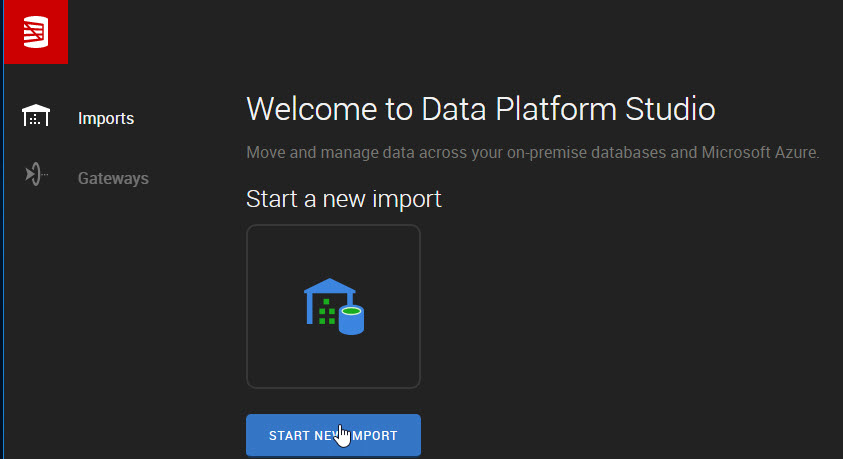
Once that you login in the DPS, press the Start a new import option:
You will have an online assistant. Unfortunately, it was a little late when I tried and I could not contact Jonathan:

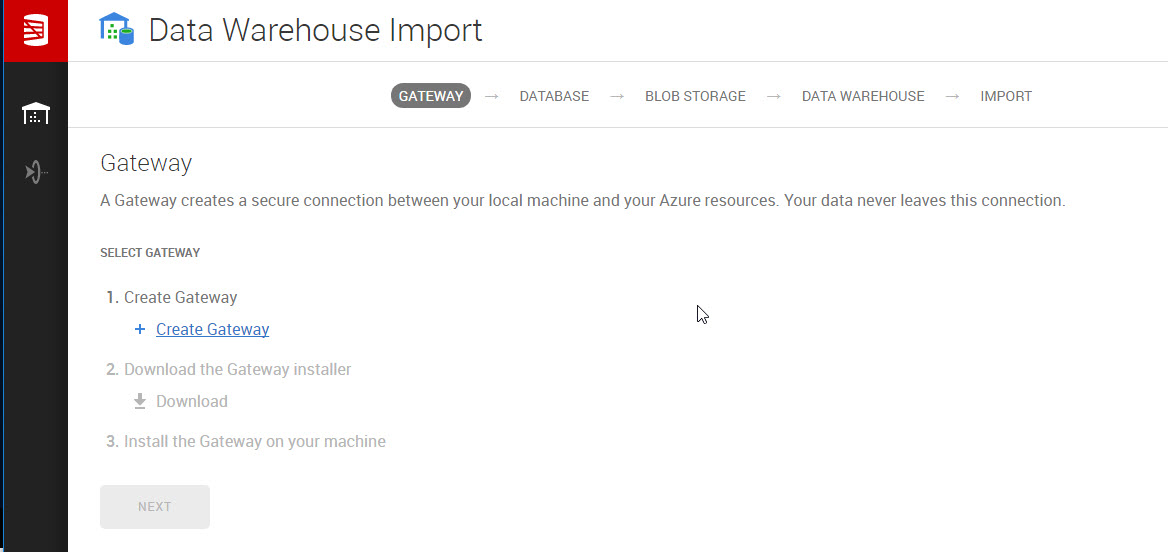
The first time, it will ask you to create a gateway to connect from Azure to the SQL Server on-premises:
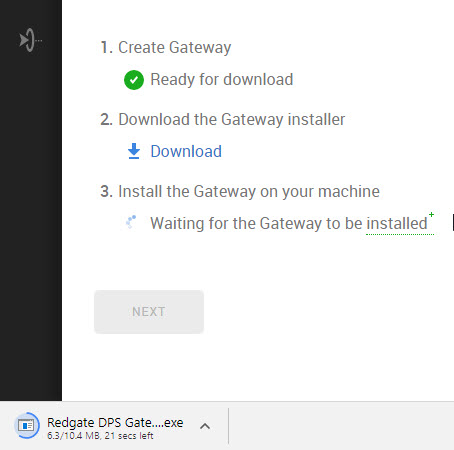
Press the Download link to download the DPS Gateway. It is a 10 MB installer:
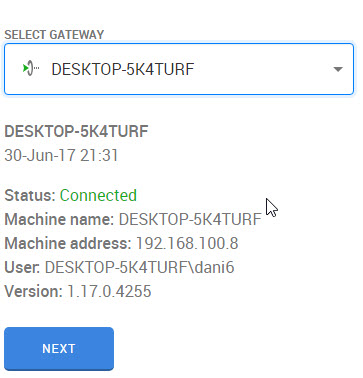
Once installed, the gateway will detect your local SQL Server on-premises instance. Press enter to connect to it and press next:
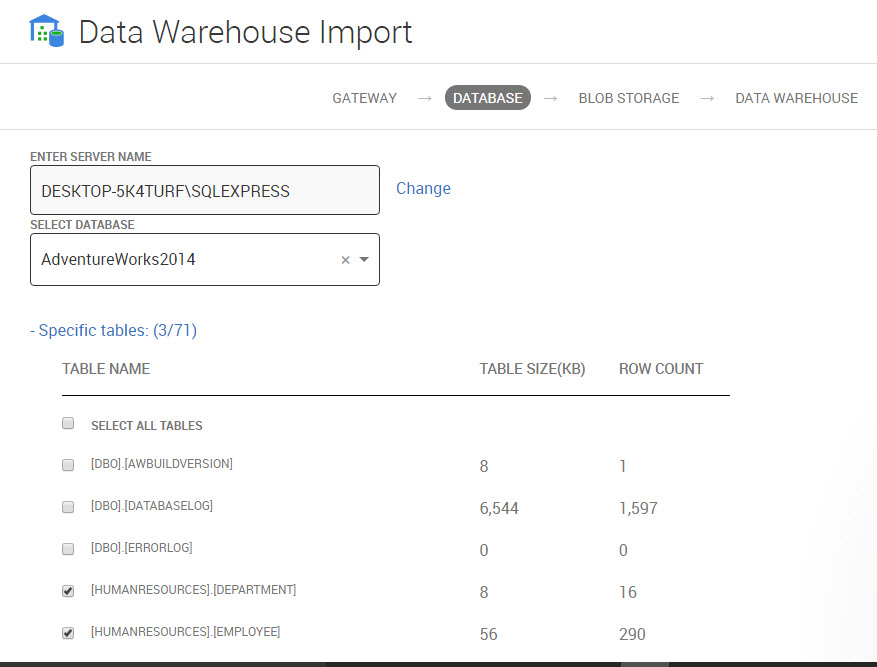
Select the database to connect. In this example, we will use the Adventureworks database. By default, it is connecting with the Windows credentials. Select also the table that you want to export to ASDW:
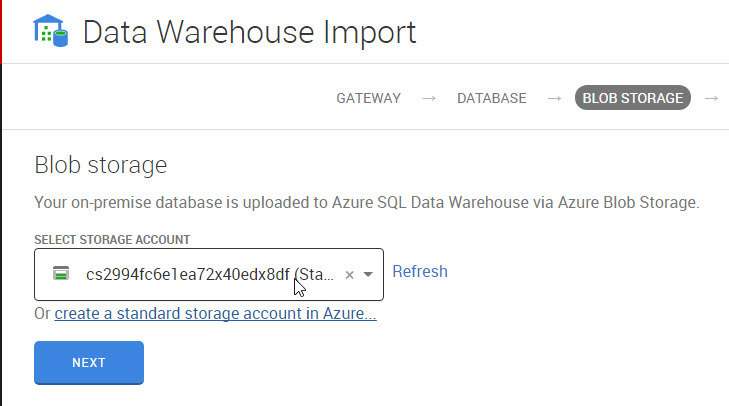
The BLOB storage in Azure is the service to store large objects in Azure. You can select an existing Storage Account or create a standard storage account. We will show how to create a new one:
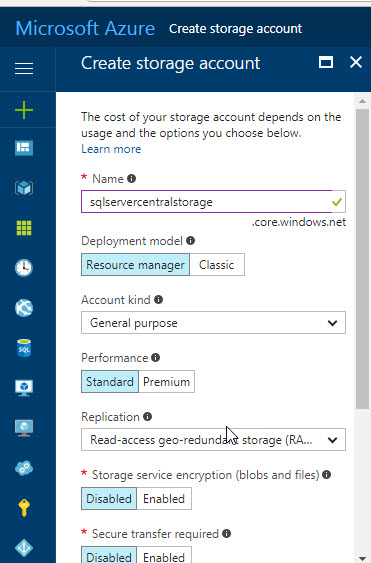
If you select to create a new storage account, you will need to specify a name for the storage account. You also have the following options:
- Deployment model is the way we deploy. It can be classic or Resource manager. In Resource Manager, we handle the different Azure components to monitory them in groups. The classic deployment is the old way and it is not recommended by Microsoft.
- Account Kind specifies the if the account is a general account (tables, queues, files, Blobs, queues and VM Disks or Blob storage accounts (for unstructured data).
- The performance can be standard or premium. Standard is the cheapest option and Premium has a higher price, but offers better performance.
- Replication is also important. Read access geo-redundant storage allows you to have read -only replicas in different geographic regions. Geo-redundant storage allows you to have a replica in different geographical location that is hundreds of miles away from the primary location. You also have the Zone-redundant storage that replicates data asynchronously within one or two regions in within one or two regions in addition to storing three replicas like locally redundant storage.
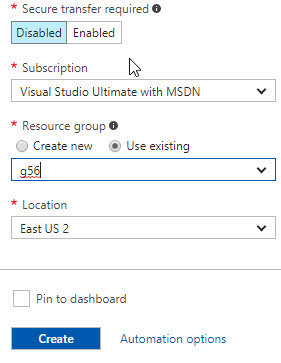
You can also select to have a secure transfer, the subscription, the resource group and the location. Choose a location that is near your region.
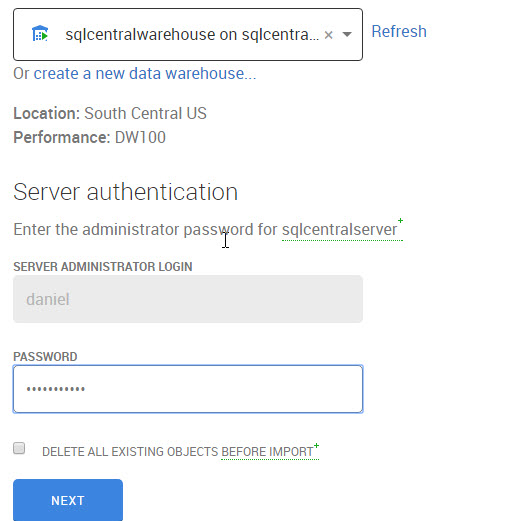
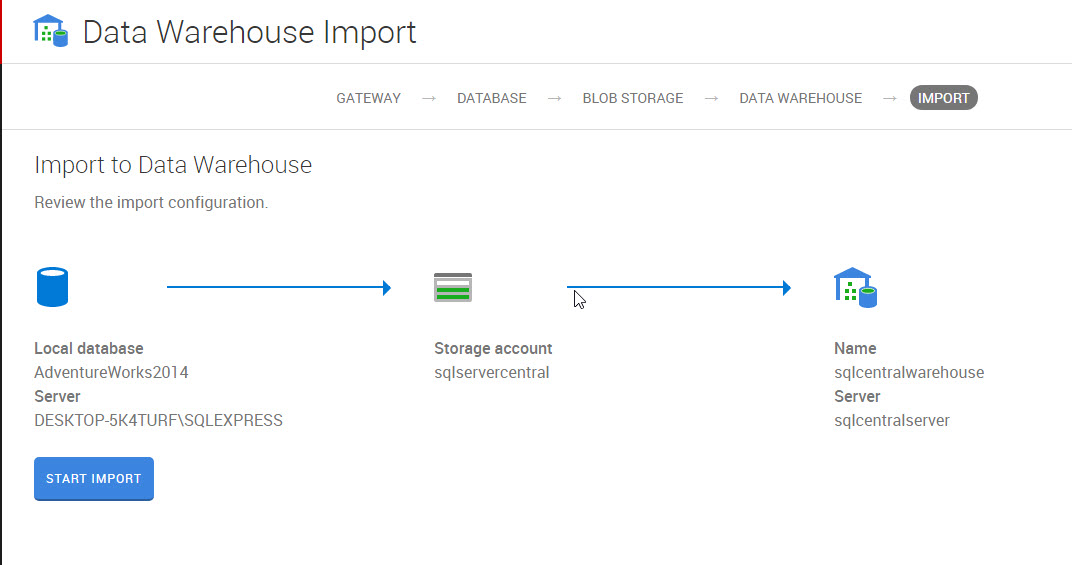
Once that the account is created, specify your ASDW credentials. This information contains to login used when you created the ASDW database and then press next:
Once that everything is done, press the Start import button:
Azure will show you upload and progress information and the time required:

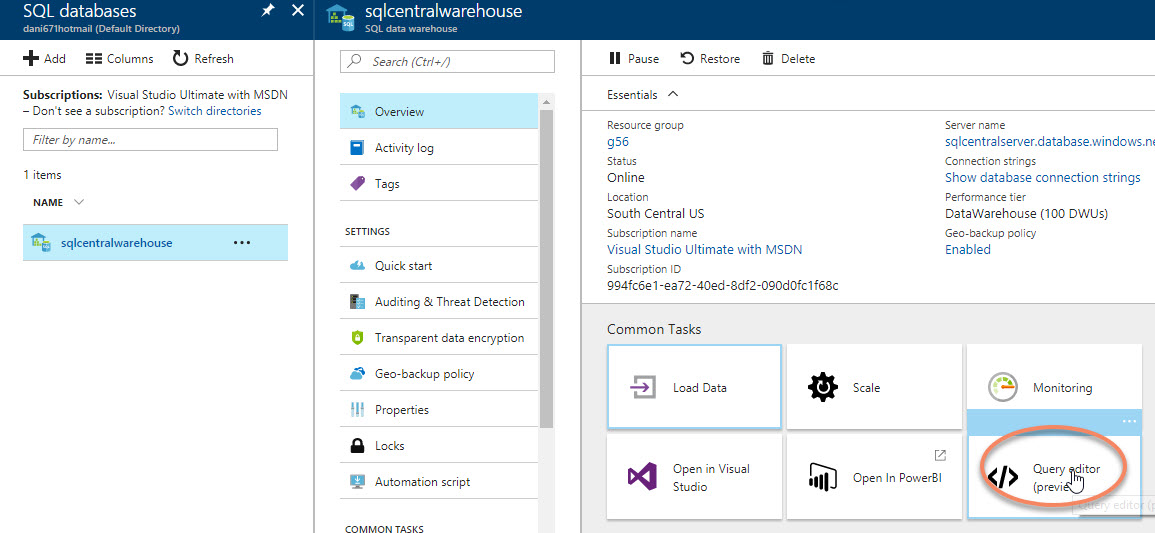
Verifying that the tables were imported successfully
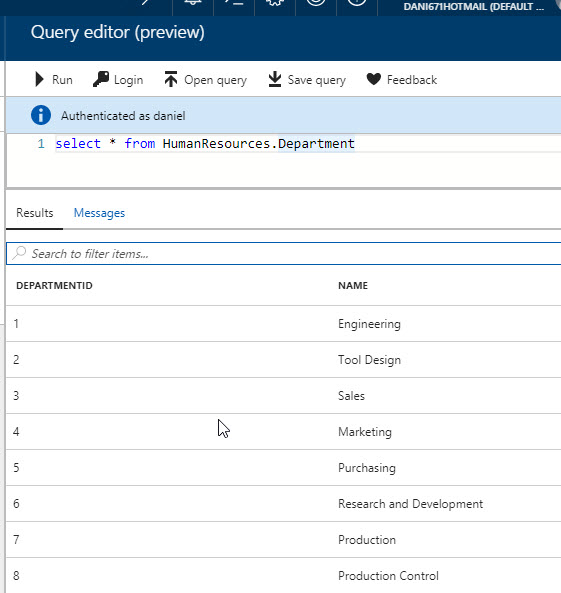
To verify that everything is OK, go to the ASDW database and select the Query editor option:
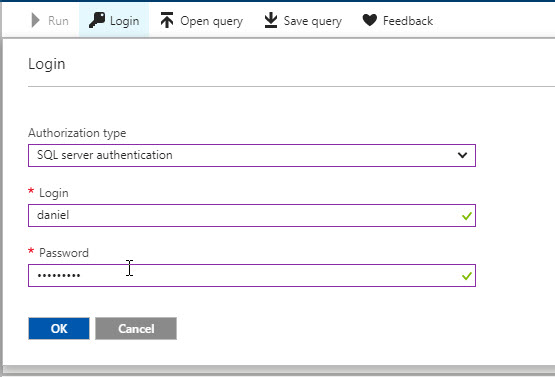
Provide your login information:
To check all the user tables you can check all the objects from the sys.objects table that are user tables:
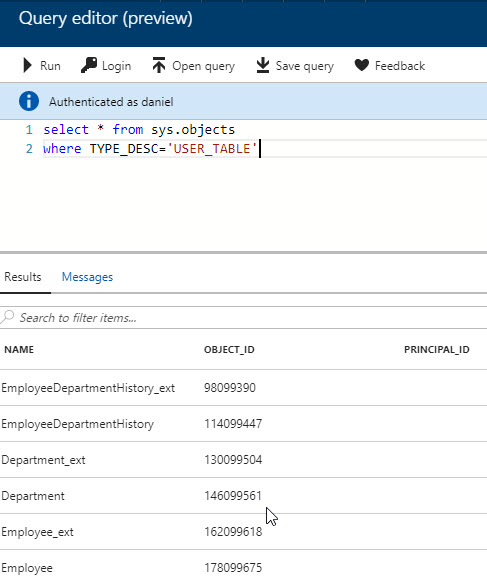
As you can see, the tables were imported successfully. You can also do a select * to verify that the data was also imported successfully:
Conclusion
As you can see, importing the data is a straightforward process using DPS. You only need to install the Gateway and then it will be easy to import the information in Azure.