

Introduction
"Hello World" is one of the most widely used statements in programming, and is commonly used in almost all "how to" programming books. The phrase is used generally as that first example on your journey to becoming a code monkey. The purpose of this series is to just take you through the basic "first steps" with getting started with Azure Infrastructure as a Service (IaaS). I do not plan on going over the business side of the house with using Azure and how it can be a great investment for your company...there are other folks doing that already. My purpose is the fact that SQL Server is a large product, and when you want to start learning it it is inventible that you have to start using it or playing with it in some form or fashion. The general consensus to get started learning SQL Server is with your own "home lab". Utilizing Azure for this lab allows you to do a few things:
- Build a lab that you can get to anywhere
- Have access to the latest CTP of the new shiny Windows OS or SQL Server build
- Learn another technology at the same time, Azure
One caveat to note up front: Microsoft Azure services and management features are ever evolving, and while they may not change overnight, it is possibly that the images you see in this article may have changed slightly (or even dramatically) after publication.
Signing Up
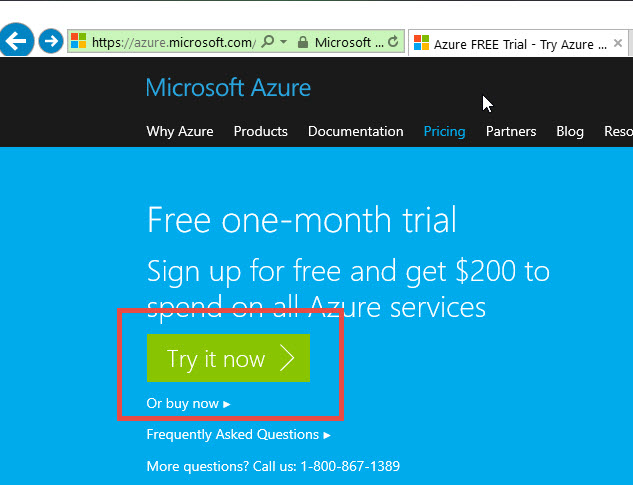
How do you actually get started? Go to: https://azure.microsoft.com. Azure does cost money, but Microsoft offers a 30-day trial subscription that comes with a $200 credit to get you started. Click on the "Free Trial" and then "Try it now":

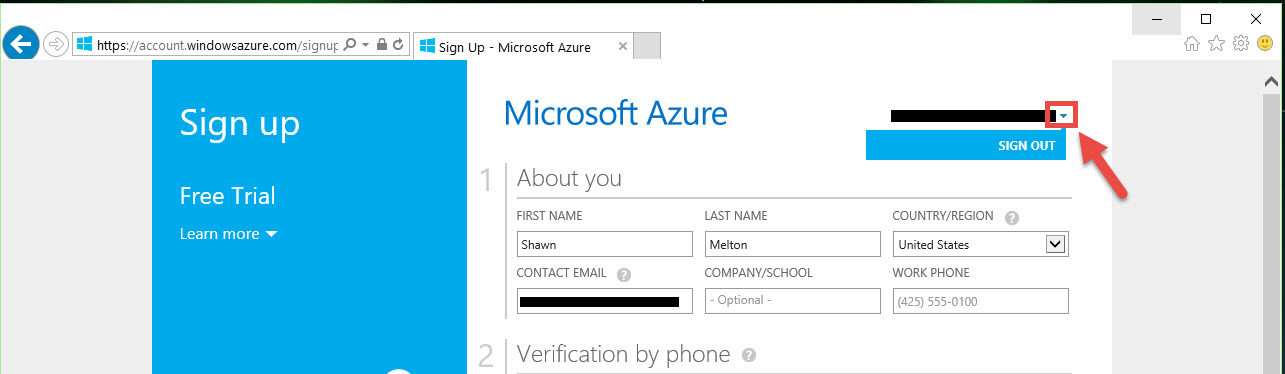
If you are currently logged into a Microsoft account (e.g. outlook.com, hotmail.com, Office 365 Account, etc.) you will see the page pre-populate the "About me" portion of the form, and you will use that account as your login to Azure. If you want to use a different account you can sign out by selecting the arrow beside your email:
In step 2 you will need to go through verifying who you are (no anonymity here), and provide a legitimate phone number to call you or send a text message. The credit card provided in step 3 is also to verify your identity, and for paying usage once you get past the 30-day trial. Check the agreement checkbox after you fill in all that information, and then click the "Sign Up" link at the bottom of that page.
Once you click on the "Sign Up" link it can take some time to complete because it is creating your account and the initial trial subscription. Once it is finished you will see something similar to the following:
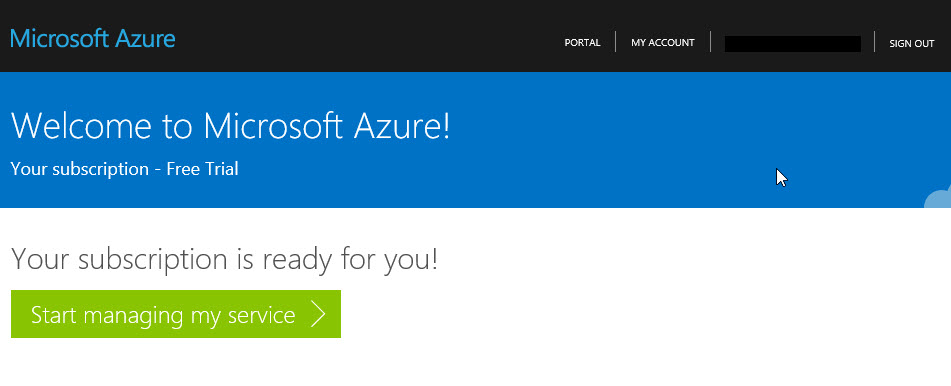
Click to start managing your service and it will take you to the Azure Management Portal. There is also a short "tour" of how to get around you can click through if you want.
Subscriptions
The business side of subscriptions can get pretty detailed in what all you can do, but for personal use there are just a handful of things to be aware of right off:
- Everything you create in Azure must be tied to a subscription.
- The free trial being a 30-day trial means after that 30 days is up, what you create under that subscription will be deleted.
- Microsoft allows some things to be migrated or moved to another subscription, but not everything that I know of so far. [As of May 2015, Microsoft is working on it.]
- You can monitor the balance of your trial credit by going into the "Subscription" blade of the portal.
If the cost of Azure bothers you already, I will bring up now that if you happen to have an MSDN subscription, check to see if it includes an Azure credit. I am not sure of the exact date it became available, but most of the MSDN subscriptions now come with an Azure $150 credit per month.
Portal(s)
To confuse you a little there are currently two portals to manage your Azure services. The Azure Portal is the original and was the primary means of creating and managing your services. Microsoft introduced the "Azure Preview Portal", and this portal has a completely different layout that offers more customization and is touch-friendly for things like tablets or mobile devices. In order to help soften the confusion I am going to reference each portal accordingly:
Azure Portal (https://manage.windowsazure.com)
Preview Portal (https://portal.azure.com)
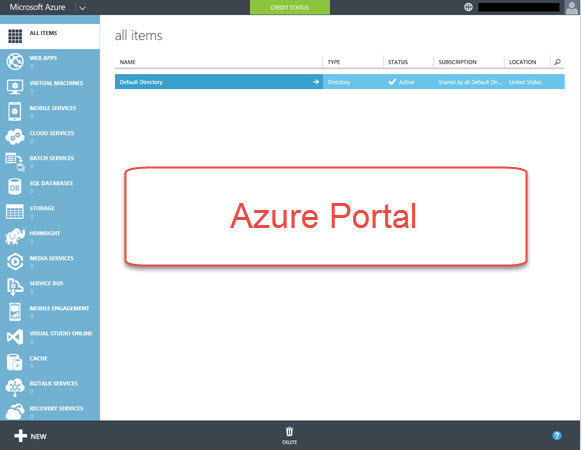
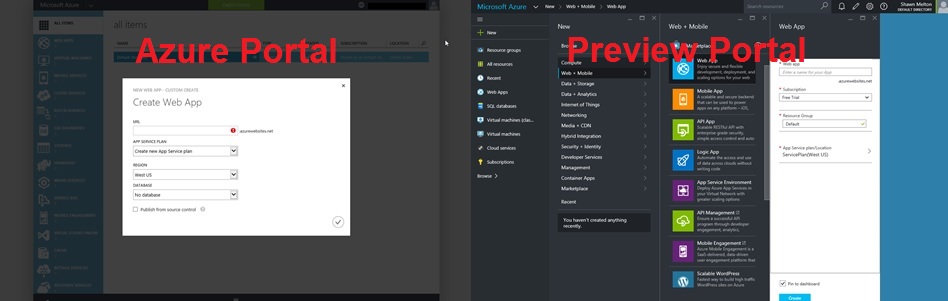
The main differences in format (outside of the obvious look) is the Azure Portal you are in a modal format when it comes to interacting with the services, versus the Preview Portal is a "blade" format:
Starting out there were a number of things you could only do under the Azure Portal, and Microsoft is migrating all the functionality to the Preview Portal. One example as of this is with billing that can only be managed under the Azure Portal. You can look at your subscription status and balance from the Preview Portal, but to make any changes to it the "managed" link will just take you to the Azure Portal.
For the purpose of this series I am going to stick with using the Preview Portal, and will from this point forward simply refer to it as "portal" or "the portal".
Pin it, not Pinterest
The overhaul Microsoft did on the new portal offers you the ability to customize it to your preferences. You can do things from pinning a whole blade to the dashboard, or just a portion of the contents within a blade. The blade contents are based on the service you are interacting with, and each could have metrics or analytical data that you can pin to your dashboard. In the end this lets you be just a click away from your resource usage or access to that particular resource. You can find a great deal of information on the customization of the dashboard in this article by Brian Keller.
Getting around
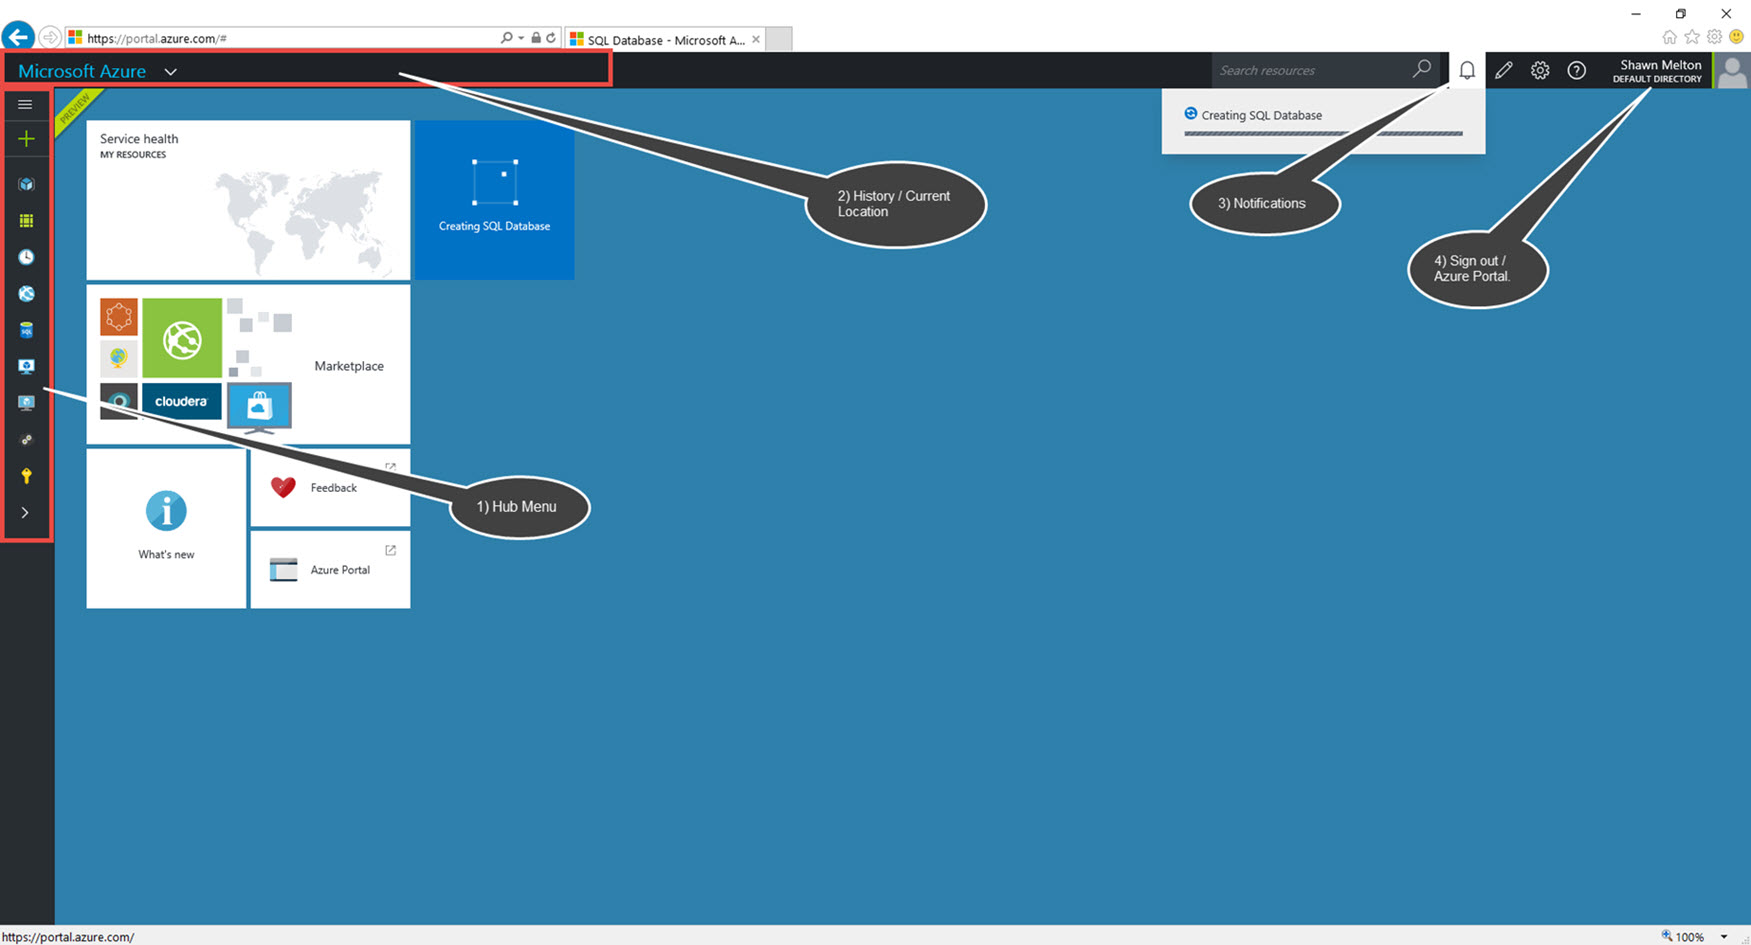
Areas of the portal that will help you understand how to get around:
- Hub menu - Think of this like the Start Menu in Windows, you can customize what goes here and move things around via drag-n-drop.
- History/Current Location - The drop down arrow beside "Microsoft Azure" will give you a list of previous places you have visited on the portal, and then as you browse you will see the path of your location shown on this bar as well.
- Notifications - Creating resources can take some time to create in Azure so you will see notifications of that work being done and when it completes amonth other things.
- Your Name - Clicking on your name will show links to sign-out and link that will take you back to the Azure Portal.
Additional information on the portal and a bit more overview can be found under the Azure documentation here.
Creating Your First Resource
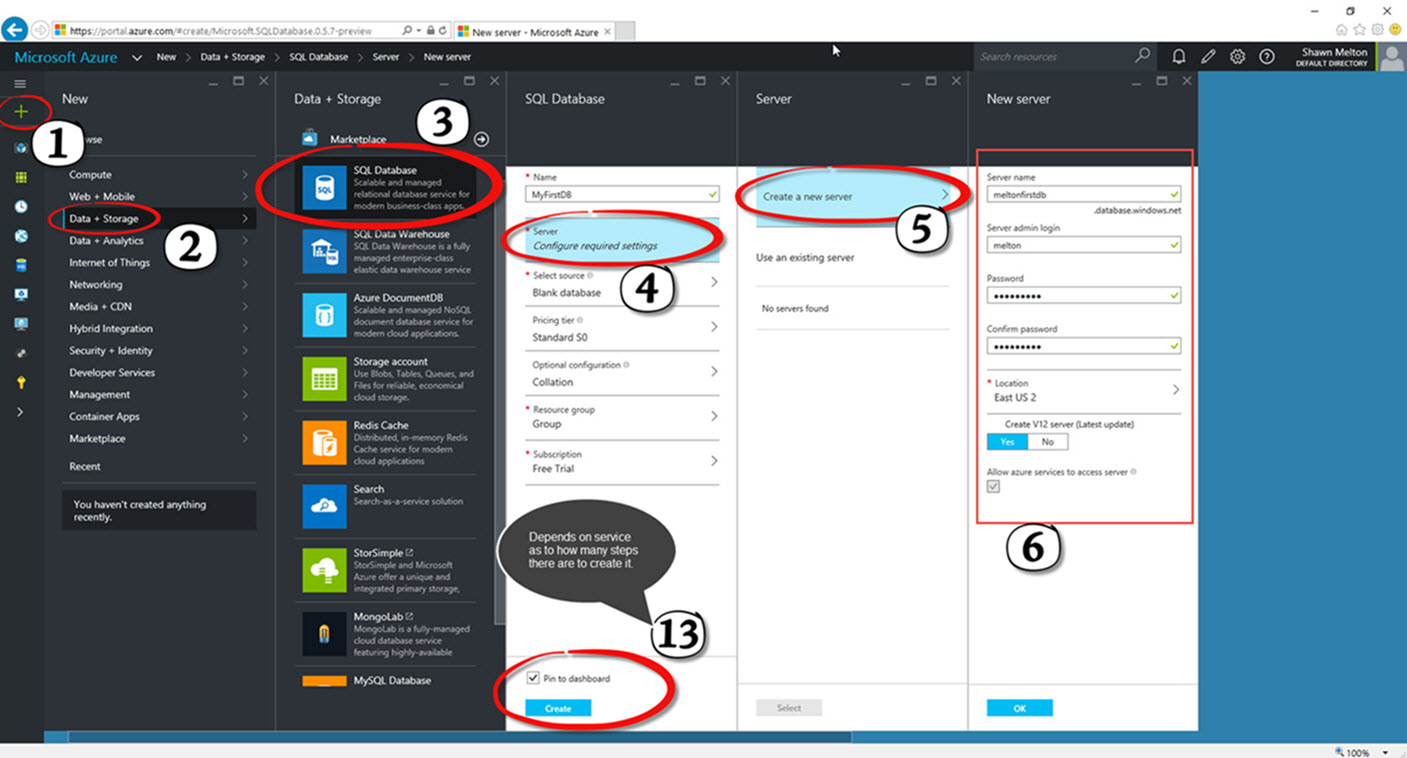
As an example let say we want to create a SQL Database. Based on what you want to create can depend on how many steps this will take, and what type of information you will need to provide. Creating a SQL Database took me around 13 in this example as just about every portion of the SQL Database blade has to be checked (to make sure of default values) or filled out before you create it:
Summary
I hope that I was able to give you some insight into how to get signed up and familiar with the portal for Microsoft Azure. Comparing what Azure was when it started, where it is at now, and where it is going is very exciting; now is the time to get involved in it as much as possible. Using Azure as your home lab can be your starting point and get you ahead in your career as a DBA. I know with day-to-day life a 30-day period can hold many things to keep us busy and it may not seem like much time to get your head wrapped around everything in Azure, it isn't for me, but it provides a good start. While you have the $200 credit get into as much as you can, play with it all.


