In Level 1 of this Stairway series, we discussed how to configure TDE in a user database using a Database Master Key (DMK) and a certificate. Level 2 showed the steps to restore the backup of this database on another instance. In this level, we will explain how to configure TDE in SQL Server with the asymmetric keys stored outside of the SQL Server in Azure Key Vault, thereby imposing additional security.
The following image summarizes the whole process flow of using the Azure Key Vault using the Extensible Key Management (EKM) capability of SQL Server.
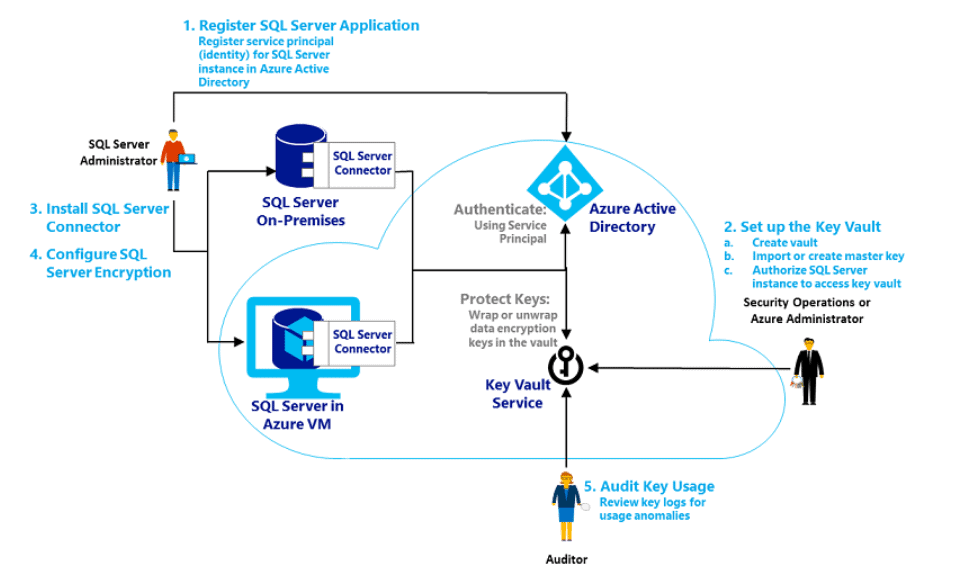
This figure is from the SQL Server documentation.
Before getting into a detailed explanation, I assume a short familiarization of the components associated that will help you out to understand the entire process clearly.
Major Components
| Components | Roles and Functions |
| asymmetric key | An asymmetric key consists of pair of public and private keys. The private key member pair must be kept safe and secure. The public key can be distributed to the requester who is authorized to use this key. |
| Azure Key Vault | A centralized location in the Microsoft Azure cloud that is designed to store application secrets and keys. Their distribution can be controlled by authorized personnel. |
| SQL Server Connector | The SQL Server Connector for Microsoft Azure Key Vault works like a bridge between SQL Server and Azure. This connector enables the SQL Server encryption features to leverage the Azure Key Vault service as an Extensible Key Management (EKM) provider. |
Prerequisites
- An Azure subscription with a basic understanding of Azure features. The free tier is enough for the scope of the contents in this article.
- A laptop or virtual machine having Internet access.
- SQL Server Enterprise or Developer Edition 2008+. In this article SQL Server SQL 2017 Enterprise Edition is used.
Overview
Below is an overview of the steps that we will be describing in the rest of the article. These are broken down into three areas: steps on Azure, steps on the Windows or Linux host OS for SQL Server, and changes inside the SQL Server itself. This table lists the breakdown.
| Azure | Host OS for SQL Server | SQL Server |
| App Registration in Azure for granting access to SQL Server | Install SQL Server Connector | Enable EKM provider in SQL Server |
| Create a Key Vault to hold the Asymmetric keys. | Create a cryptographic provider using the SQL Connector provider file. | |
| Create Client Secret. | Create a credential for SQL Domain user and SQL Server Login to use the Key Vault. | |
| Set Access Policy for granting necessary set of privileges required for EKM. | Create an asymmetric key using the Cryptographic provider and Azure Key. | |
| Create a Key. | Create a SQL Login from the asymmetric key. | |
| Map the domain user and the SQL Server login to the respective credentials. | ||
| Create Database Encryption Key | ||
| Turn on TDE in the user database. | ||
Azure Configuration
In this section, we discuss the steps to be followed in the Microsoft Azure portal.
Application Registration
An application needs to be registered in the Azure Active Directory(AAD) in order to grant access to the Azure Key Vault for the SQL Server instance. Follow the below steps to do this.
Log in to the Azure portal using your credentials. (https://portal.azure.com/).
Set up an Azure Active Directory (AAD) service principal.
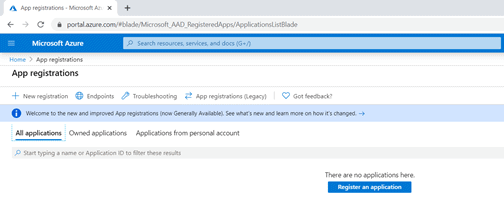
Go to Azure Portal > Azure Active Directory > App Registrations > New Registration as shown below.
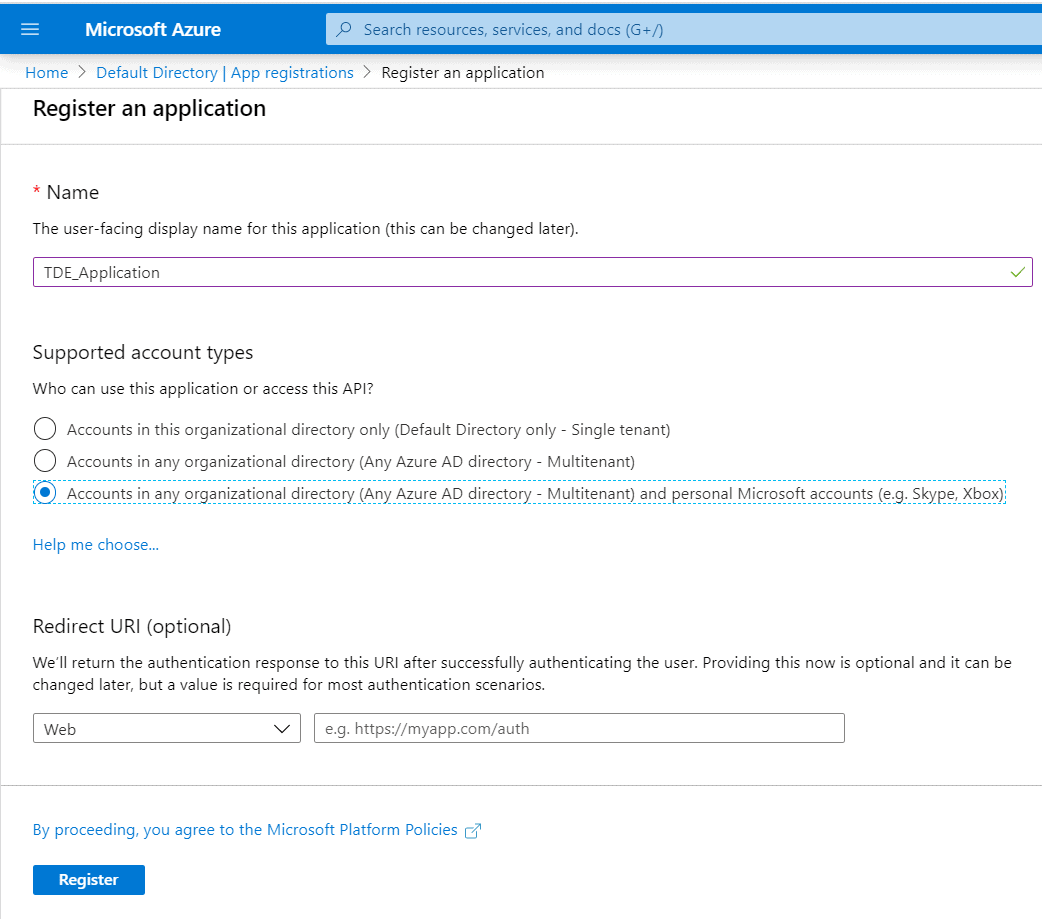
Name the application : (For eg: TDE_Application ). Follow a standard naming convention like
SQLServerName_TDE_Application for convenience in managing the Application and Keys later.
Account Type: Choose an account type based on the Tenancy.
| Single-tenant | All user and guest accounts in your directory can use your application or API. |
| Multi-tenant | All users and guests with a work or school account from Microsoft can use your application or API. This includes schools and businesses that use Office 365. |
| Multi-tenant with personal Microsoft accounts | All users with a work or school, or personal Microsoft account can use your application or API. |
Configure a Redirect URI if there is one.
Click Register once all the details are filled as in the below page.
This registers the application and displays the below page with the application details.
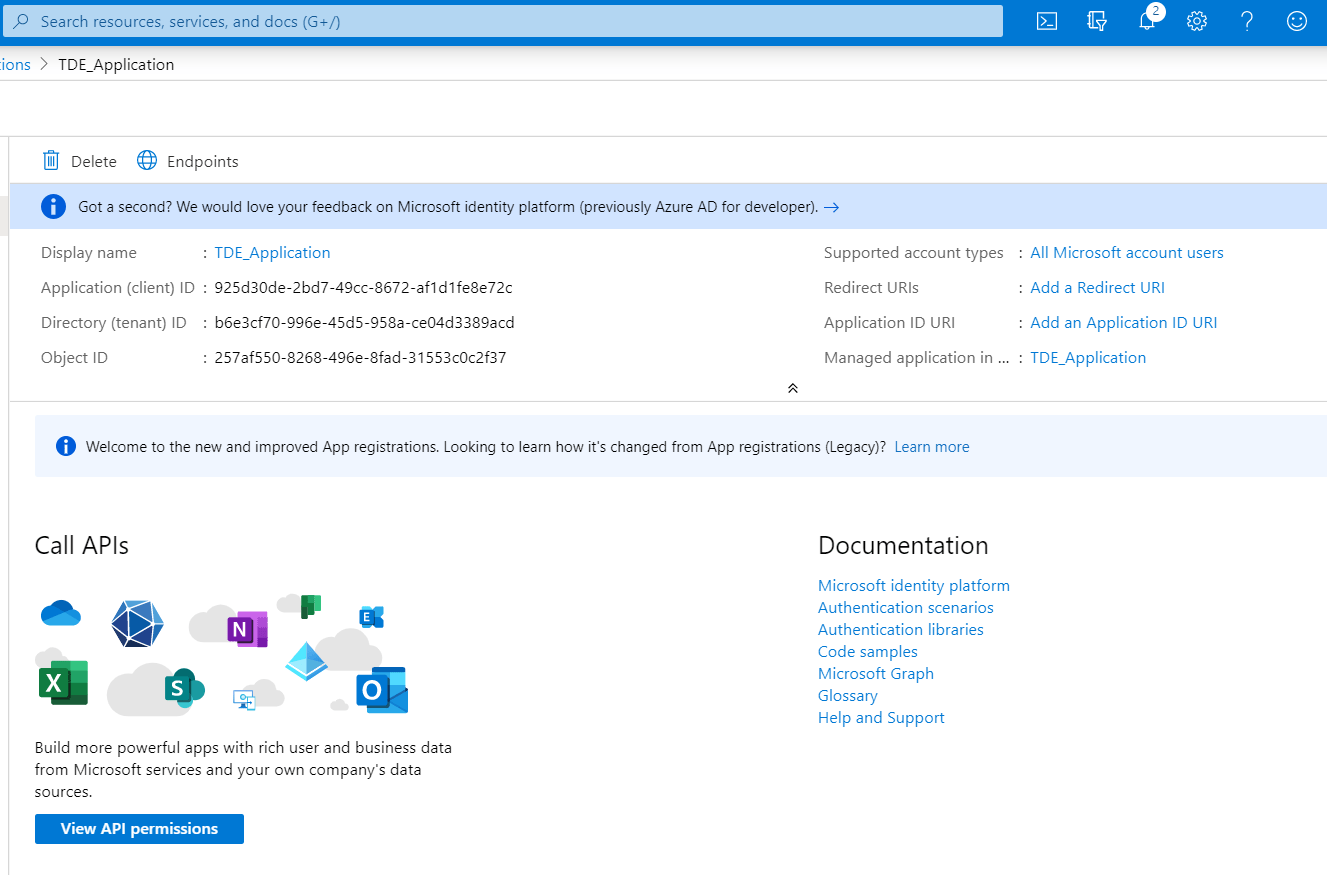
Copy the client ID, 925d30de-2bd7-49cc-8672-af1d1fe8e72c in the image above, for later use when you create the SQL Server credential.
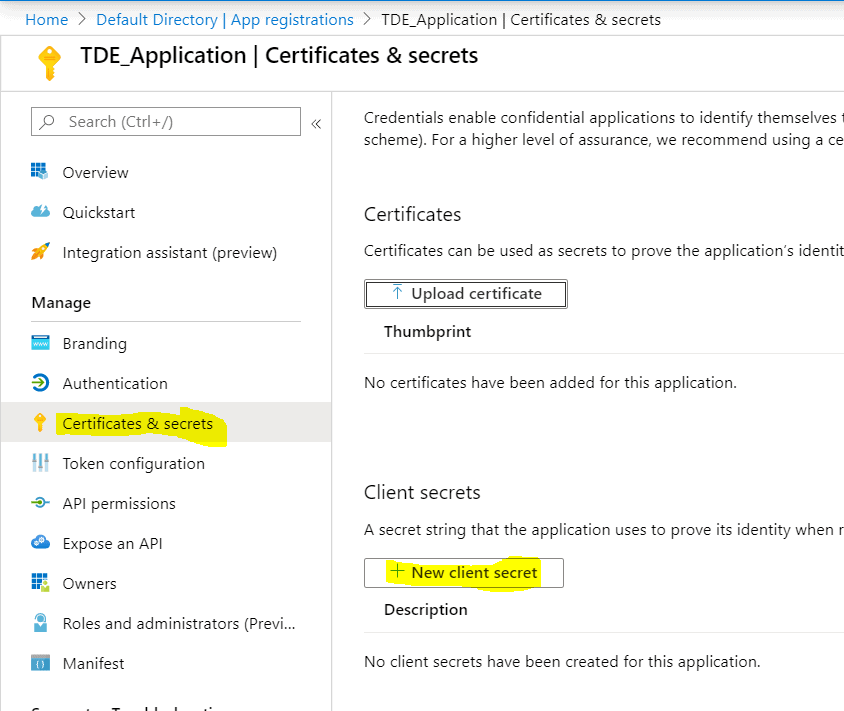
Client Secret Creation
The Application ID and Client secret are used for the SQL Server Credentials creation which is responsible for the authentication between SQL Server and Azure Key Vault. To create a client secret, click on the Clients and secrets option on the left side panel in the below TDE_Application page. Then, click on the ‘New Client Secret’ as highlighted in the above image for the Client Secret creation.
The below blade opens upon clicking the New client secret button. I named the client secret, TDE_ClientSecret. Set expiry for the client secret from the options. The expiry time frame can be set to one year or two years for which the secret has to be changed prior to the expiry time. Keeping the 'Never' expire option keep secrets not to be expired over time.
As soon as the client secret is added, it is displayed on the client secrets page as shown below. For security reasons, the secret cannot be shown once the blade is closed. Copy the client secret value 5mB4LltDgdf~4.ZwmZ6_4._5lxu_9YgL.2 to use later in this article.

Key Vault Creation
The Key Vault is used as a Key Management solution. Azure Key Vault makes it easy to create and control the encryption keys used to encrypt your data.
The Key Vault you create must be in the same subscription as the one used to create the application above.
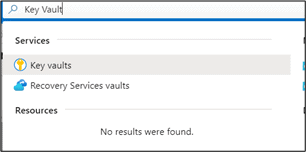
Search for ‘Key Vault’ in the Azure portal as shown below to choose Key Vault resource.
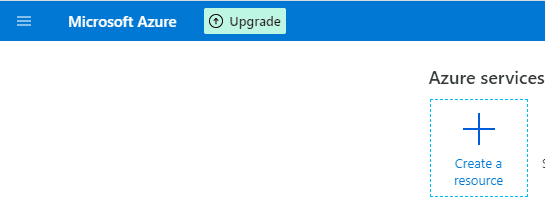
Alternatively, the Key Vault resource can be opened from the Azure dashboard as shown below.
Select 'Create a resource' button,
Search for Key Vault and select the 'Key Vault' option from the dropdown.

Click on 'Create; button.
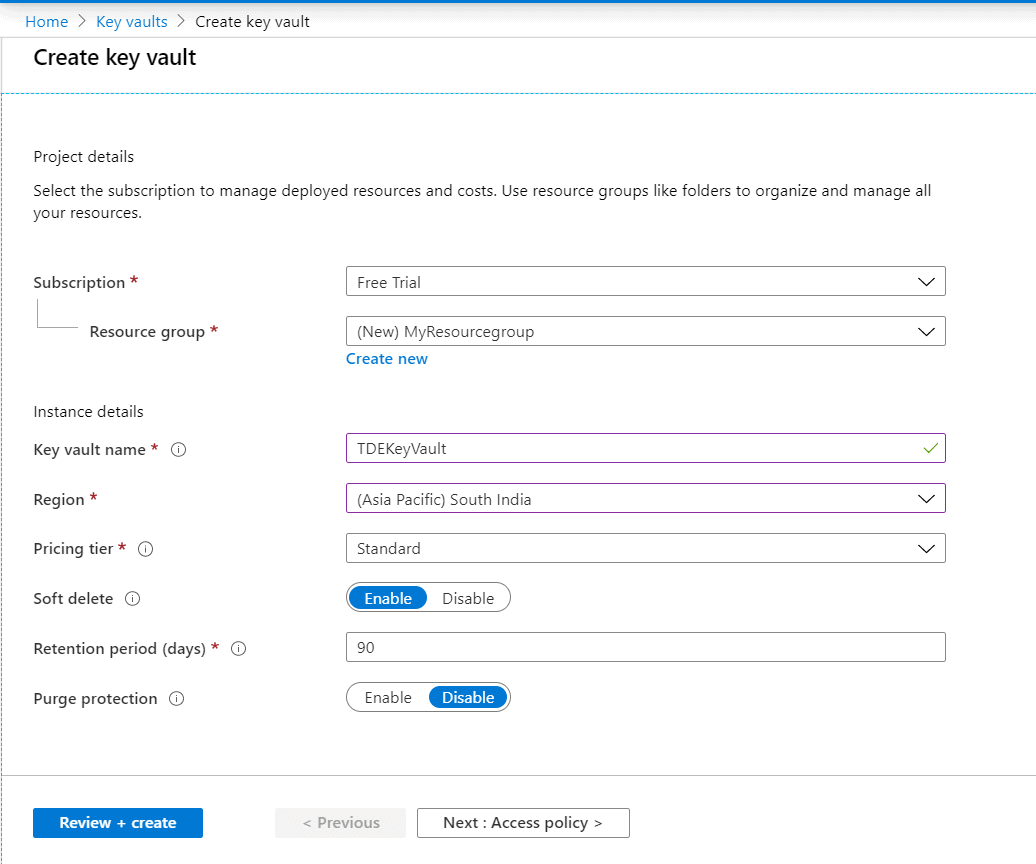
Upon clicking the Create button, a blade opens to furnish the details for creating a key vault.
Select a Subscription. The free trial would be enough for the scope of this article. Select the Resource group if you have one already or you can create it easily by clicking on the ‘Create New’ button at the bottom part of the Resource group text box.
Supply a name for the Key Vault ( eg: TDEKeyVault). Key Vault can store keys of multiple databases/instances. Hence it is suggested to supply a name symbolizing the keys stored in the Key Vault. Select the Azure region (preferably nearer to your location)
Select the pricing tier as standard.
Soft delete: Azure key vault’s soft-delete feature allows the recovery of the deleted vaults and objects (keys, secrets, certificates). When enabled, resources marked as deleted are retained for a specified period (default 90 days) and during this time the service provides a mechanism for recovering the deleted object.
Retention period: Period for which the soft key will be retained after the key is deleted.
After providing the inputs, click on the 'Next: Access Policy' button to configure the key permissions.
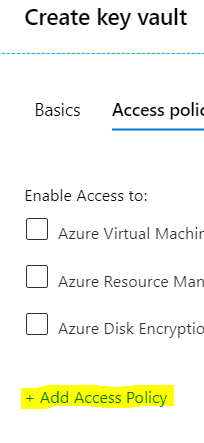
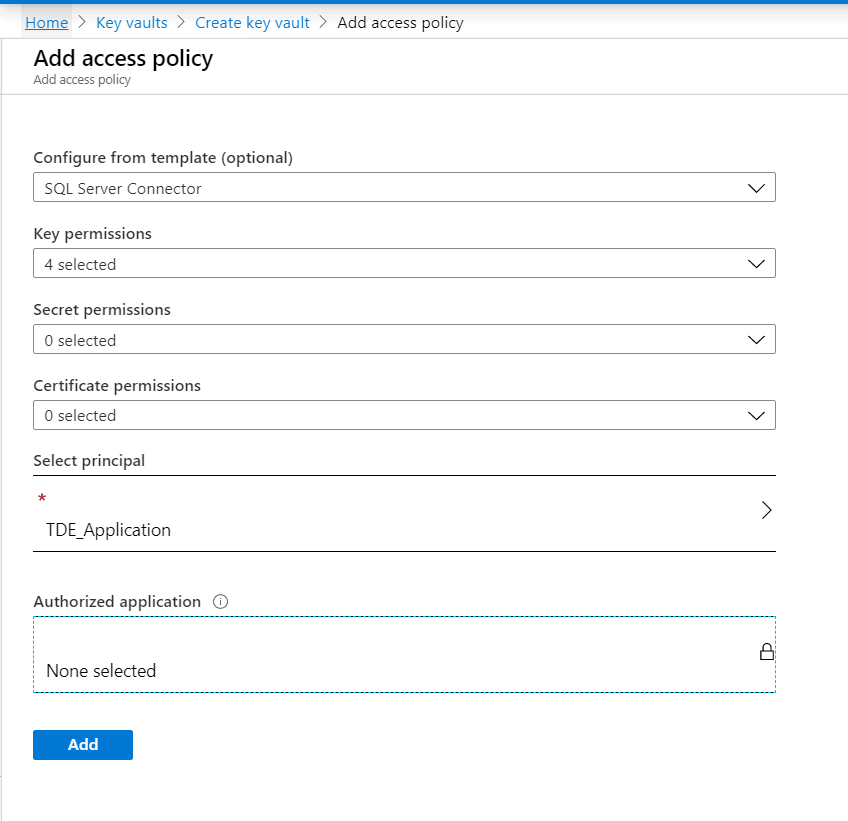
Click on the '+Add Access Policy' link to set the key permissions with the 'SQL Server Connector' template.
Select 'SQL Server Connector' from the dropdown box of the 'Configure from template' option. This will ensure the key permissions Get, List, Unwrap Key, and Wrap Key will be applied.
Click on the 'Select principal' arrow and then a blade opens to search the applications. Search for the application TDE_Application that we created above and select.
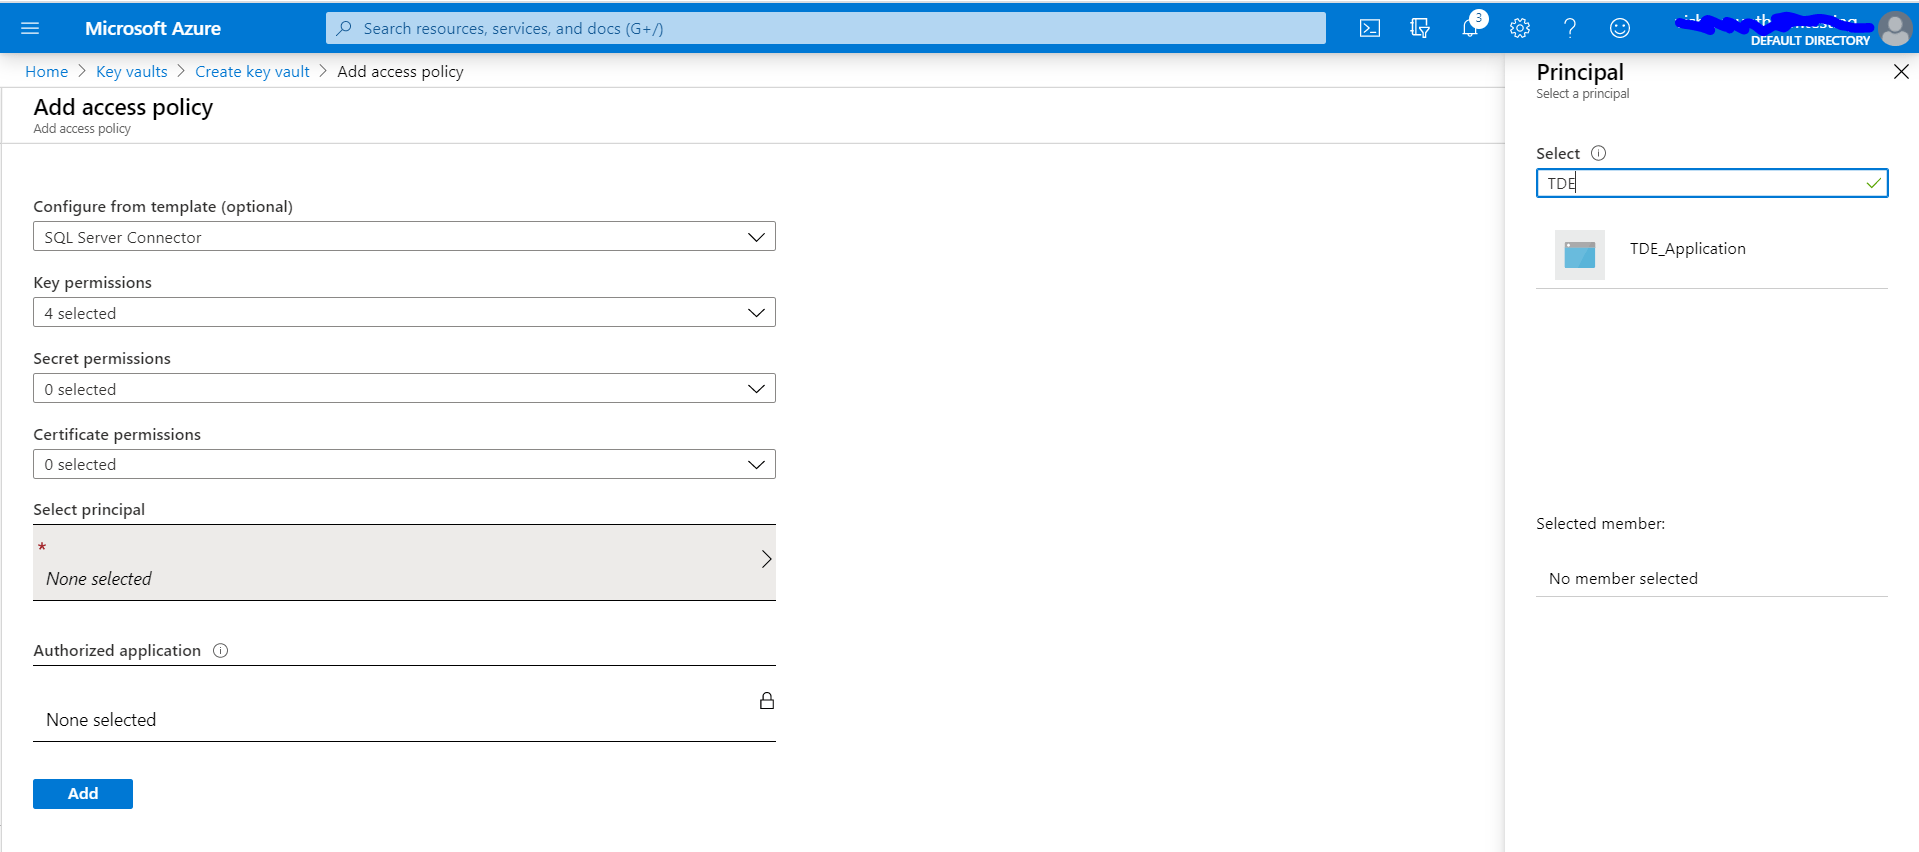
Once the application is selected it will show in the 'select principal' field as shown below. Click the 'Add' button to add the access policy.
We are taken now to the 'Create key vault' page.
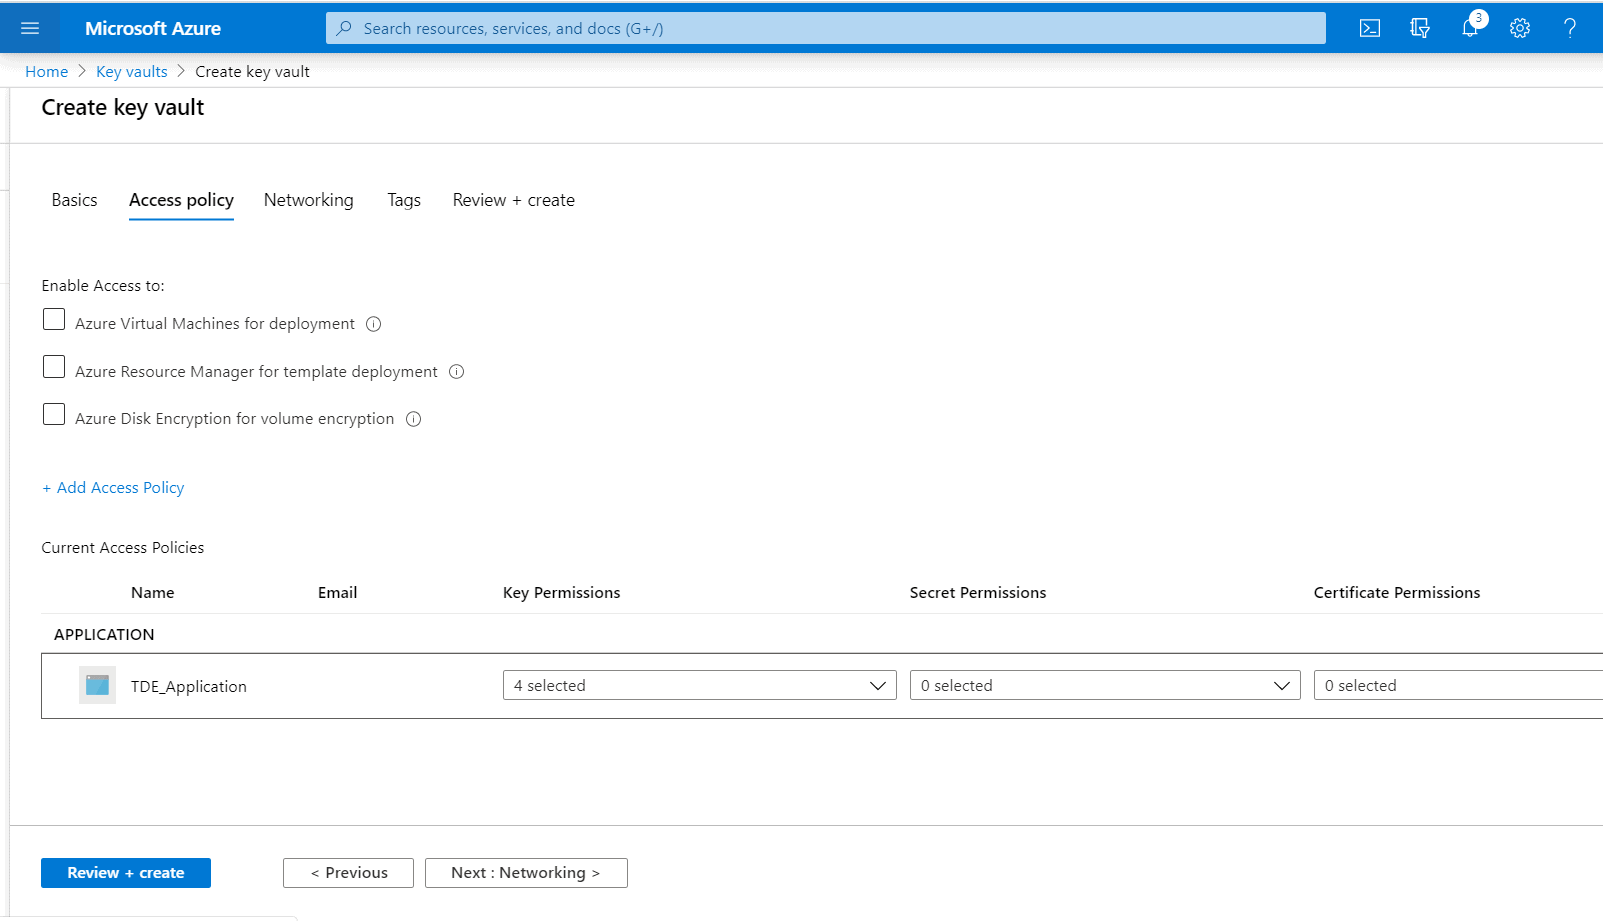
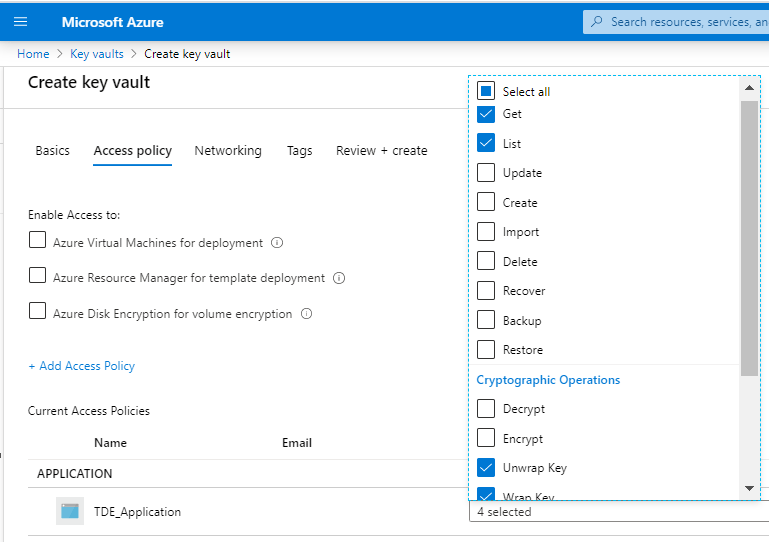
The TDE_Application should have the Get, List, Wrap Key, and Unwrap Key permissions granted. Click the checkboxes under 'Key Permissions' referring to these sets of permissions.
Click on the 'Next' button at the bottom.
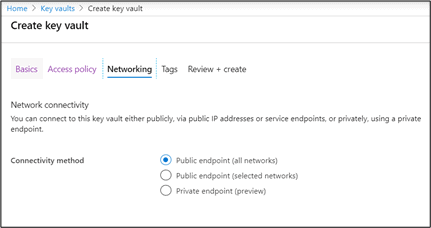
Select the Public endpoint (all networks) option if you want the key to be accessed from all networks or choose the public endpoint (selected network) if you want to restrict the access based on the network (preferable in production). Pick the best option so that you can connect to this key vault either publicly, via public IP addresses or service endpoints, or privately, using a private endpoint.
For this article, the former option is chosen.
Create tags as shown below though it is not mandatory. Tags can be used to label or categorize multiple resources in a non-hierarchical way for easy consolidation.
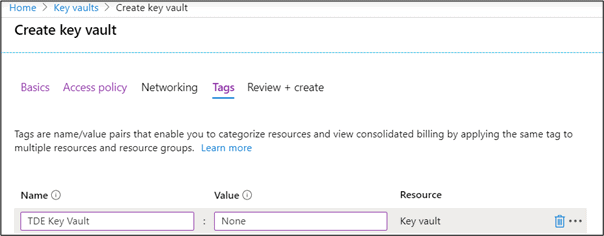
Once all the tags are added, click on the ‘Create’ button on the page as shown below so that it will review and create the key vault.

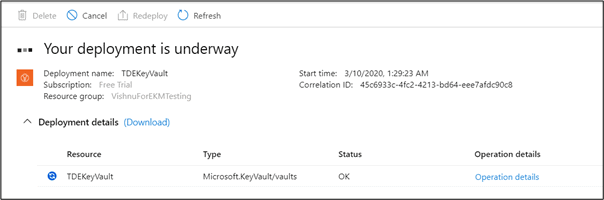
Below image shows the key vault creation progress
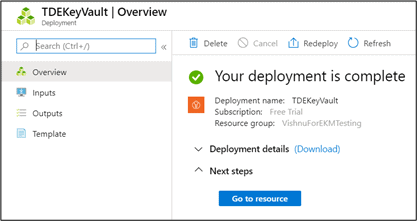
Upon completion, a message is shown saying that the deployment of the key vault is complete.
Key Creation
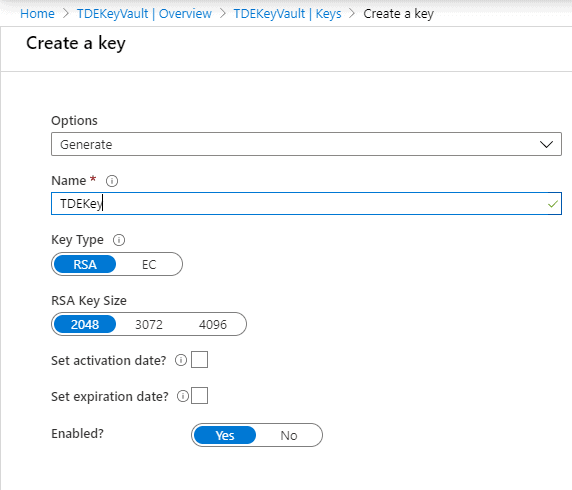
Now a key has to be created in the Key Vault. The key and the key vault will be used by the SQL Server Database Engine for encryption key protection. Create a key with RSA 2048 algorithm which is the one supported by the SQL Server.
Create the key, TDEKey in the below 'Create a key' page.
Alternatively, the keys can be created outside of Azure in an HSM (Hardware Security Module) and import it to the Azure Key Vault.
Once the key is created, you will get a similar page as follows showing a message that the Key has been successfully created.

It is recommended to take an Azure Key Vault key backup before using the key in Azure Key Vault for the first time or whenever any changes are made to the key (for example add ACLs, add tags, add key attributes).
Backup-AzureKeyVaultKey command can be used for backing up the Azure Key Vault key.
With the key creation, we are done with the configuration with the Azure portal for setting up TDE with Extensible Key Management (EKM).
Now we need to go ahead with the SQL Server Connector installation.
Configuration on the host server
There needs to be a bridging unit between SQL Server and the EKM provider (MS Azure in this case). This bridging unit is termed as SQL Server connector for Microsoft Azure Key Vault. This needs to be installed on the host server.
Download the SQL Server connector from this link and proceed with the installation in the host server where SQL Server is installed.
Following the installation, by default, Microsoft.AzureKeyVaultService.EKM.dll will get created in the below location. This is the cryptographic Azure EKM provider DLL that needs to be registered with SQL Server by using the CREATE CRYPTOGRAPHIC PROVIDER statement.
C:\Program Files\SQL Server Connector for Microsoft Azure Key Vault
However, this location can be changed during setup if required. Copy this path location which will be used later in this article.
Configurations to be performed in the SQL Server Instance
We are done with the Azure configurations and the SQL Server connector installation. Now we need to proceed with the configuration in the SQL Server side using the components we had set up above.
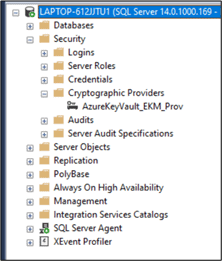
Configure SQL Server for using Extensible Key Management Providers
Launch SSMS and Enable the EKM provider in sp_configure options using the below T-SQL script.
-- Enable advanced options.
USE master;
GO
sp_configure 'show advanced options', 1;
GO
RECONFIGURE;
GO
-- Enable EKM provider
sp_configure 'EKM provider enabled', 1;
GO
RECONFIGURE;
Register the SQL Server Connector
Create a Cryptographic Provider with the EKM provider DLL that got created with SQL Server connector application.
CREATE CRYPTOGRAPHIC PROVIDER AzureKeyVault_EKM_Prov
FROM FILE = 'C:\Program Files\SQL Server Connector for Microsoft Azure Key Vault\Microsoft.AzureKeyVaultService.EKM.dll';
GO
Create the SQL Server credentials
Two credentials are required for the configuration. One credential is to be associated with the SQL Server administrator who can connect to Azure Key Vault through the SQL Server Management Studio and set up and manage SQL Server encryption scenarios. The SQL Server administrator Login can be either a domain account or a SQL authenticated account.
The other credential is to be mapped with the login which is used for opening the keys in Azure Key Vault thereby encrypting the databases or backups each time. There is a one-to-one mapping between credentials and logins. That is, each login must have a unique credential.
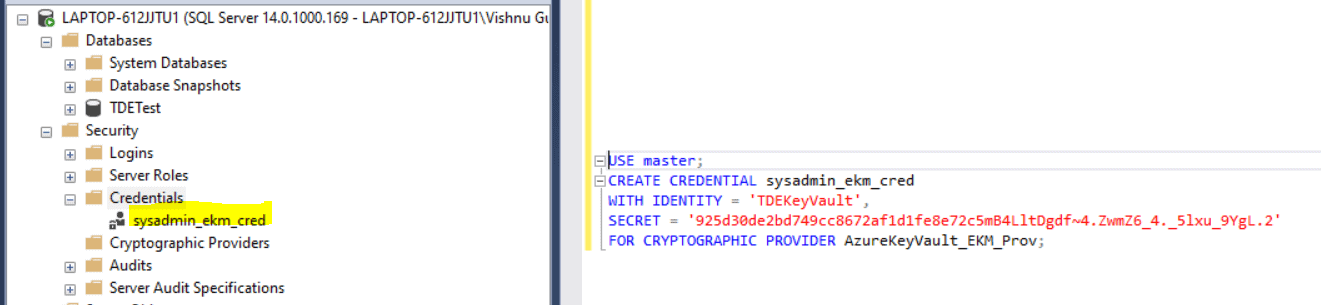
Credential creation for SQL Server administrator login
Query to create the credential is as follows :
USE master;
CREATE CREDENTIAL sysadmin_ekm_cred
WITH IDENTITY = 'TDEKeyVault',
SECRET = '925d30de2bd749cc8672af1d1fe8e72c5mB4LltDgdf~4.ZwmZ6_4._5lxu_9YgL.2'
FOR CRYPTOGRAPHIC PROVIDER AzureKeyVault_EKM_Prov;
IDENTITY : key vault name as in your Azure portal.
SECRET : String created by concatenating the ClientID without hyphens and the Client secret.
From the above sections, we already copied the Client ID and Client Secret as follows:
Client ID : 925d30de-2bd7-49cc-8672-af1d1fe8e72c
Client Secret : 5mB4LltDgdf~4.ZwmZ6_4._5lxu_9YgL.2
Hence the SECRET to be used in the query is
925d30de2bd749cc8672af1d1fe8e72c5mB4LltDgdf~4.ZwmZ6_4._5lxu_9YgL.2
Add the credential to the SQL Server administrator's login with the below code. In my case, the account name is "LAPTOP-612JJTU1\Vishnu Gupthan Nair".
ALTER LOGIN [LAPTOP-612JJTU1\Vishnu Gupthan Nair]
ADD CREDENTIAL sysadmin_ekm_cred;
GO
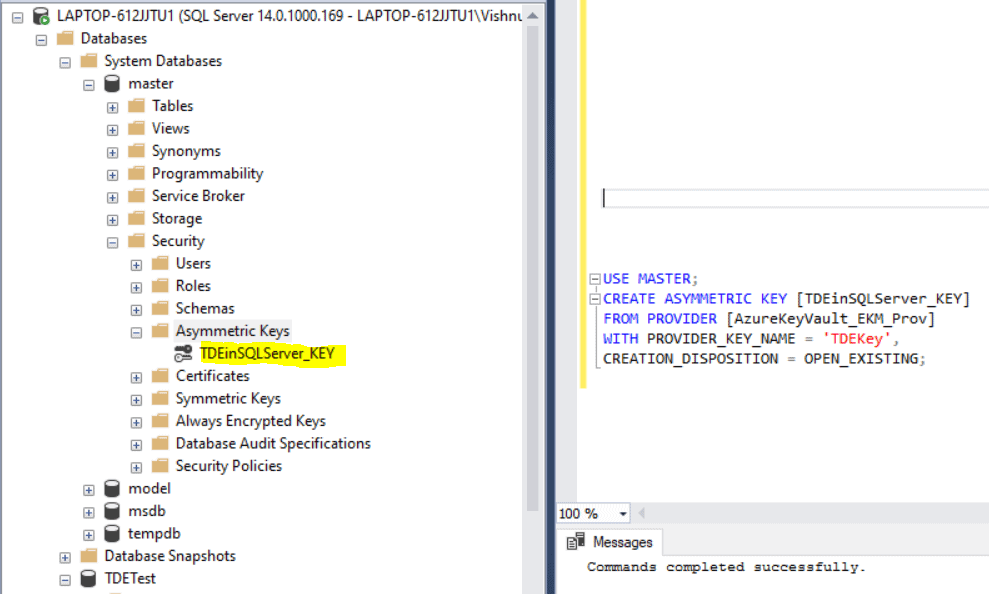
Asymmetric Key Creation
In this step, we need to create an asymmetric key in SQL Server with the below code using the key created in Azure Key Vault, TDEKey.
USE master;
CREATE ASYMMETRIC KEY [TDEinSQLServer_KEY]
FROM PROVIDER [AzureKeyVault_EKM_Prov]
WITH PROVIDER_KEY_NAME = 'TDEKey',
CREATION_DISPOSITION = OPEN_EXISTING;
- FROM PROVIDER refers to the EKM provider configured to get the key from the Key Vault, AzureKeyVault_EKM_Prov
- PROVIDER_KEY_NAME parameter refers to the key created in Azure Key Vault, TDEKey
- CREATION_DISPOSITION=OPEN_EXISTING opens the existing key in Azure Key Vault, TDEKey.
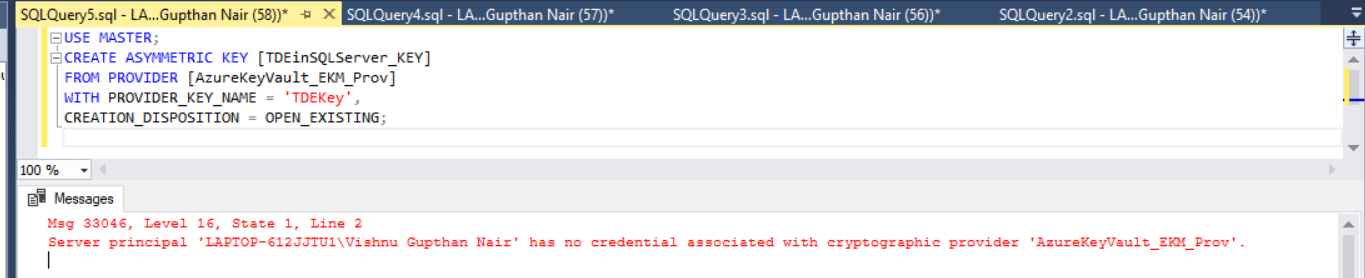
Make sure the asymmetric key creation script is executed in the SSMS as the admin account linked to the credential created above, sysadmin_ekm_cred.
Once the asymmetric key is created, you can view it under the Asymmetric Keys tab under the master database as shown below.
Credential creation for the SQL account
As mentioned above, a credential needs to be set up for the login which is used for opening the keys in Azure Key Vault thereby enabling the TDE. You may use the same SECRET, IDENTITY, and PROVIDER name which we used earlier while creating the credential for the SQL Server administrator.
-- Create a credential for the login 'TDE_Login'
USE master;
CREATE CREDENTIAL Azure_ekm_TDE_cred
WITH IDENTITY = 'TDEKeyVault',
SECRET = '925d30de2bd749cc8672af1d1fe8e72c5mB4LltDgdf~4.ZwmZ6_4._5lxu_9YgL.2'
FOR CRYPTOGRAPHIC PROVIDER AzureKeyVault_EKM_Prov;
Create a SQL Server login, TDE_Login as shown below using the asymmetric key we created earlier, TDEinSQLServer_KEY. Map the credential that we created above, Azure_ekm_TDE_cred.
USE master
--Create the login for the TDE key
CREATE LOGIN TDE_Login
FROM ASYMMETRIC KEY [TDEinSQLServer_KEY]
GO
--Assign the credential to the login
ALTER LOGIN TDE_Login
ADD CREDENTIAL Azure_ekm_TDE_cred ;
GO
Create the Database Encryption Key (DEK)
Follow the same process that we performed on Level 1 of this series for the creation of DEK however the certificate was replaced by the asymmetric key stored in the key vault. The DEK will encrypt your data and log files in the database instance, and in turn be encrypted by the Azure Key Vault asymmetric key. The DEK can be created using any SQL Server supported algorithm or key length.
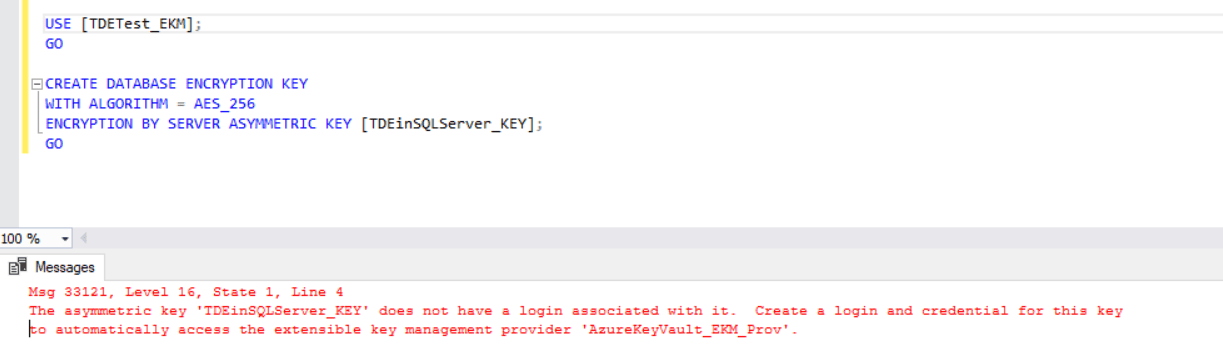
USE [TDETest_EKM];
GO
CREATE DATABASE ENCRYPTION KEY
WITH ALGORITHM = AES_256
ENCRYPTION BY SERVER ASYMMETRIC KEY [TDEinSQLServer_KEY];
GO
Turn on TDE
The final step is to turn on the encryption database option in the database properties. The code shown below will set the encryption state to ON for the user database.
-- Alter the database to enable transparent data encryption.
ALTER DATABASE [TDETest_EKM]
SET ENCRYPTION ON;
GO
Summary
By using Azure Key Vault as the repository for the asymmetric keys, it provides additional security to the encryption process as it is stored outside of SQL Server in an external cryptographic provider. Also, it allows the admin to take advantage of advanced capabilities, such as key aging and key rotation. This provides an alternative to managing the storage, protection, and sharing of those keys yourself, unlike the on-premise TDE configuration.
This Stairway level describes the steps to encrypt Microsoft SQL Server databases and backups with Extensible Key Management and Azure Key Vault. The steps involved the configurations to be done in Azure, on the host server OS, and inside the SQL Server instance.
Possible Errors
You may encounter the below errors in the quoted scenarios
Error 1: The server principal has no credentials associated with cryptographic provider.
Solution: Do the asymmetric key creation by login into SSMS using an account having a proper credential associated with it. Refer to the above article to get more details regarding the creation of asymmetric keys.
Error 2: Asymmetric key does not have a login associated with it.
Solution: Create the Database Encryption Key after creating the SQL Login which is associated with a credential to access the EKM provider.