

Introduction
In my last article, Loading data in Azure Synapse using Copy, I discussed about loading data in the SQL Pool of Azure Synapse Analytics using the COPY command. Here, I will discuss the step-by-step process for data loading in the SQL Pool using Azure Data Factory (ADF).
Azure Data Factory (ADF)
ADF is a managed service in Azure. It is used for extract-transform-load (ETL), extract-load-transform (ELT), and data integration projects. It helps to create data-driven workflows for orchestrating data movement and transforming data. Transformed data can be published to Azure data stores.
This is the cloud version of Integration Services (SSIS).
The Data Loading Process
I explain here the step-by-step process to load data from Azure Blob stoarge to the SQL Pool table using ADF.
Step 1: Create a table
I create a table named heart_adf in the dbo schema of my SQL Pool using SSMS.
CREATE TABLE dbo.heart_adf
(
age INT,
sex INT,
cp FLOAT,
trestbps FLOAT,
chol FLOAT,
fbs FLOAT,
restecg FLOAT,
thalach FLOAT,
exang FLOAT,
oldpeak FLOAT,
slope FLOAT,
ca FLOAT,
thal FLOAT,
target INT
)
WITH
(
    DISTRIBUTION = ROUND_ROBIN,
    CLUSTERED COLUMNSTORE INDEX
)
Step 2: Create an ADF Resource
We will use the portal to create a ADF resource named adf1-sd. Start by selecting ADF in the New blade.
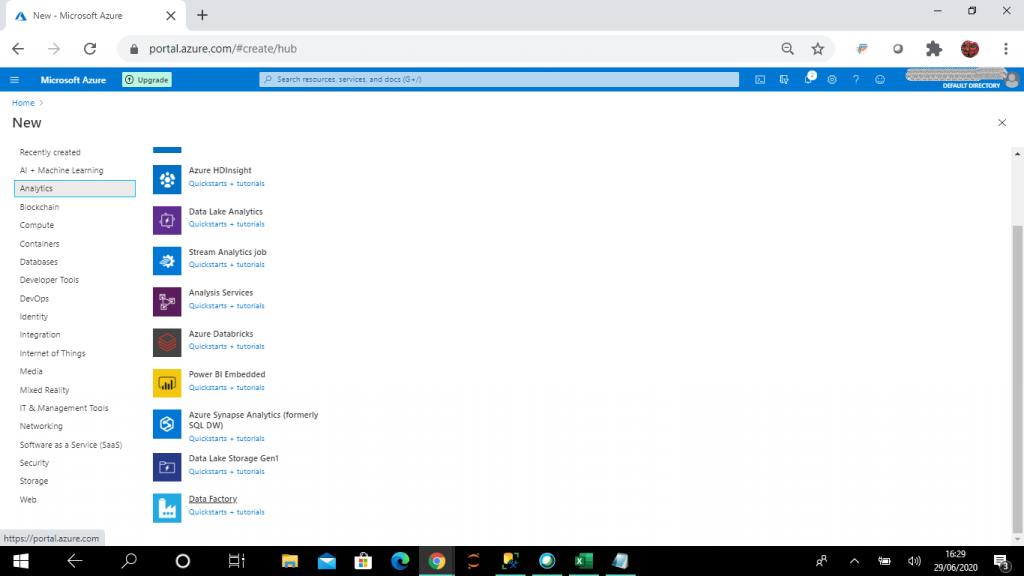
Give this resource a name and choose a subscription and resource group. You also need to select the location. The click Create.

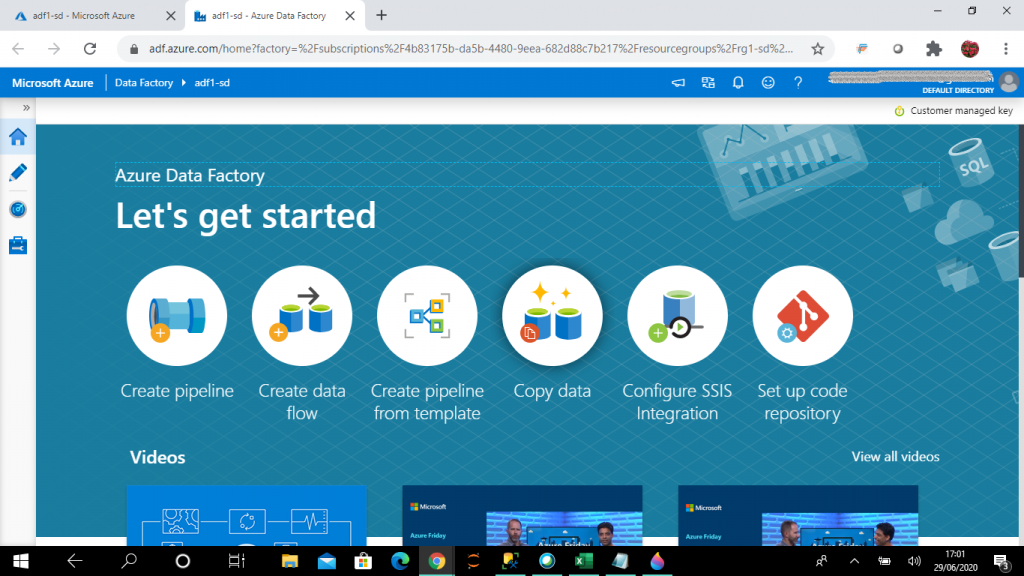
Step 3: Author and Monitor
I select Author & Monitor link in the ADF resource, adf1-sd. The Author & Monitor link helps to create, deploy and monitor ADF components. The user interface helps to work on the components without writing code. The documentation link gives access to the help documents available for learning about ADF.

Step 4: Setup the Factory
I select the Copy data option in the next screen.
A few options are available on this screen. Each is described below.
Create pipeline - With this option, a pipeline can be created. A pipeline is a set of activities which together perform a task. Pipelines are deployed and scheduled to execute the set of activities together. The activities define actions to be performed on data. Activities can be of different types: data movement activities, data transformation activities and control activities. Activities can take zero or more input datasets and produce one or more output datasets.
Create data flow - A data flow allows a developer to build graphical data transformation logic. Data can be copied among different data stores located in both on-premises sources and in the cloud. Data copying is done using the following steps:
- Data is read from a source
- Operations such as serialization/deserialization, compression/decompression, column mapping, etc. are performed on the source data
- Data is written to the destination data store.
Useful templates are given. Pipelines can be created using the templates in an easy and convenient way.
Copy data - This option can be used to copy data from source to destination data store in a graphical step-by-step process. No coding is required. Source to target column mapping and staging configuration can be done through settings.
Configure SSIS Integration - An Azure-SQL Server Integration Services (SSIS) integration runtime (IR) can be provisioned in Azure Data Factory (ADF). Azure-SSIS IR supports:
- running packages deployed into SSIS catalog (SSISDB) hosted by Azure SQL Database server/Managed Instance (Project Deployment Model)
- running packages deployed into file system, Azure Files, or SQL Server database (MSDB) hosted by Azure SQL Managed Instance (Package Deployment Model)
Set up code repository - A source code repository can be configured here for your ADF pipelines. This allows you to manage the code for your ADF pipelines as you would any other code.
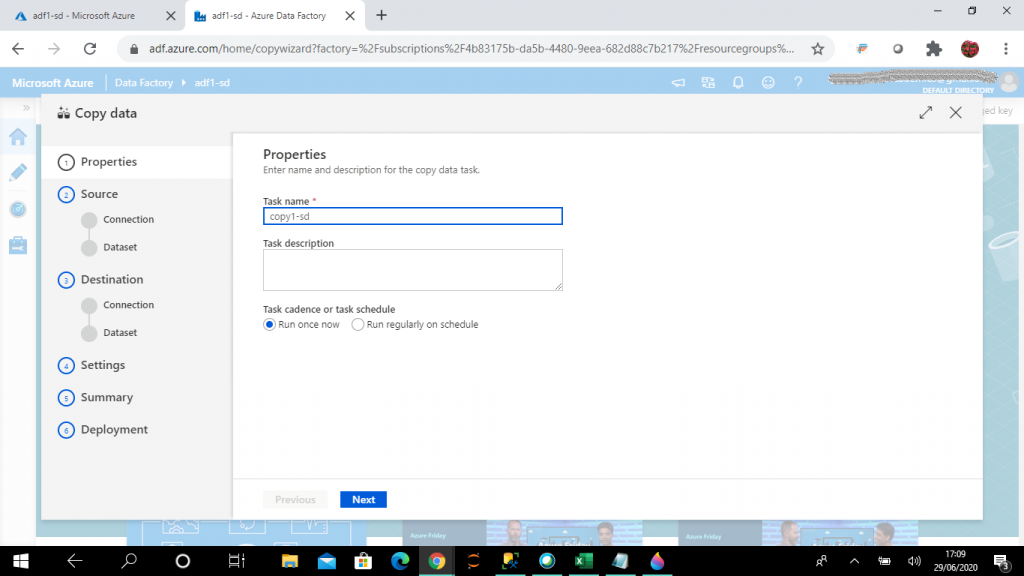
Step 5: Configure the Task
A graphical Copy Data screen is open. The first step of the Copy Data task is the Properties. Here, I need to give the name of the task. Also, I can set the task schedule to run once or run on a schedule. I keep it to the default option to run once. Then press Next.
Step 6: Source Data
Next I need to select the source data connection. I select Azure Blob Storage as the data source type and press the Continue button.
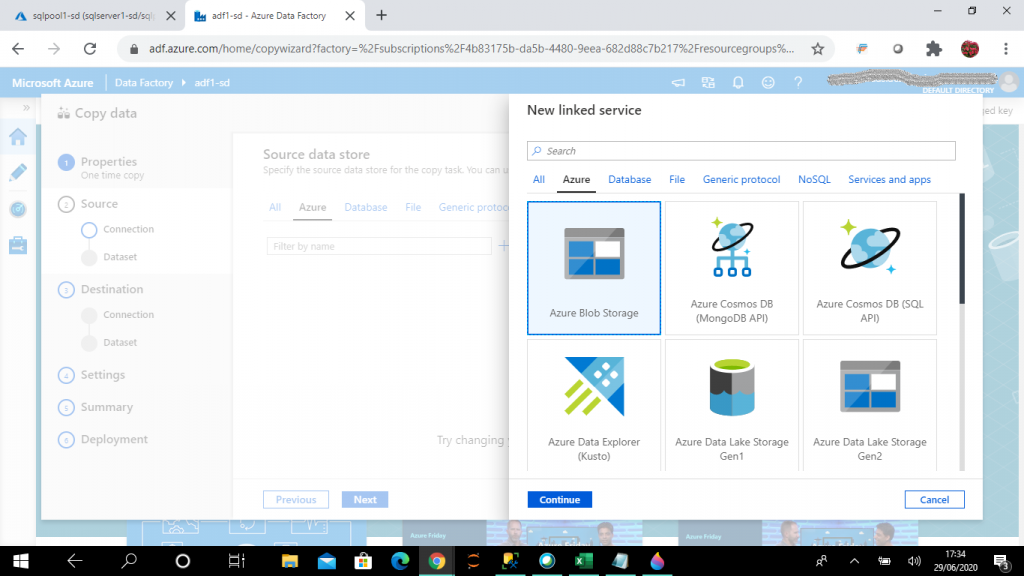
Step 7: Create a New Linked Service
In the second step of the Copy Data I need to provide the source connection and the source dataset. The source data store can be selected from any existing data store connections or a new data store can be created from many data stores available under different categories.
When I go to create a new connection, it creates a linked service. The linked service helps to link the source data store to the Data Factory. A Linked Service is similar to a connection string, as it defines the connection information required for the Data Factory to connect to the external data source.
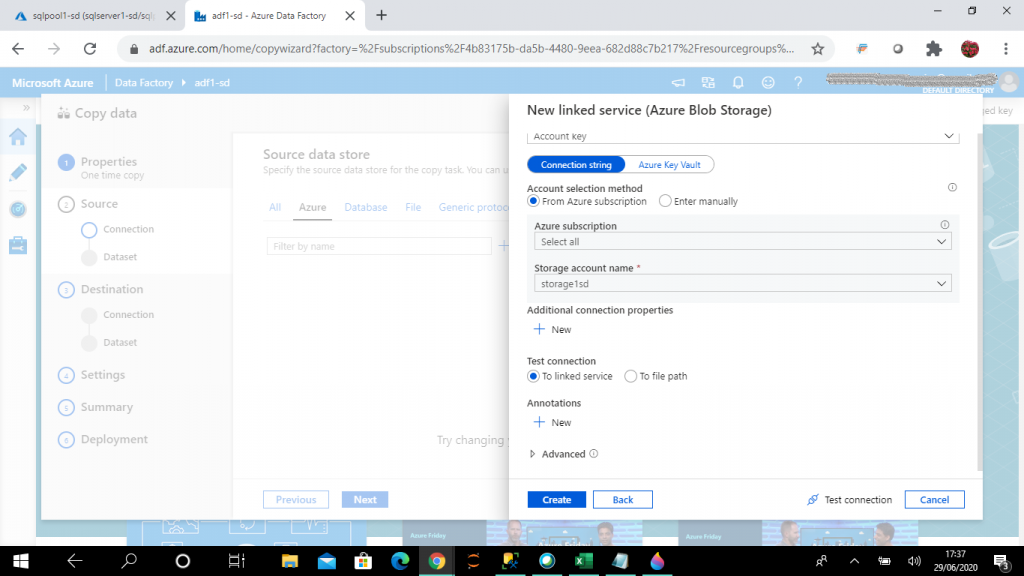
Based on the data store type I select, I need to provide the connection details for the data source here. I may test the connection before proceeding to the next step.
There is an option to connect via Integration runtime. The Integration runtime provides the connectivity between the activity and the linked service. It is referenced by the activity or the linked service and it provides the compute environment for the activity. An Integration runtime (IR) provides the following capabilities:
- run data flows in Azure
- copying data between cloud data stores and data stores in private network
- dispatch and monitor transform activities
- execute SSIS package in a managed Azure compute enviornment
There are three types of Integration Runtimes based on the data integration capabilities and network support: Azure, self-hosted, and Azure-SSIS.
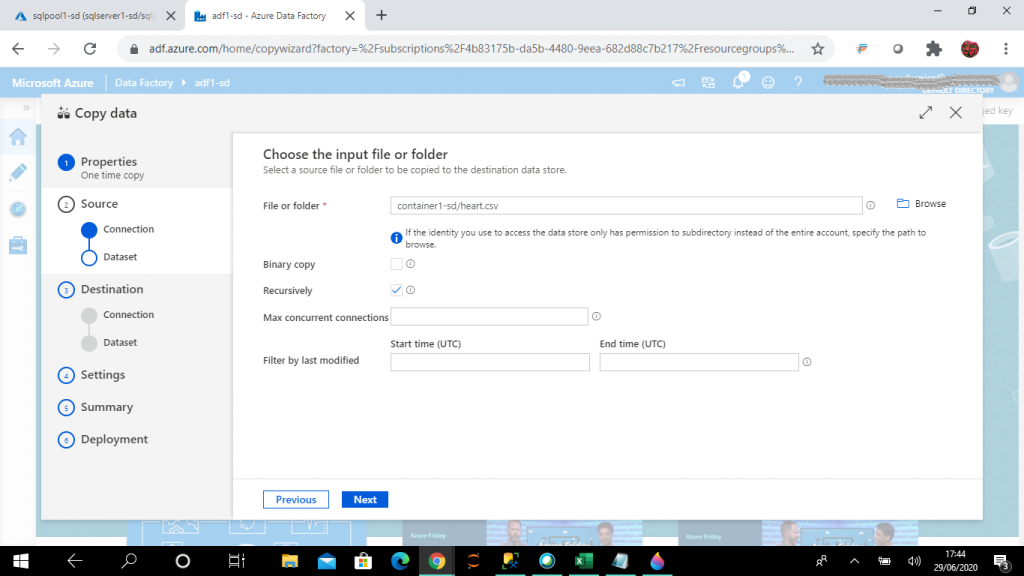
Step 8: Pick the Dataset
I can enter the folder name or a specific file name in a folder of the source data store as the dataset. A dataset is a named view of data that simply points or references the data to use in the activities as inputs and outputs. Datasets identify data within different data stores such as tables, files, folders and documents.
I select the text file heart.csv as the source data set and press the Next button.
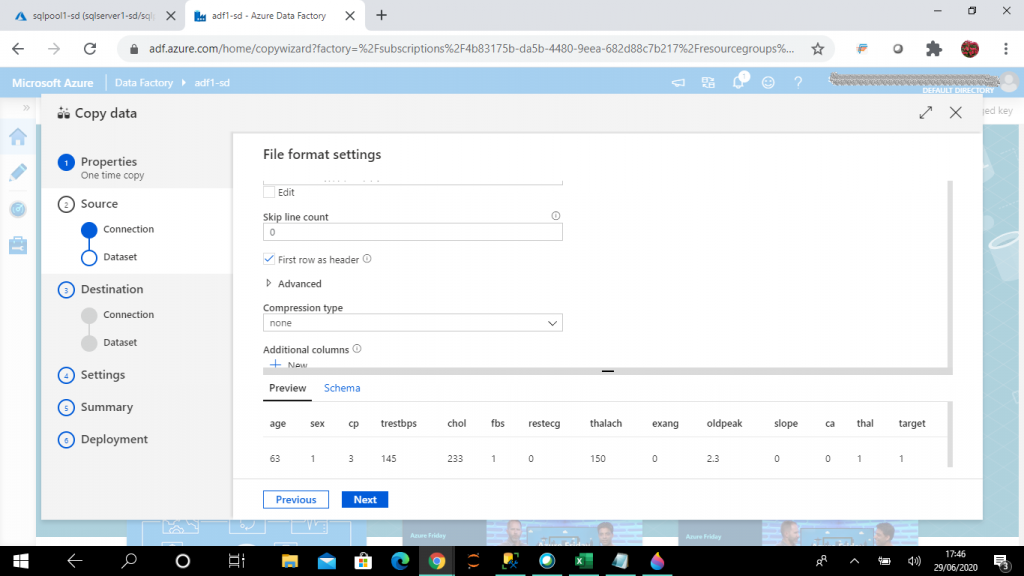
Step 9: File Settings
I select and modify the required file format settings for the source data file. I also see the data preview here. I press the Next button.
Step 10: Select the Destination
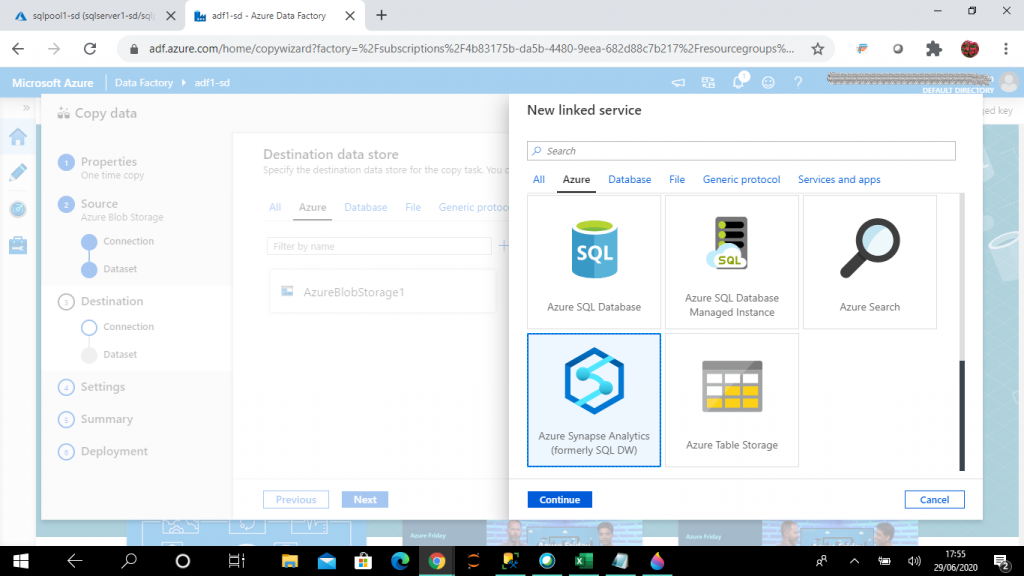
The third step in Copy Data is the Destination. I need to select the destination data store connection and the dataset. The destination can be selected from any existing data store connections or a new data store can be created from many data stores available under different categories.
I select Azure Synapse Analytics (formarly SQL DW) as the destination data store and then press Continue.
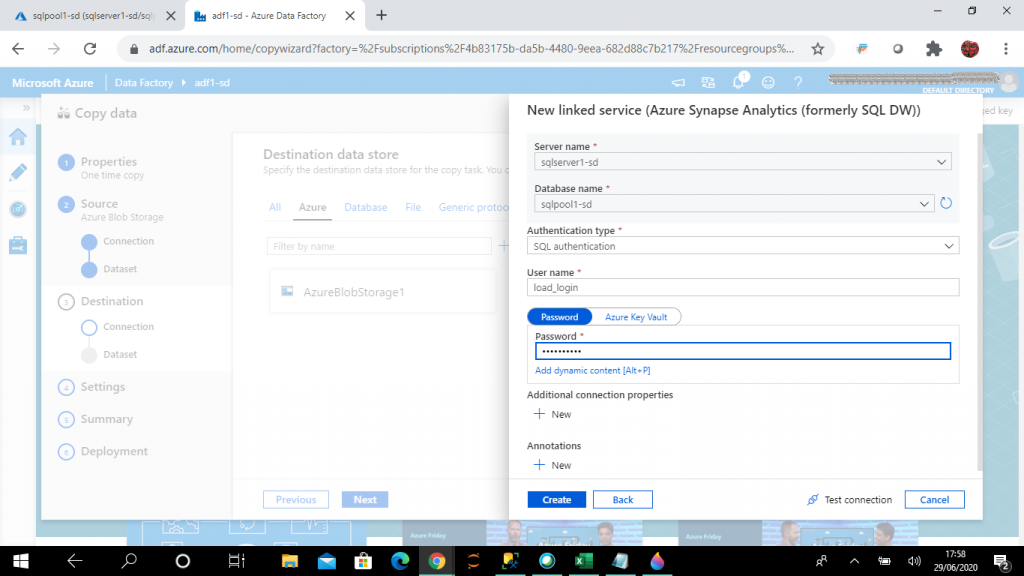
Step 11: The Destination Service
As my destination data store is Azure Synapse Analytics, I need to give the details about the SQL Pool to create the new linked service. I select the existing SQL pool named sqlpool1-sd and make a connection with it and proceed to the next step.
Step 12: Pick the Target
I select the destination table from the pool named dbo.heart_adf that is to be populated from the blob storage file named heart.csv. I can see the data preview and schema details of the target table here.
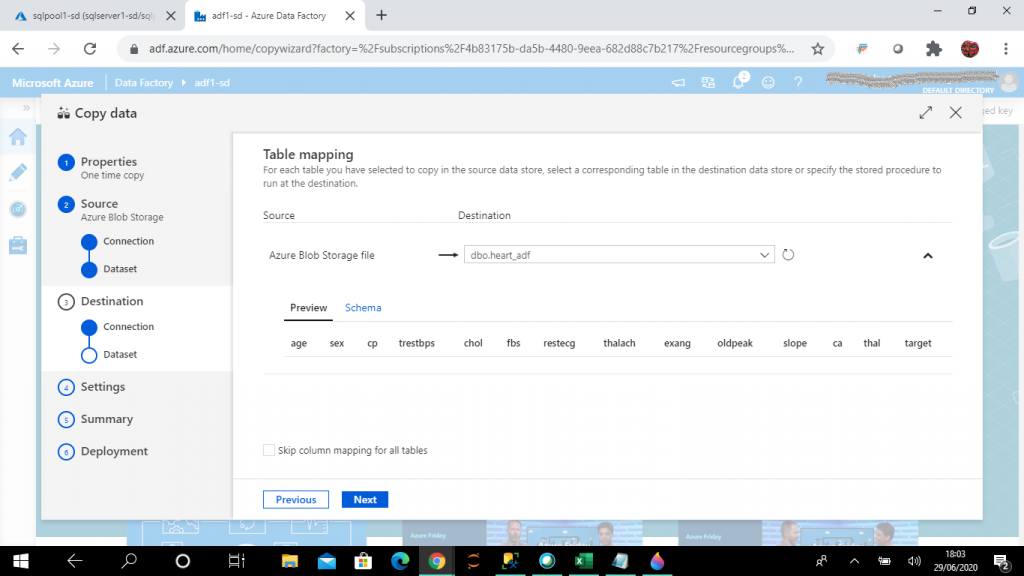
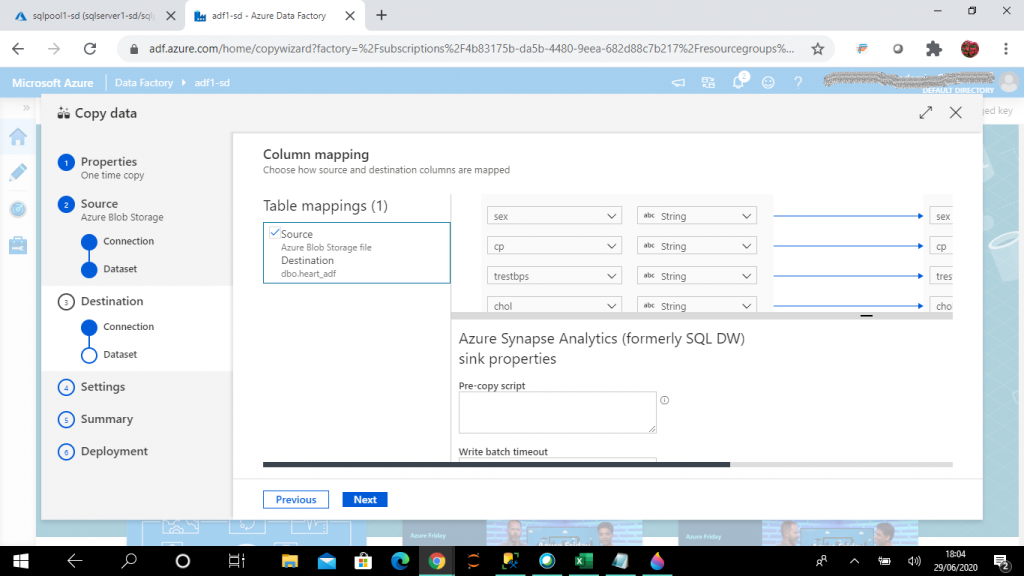
Step 13: Mapping Columns
After the source file and target table are selected, I complete the column mapping between source file columns and target table columns.
Step 14: Choose the Copy Method
Settings is the fourth step of Copy data. Different settings can be set here for the Copy data task. In the Settings section, I select the copy method as Bulk insert. I keep other settings as the default values.
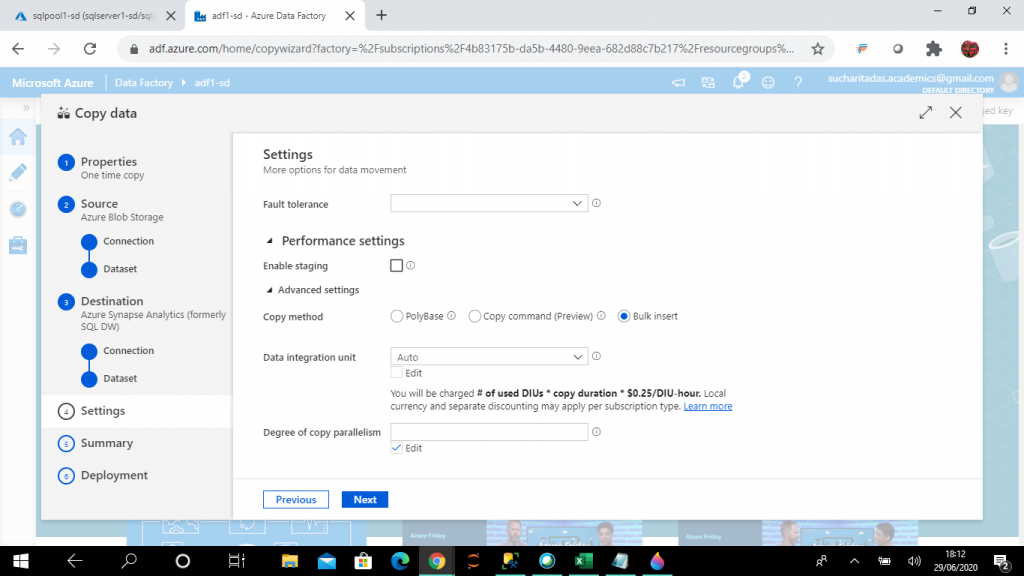
There a few other settings as well.
Fault tolerance helps to prevent interruption from failures in the middle of data movement. The source and sink dataset should be in binary format to enable this option.
There is also an option to enable staging. When this option is enabled, data is copied to the staging blob store from the source data store and then from staging blob store to the destination data store. Azure Data Factory automatically manages the two-stage data flow.

There are three copy methods: Polybase, Copy command (in preview) and Bulk insert. The Polybase technique can be used to access data stored in Azure Blob and Azure Data Lake storage. Data need not be copied in SQL Pool for accessing it. There is a concept of external tables through which the data stored in external file storage can be queried.
The Copy command is in preview and can be used to copy data stored in Azure Blob and Azure Data Lake storage to the SQL Pool.
The Bulk insert statement helps to import a file into a database table or view in a user-specified format. It enforces strict validation and checks on the data which are read from the input files.
Data Integration unit
A Data Integration Unit is a measure that represents the power (a combination of CPU, memory, and network resource allocation) of a single unit in Azure Data Factory. It applies to Azure integration runtime but not self-hosted integration runtime. I may choose the option Auto or can specify a value between 2 and 256.
Degree of copy parallelism
It indicates the parallelism the Copy activity uses to copy data between the source and target. The default behavior usually gives the best throughput.
Step 15: Summary
The Summary is the fifth step of Copy data. I check the details of the source, destination and settings and make necessary changes as required. Then, I move to the next step.

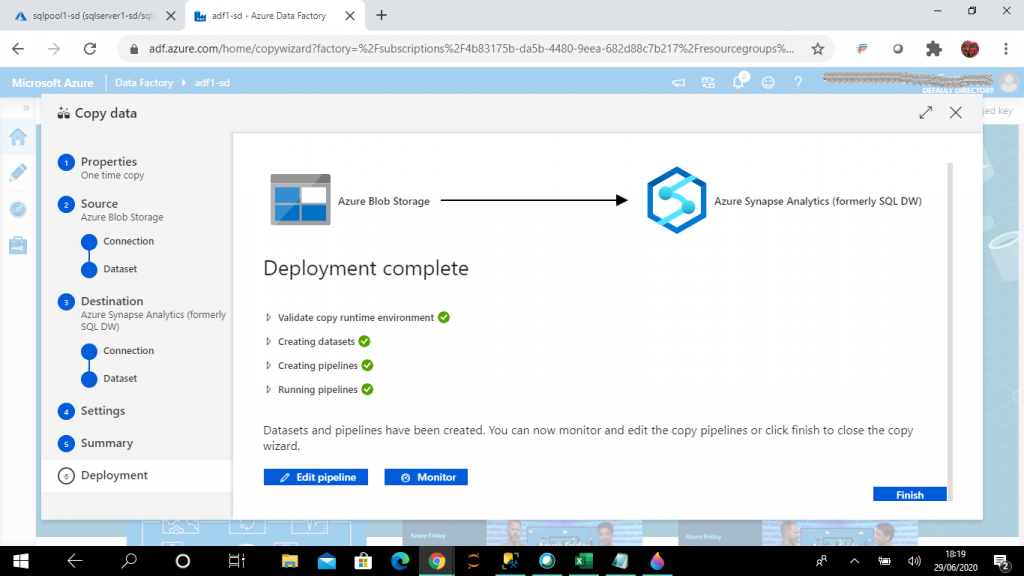
Step 16: Validation and Deployment
The deployment is the sixth and final step of Copy data. In this step, the deployment is completed. Datasets and pipelines are created. Pipelines are executed as well because I selected the option to run the task once in an earlier step.
There are options to edit the pipeline created and monitor the pipeline execution. I press the Finish button to close the Copy wizard.
Step 17: Check the Data
In SSMS, I select all the records from heart_adf table. The data is now available in the table. as it was copied from the heart.csv file.
select * from dbo.heart_adf
--(303 rows affected)
Conclusion
Azure Data Factory (ADF) can be used to populate Synapse Analytics with data from existing systems and can save time in building analytic solutions. ADF is very convenient and easy to set up with no scripting required. It has built-in support for a wide set of data stores both from on-premise and cloud sources. Data transfer is secure as it is done through HTTPS or ExpressRoute. This global service ensures data transfer between different geographic locations. The staging blob feature can be used to achieve high data load speed. So, ADF can be chosen for easy, convenient and efficient data loading from various sources to the Synapse SQL Pool.