

This is the fourth article in a series on the basics of using Git. The other articles in the series are:
- Basic Git for DBAs: Getting Started with Git
- Basic Git for DBAs: Sharing Files Through GitHub
- Basic Git for DBAs: the Basics of Branches
- Basic Git for DBAs: Making Changes in GitHub
- Basic Git for DBAs: Merging Code Between Branches
- Basic Git for DBAs: What's a Pull Request?
- Basic Git for DBAs: Managing PowerShell Scripts
- Basic Git for DBAs: Ignoring Files and Customizing Your Environment
In the first few articles, we set up a repository and shared files through GitHub. Based on a comment in a previous article, we will look at how we edit files and code online in GitHub. We'll cover editing, adding, and tracking problems and work to be done.
Navigating GitHub
The main GitHub page is always changing, and it's view depends on what your activity has been. I usually see the repos I've been working with lately on the left. In this image below, I see the SQLServerCentral repo, a couple demos ones (including this series' dbascripts) and a few Microsoft ones. I do some PRs for them, so these are used often.
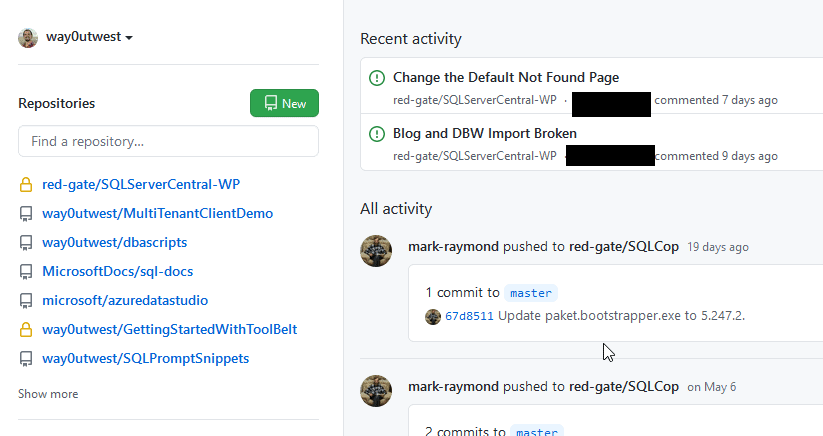
I have activity on the right, which is new. In most cases, I'm not looking at an overview of the repos I work with. Instead, I have specific tasks, so I usually click on one in the list in the left pane, or I'll search for one.
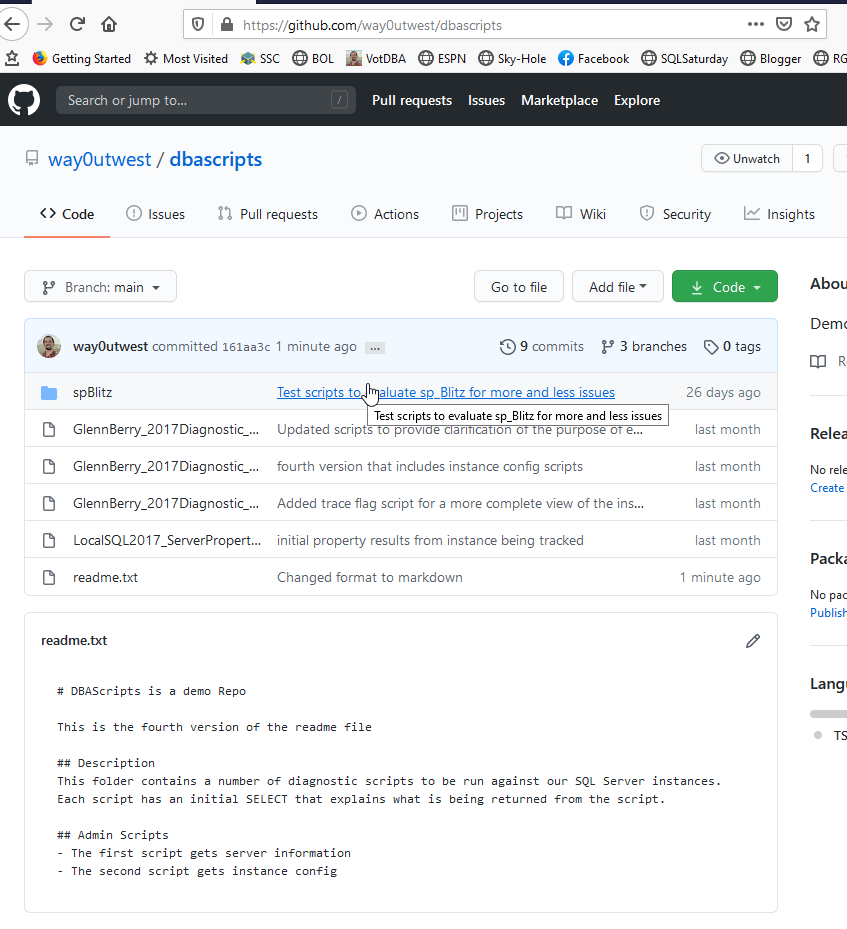
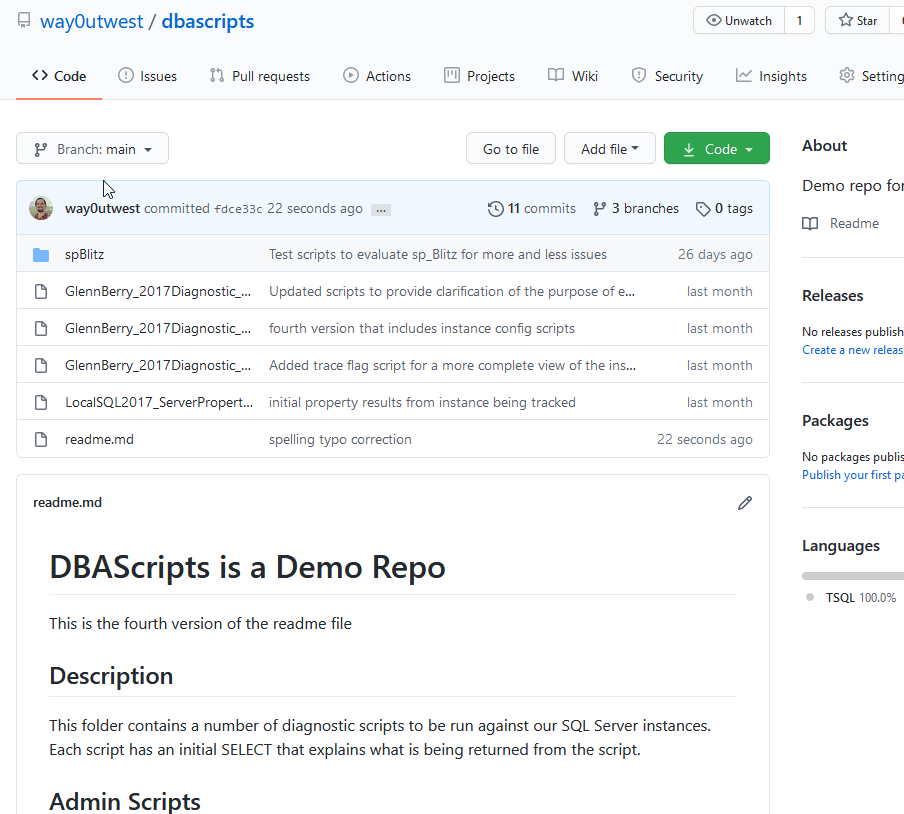
If I click my dbascripts repo, I see this:
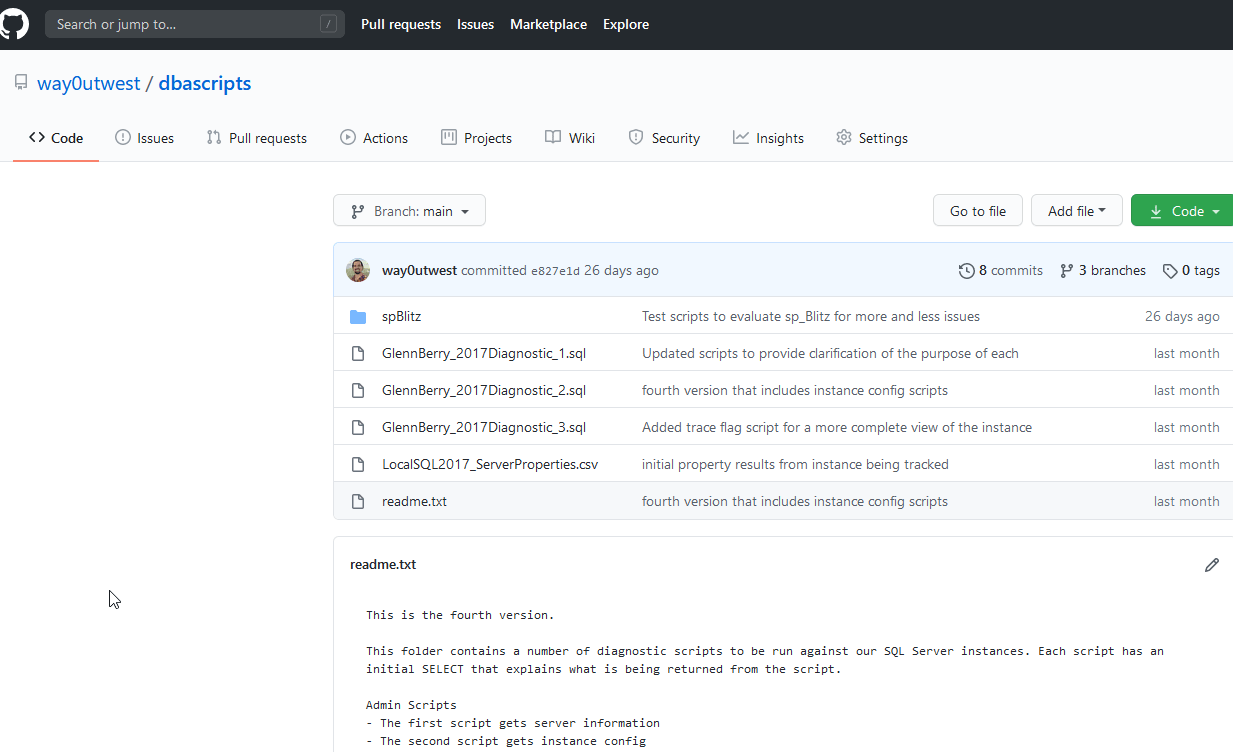
Across the top I have a series of "tabs" for my repository. The "Code" tab is underlined, which is the view I see below. The main pane here shows me the filesystem view of my files. This should be familiar, and it looks like what I see in my local Explorer window.
At the bottom of the Code tab, I see my Readme.txt file. GitHub tries to render the readme file in your repo. Here's a short guide on what to put in a Readme, and note that Giuthub works with many text formats, but it does better with markdown. Let's fix our readme.
Editing a File Online
I can certainly edit the readme.txt on my local file system, commit the changes as we've seen in previous articles and push it up. However, sometimes it is easier to just do this online. To do that, I'll pick a file. In this case, I click on readme.txt in the list of files. The name will show an underline and link if you put your mouse cursor on it. When I click, I get a new page that is my file. You can see this below.
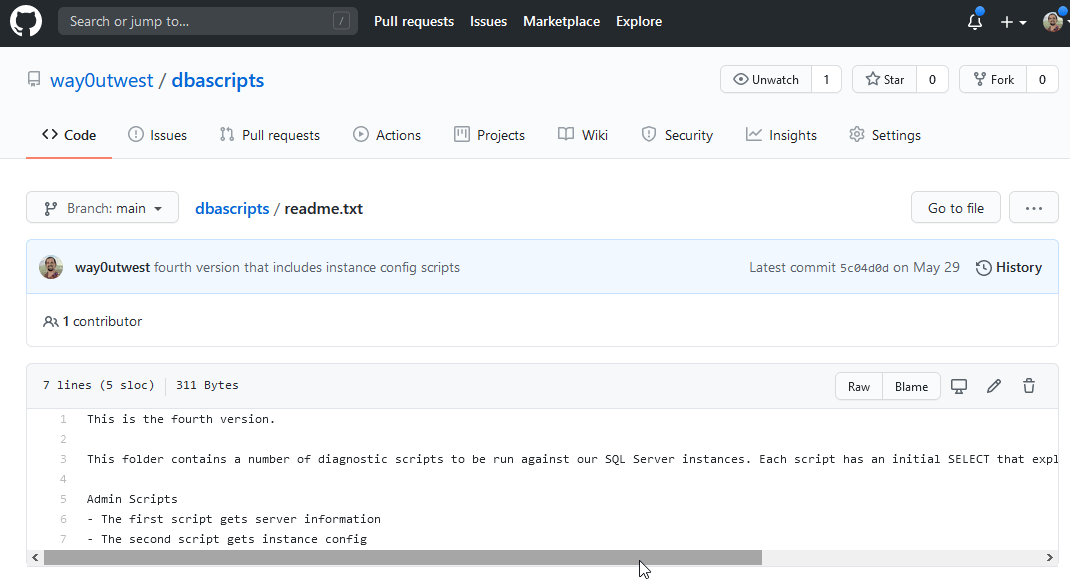
A few things to note. First, I have a drop down near the top that lets me switch branches. We looked at branches in the third article, and often we want to work in a branch and merge those changes into your main copy of the code. We won't do that for a simple change, so show how this works.
Next to this we have a breadcrumb showing the repo name and then the path to this file. In this case, there is only the root, but if we click the root name (dbascripts), we return to that place in our repo. To the right we have the last commit and a link to get the history of this file.
Just above the actual contents of the file, we see some metadata on the file with a line count (7), a count of lines with text (5), and a file size (311 bytes). To the right of this we have the buttons for the raw text of the file in a browser window, a blame link that gives me a quick look at history and then three icons. The first is to open this in GitHub Desktop, the second allows me to edit this online, and the last one deletes the files.
We'll click the second one, which allows us to edit the file. This gives me a simple editor for text, as you see below. Notice I can change some of the editor settings on the right.
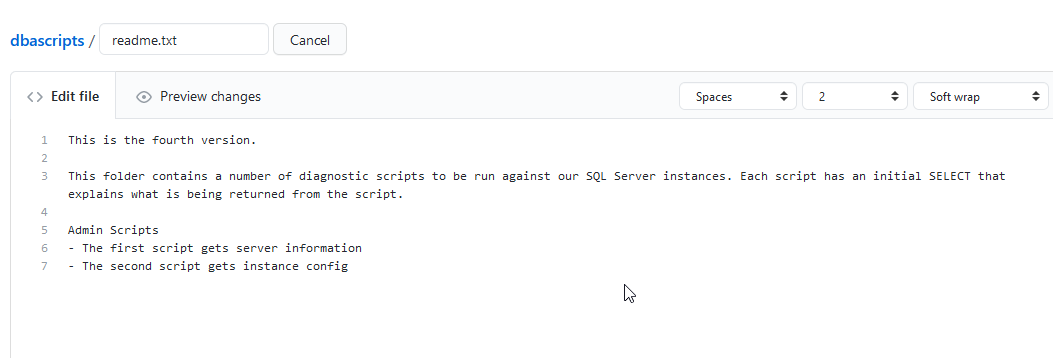
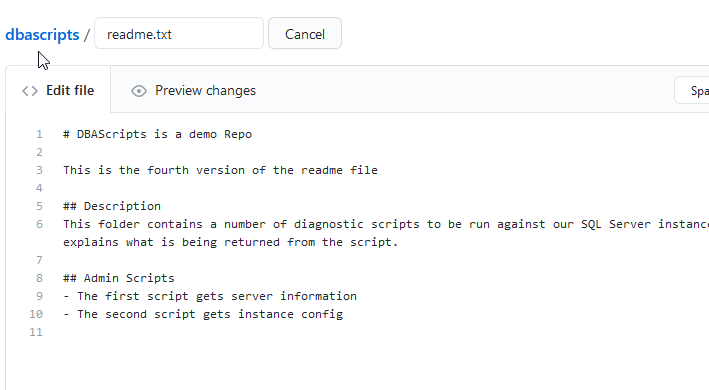
This is a basic editor, and I can change the text. I can also rename the file, as there is a text box with the file name at the top. I'll make a few changes, and alter this file to use Markdown. I like this reference, but there are plenty online you can use. You can see my changes below, which include the markdown elements.
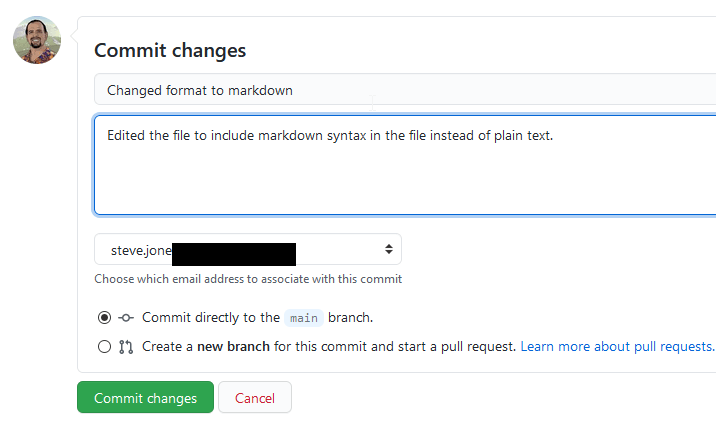
If I scroll below this, I see a commit dialog of edit boxes. I've added a few items in here for this commit, and I'll just commit this to the main branch.
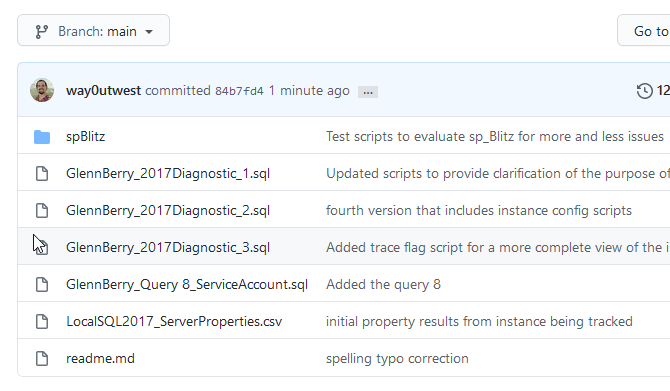
When I do this, I go back to the display of the file contents. I'll click on the root repo link to see how my file looks now. It doesn't look great, as you can see.
None of my markdown is being interpreted. This is because I have the wrong file extension. I need to change this to a ".md" to get this to work.
I didn't do this on purpose. This also illustrates why we work in branches, and try to ensure some review and testing of our changes, no matter how small. We all make mistakes, and when we can. This doesn't affect much, but imagine this was a small data change or some other software code item. I could break an application. I still could from work that doesn't get well reviewed and is poorly tested, but putting a small step in to review changes from another person has certainly helped many companies improve the quality of their software by catching simple errors.
We haven't covered merges, so I'll edit the file again and change the extension. When I do that, I see my markdown is properly rendered in the main page of the repository.
Adding Files
We can easily add files to our repository online. On each page, there is an add file drop down. If I click this, I get two options. I can upload something, or create a new file.
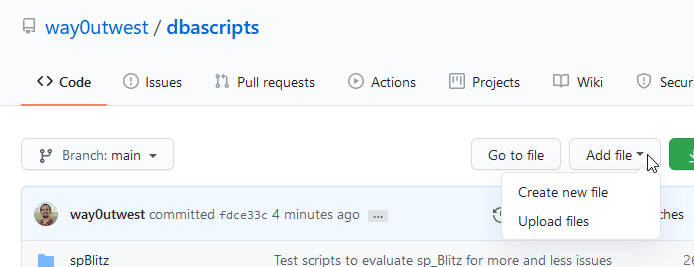
In either case, I also need to commit this change. For now, I'll add a new file to the repository. When I click "Create new file", I get this: the editor with a blank file name.
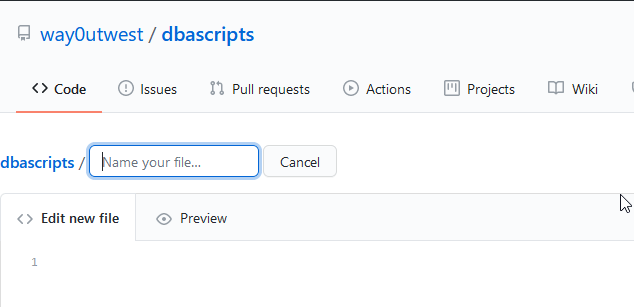
I'll enter a new file name here and then some code:
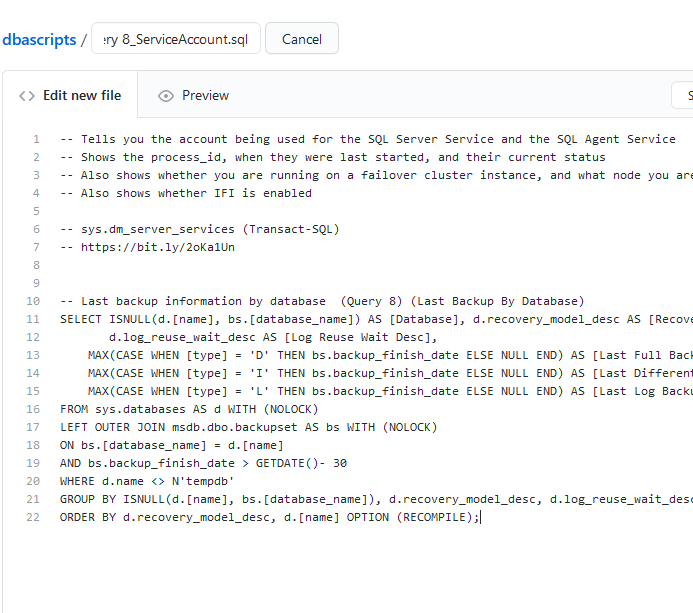
As you can see, this is a fixed width editor, with no color coding or other plugins. This is straight text editing,, so anything you put in here should be checked in another IDE. Below this text is the same commit dialog that we used above. I'll add this to the main branch and commit it. We now see this in the root of the repo.
Adding a Folder
While you're online, you cannot just add a folder, but you can add a file to a new folder and the folder will be created. Here's an example of how this works.
Click the "Add file" button and choose create a new file. Then you can start typing the folder name that you want. In the image below, I'll type "docs".
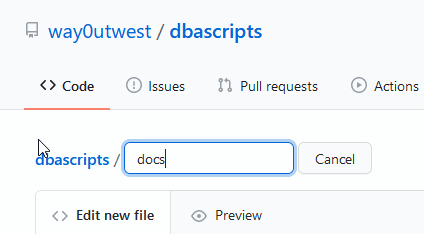
When I type a slash (/), this gets converted into a folder. I can then enter the file name that I want. In this way, I actually create a folder and a file.
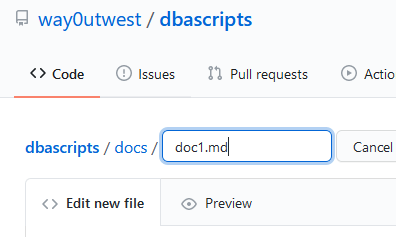
I'll commit this file with a bit of text.
Tracking Issues
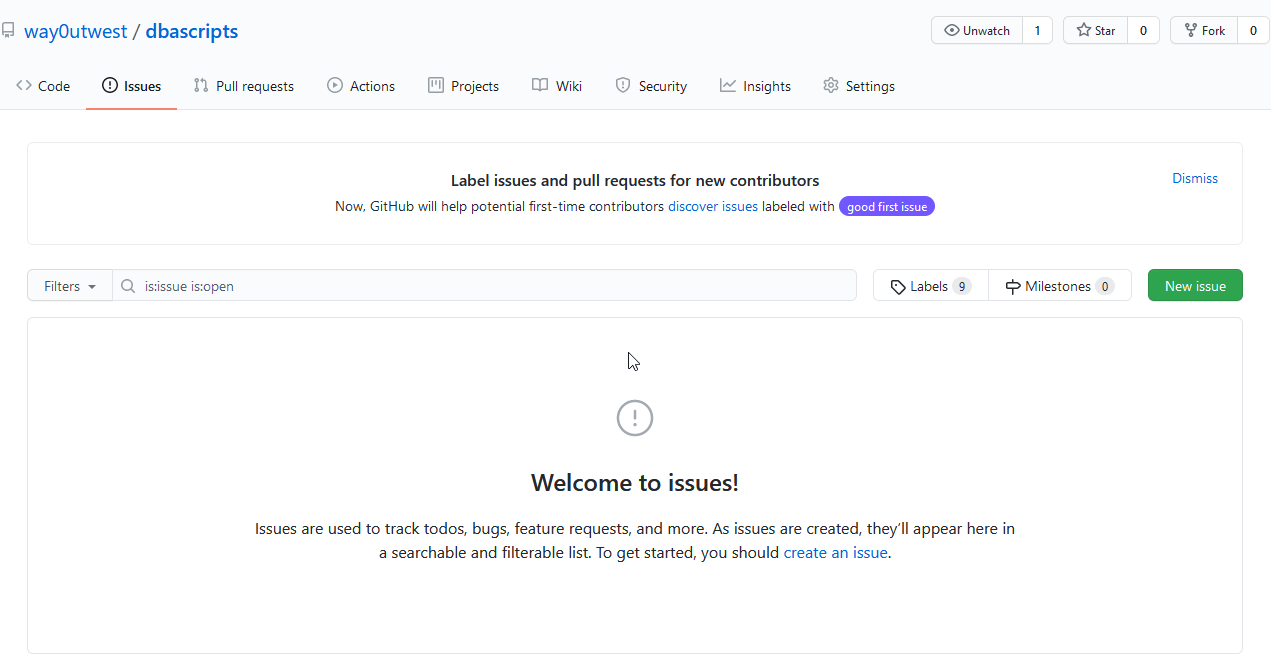
The second tab in GitHub is the "Issues" tab at the top. This is a place where your users or developers can enter specific bugs, problems, enhancements, suggestions, and more. When we click this, we get a list of issues, or a welcome screen if there are no issues already in the system.
I can click "New Issue" on the right to create a new item. If there were issues here, I can search among them or sort them based on some of the metadata around issues. If I click a new Issue, I get a dialog. I've entered some data below so that you can see what is shown. I've even added a screenshot into my issue by dragging an image onto the lower edit box.
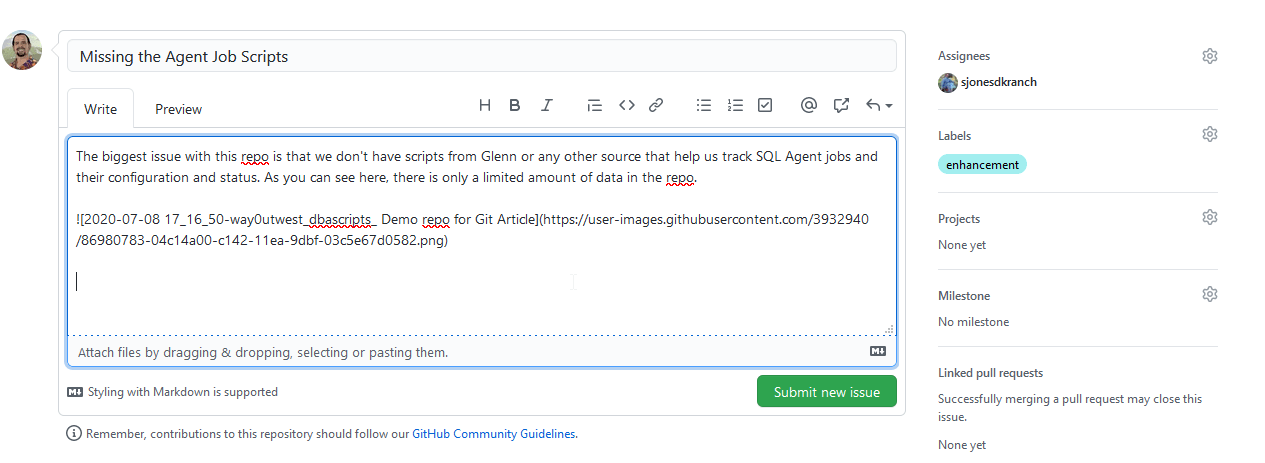
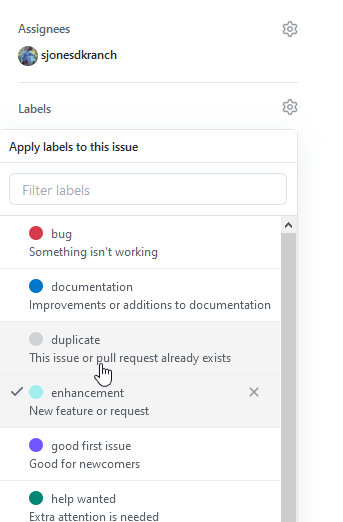
I can type whatever I need in here, add images, and use markdown to format the issue. I can also assign this by clicking the gear on the top right. In this case, I've assigned my other account. For labels, I can choose from a number of them. As you can see, I only selected one.
I can also configure projects, milestones, and other items about this issue. These items is useful for adding metadata and tracking the work that needs to be done. Once I add the issue, it's in the list of issues. In this case, it's the first one.
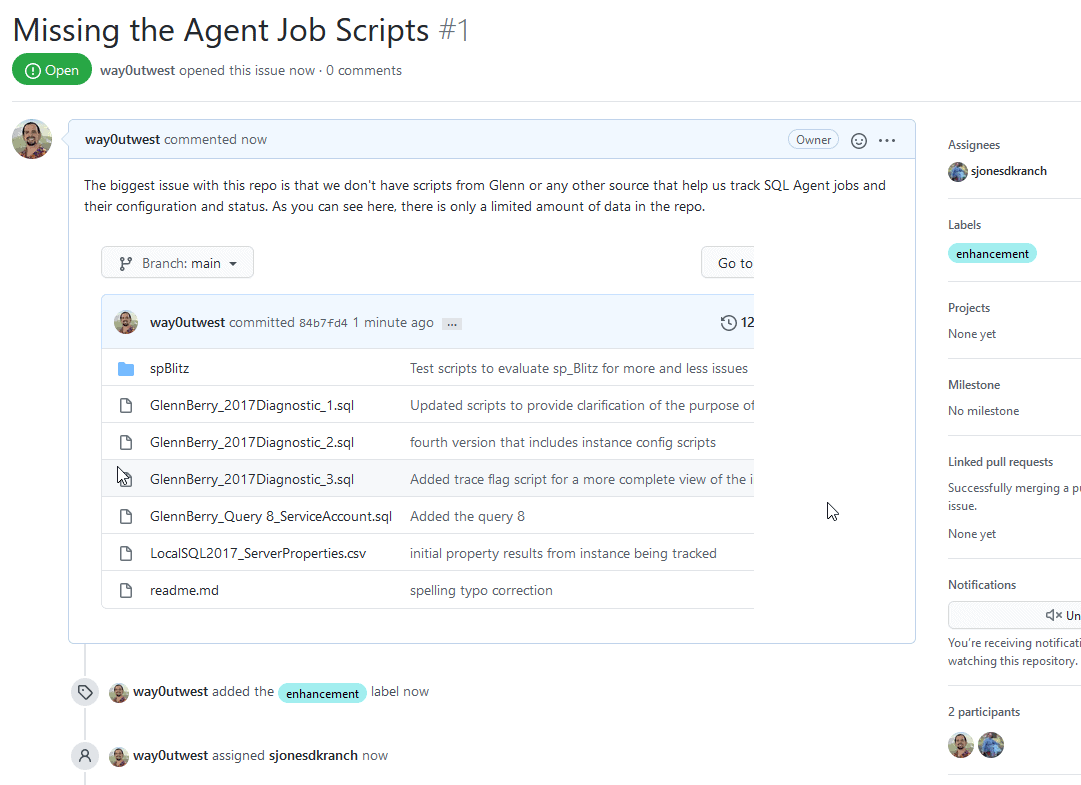
This is rendered on screen with my formatting and the image displayed. I also got an email with the issue sent to my account.
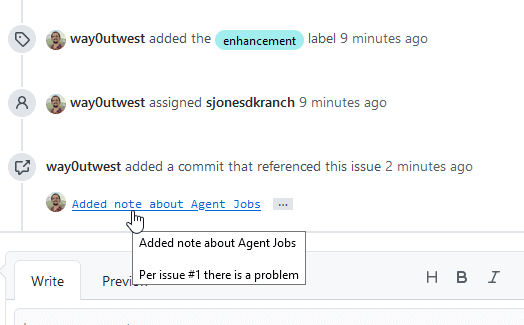
The reason this becomes useful is shown when I enter this as a comment in a dialog, like this commit dialog. As soon as I type #, I get issues listed, If I start typing a number, this filters down. Here I see my one issue.
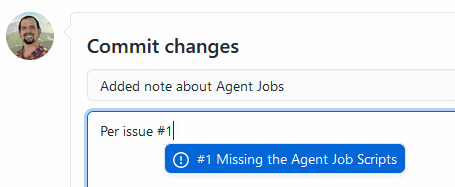
This will link the commit to the issue. Or I could like other issues to this issue using the hash sign (#) notation. This ensures that I can track the code as it relates to issues, pull requests, and more. If I go to the issue now, I see there is a link to that commit.
One of the powerful things about having a platform hosting Git is that you have linkage between your code and other items that you track.
Getting Changes Locally
I've made changes online, but I need to be sure my developers see them. When they pull a branch with changes I've made online, they will get the updates. I can issue a git pull from my local repo and I'll see these results.
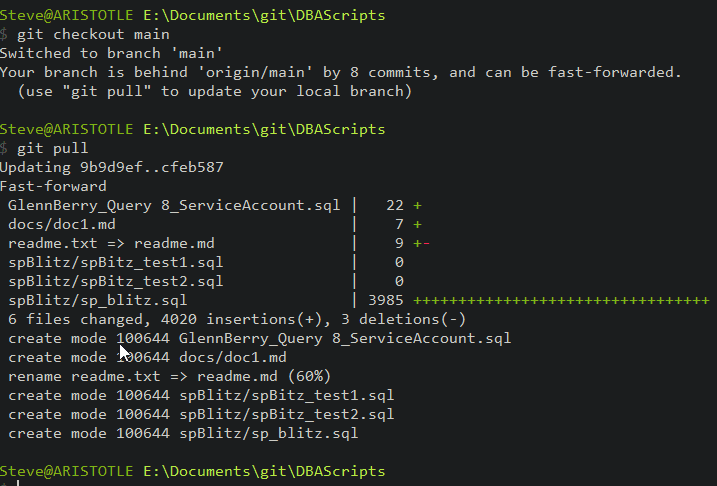
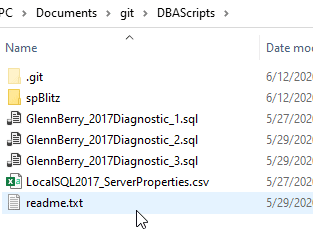
Checking the repo, I see my changes in the filesystem.

Conclusion
This article looks at how you can work your code and file issues against it on GitHub. While the capability exists to add and edit files online, in general this is not what we want to do. We should work with our local copy of the code and push/pull the code with GitHub and other remote repositories. That the the model for a distributed VCS, of which Git is one type.
In an emergency, or when some minor documentation fix is needed, you can just use the GitHub site to make a change. However, these changes aren't verified or validated when they're made to code, so be careful about doing this.
The Issues are a good way to track the work being done on your project and code, and I would encourage you to use them for users and developers to coordinate. This ensures that we link code changes to some request, something that becomes useful over time if bugs exist in the code or someone wants to understand why something was done. Just be sure that you review these issues and reorder them or prioritize them with some triage process. Also close them when the work is done.
We looked a branching in a previous article, but only learned how to copy code. The next article will examine how to bring changes from different developers and branches back together.