The series so far:
- ASP.NET Core with GitOps: Dockerizing an API on AWS EC2
- ASP.NET Core with GitOps: Deploying Infrastructure as Code
- ASP.NET Core with GitOps: Orchestrating Your Containers with Kubernetes
The first article of the series explained how to create a Docker image of your ASP.NET Core WebApi and deploy it to an existing server. This ensures that you can deploy your application to any server, without having to worry about the software that is installed on it; but you still had to create the server, configure it to accept traffic from port 80, connect to it through SSH and run the Docker image. To follow along with this article, make sure that you have created the Docker image and pushed it to Docker Hub.
By the end of this second article, you will learn how to create your EC2 instance through code, with all the necessary configuration, and deploy the API as part of the process. As explained in the first part of the series, this reduces the risk of your application working in one environment, but failing in another, since you ensure that you always have the same configuration in all environments.
Understanding Infrastructure as Code and CloudFormation
Infrastructure as Code (or IaC) is a way to manage your servers, networks, and other elements of your cloud infrastructure, by writing code instead of manually configuring them.
Most IaC tools offer a way to define your infrastructure by writing in a language like JSON or YAML, in which you can create reusable templates that you can deploy in the cloud. There are many IaC providers out there – Ansible, Azure Automation, Google Cloud Deployment Manager, AWS CloudFormation, etc. Since this series follows all the concepts using AWS, the IaC deployment process will be performed using CloudFormation. However, even on AWS, you can choose other providers, such as Ansible or Chef.
As you will see in this tutorial, CloudFormation works with something called stacks – simply put, collections of resources that you can manage as a single unit (you can read more about it here). CloudFormation currently supports two file types of configuration files: JSON and YAML. The documentation always shows examples in both languages, but the rest of this series will use YAML, as it contains less noise than JSON, making it easier to read and understand.
Each resource has a name, a type, and a list of properties – you can configure resources the same way you would do from the AWS Console. After creating a stack, managing the resources inside it is as simple as updating the file that defines your infrastructure and then performing an update command – this will create any resources that you added in the meantime, update the existing one if necessary, or delete those resources that you eliminated from your code.
Cleaning up is also easy, as deleting the stack will remove all the resources that were part of it, making sure you are not susceptible to any additional costs by forgetting to delete a resource.
What about Elastic Beanstalk?
If you are familiar with AWS, you might have heard about Elastic Beanstalk (EB). If not, you can find an introduction to it here. If you compare its features with what you will learn in this tutorial, it might seem that writing Infrastructure as Code is redundant, since there is a service to do it for you out of the box.
Depending on your purposes, EB might be the way to go for you – it is easier to setup, it offers the scaling capabilities that are going to be touched in this series, and it doesn’t require low-level management of resources.
The reason to use CloudFormation instead of Elastic Beanstalk is being able to have your infrastructure in one place, as a single source of truth, and having the possibility of deploying that anywhere, while also being sure that it will have the intended result.
Prerequisites
Before moving on with CloudFormation, you will need to install the AWS CLI on your machine. This will give you access to working with your resources from the terminal, instead of needing to use the AWS Console in the browser. You can find installation instructions for your OS here. Note that if you install AWS CLI version 2, you will need to change all the commands in the article from aws to aws2.
After successfully installing the CLI, you need to set up an IAM user that will be used to work with your resources.
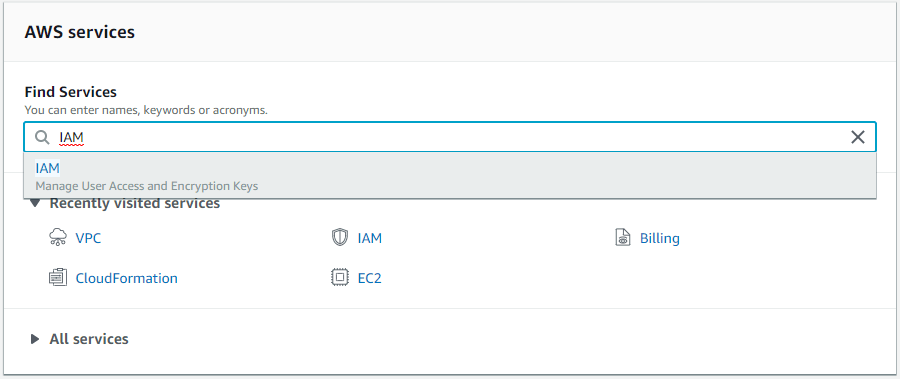
First of all, open the AWS Console and search for IAM in the Find services box.
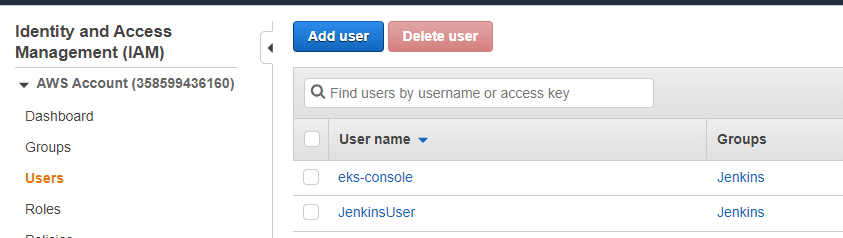
Then, select Users from the left menu and click the Add user button.
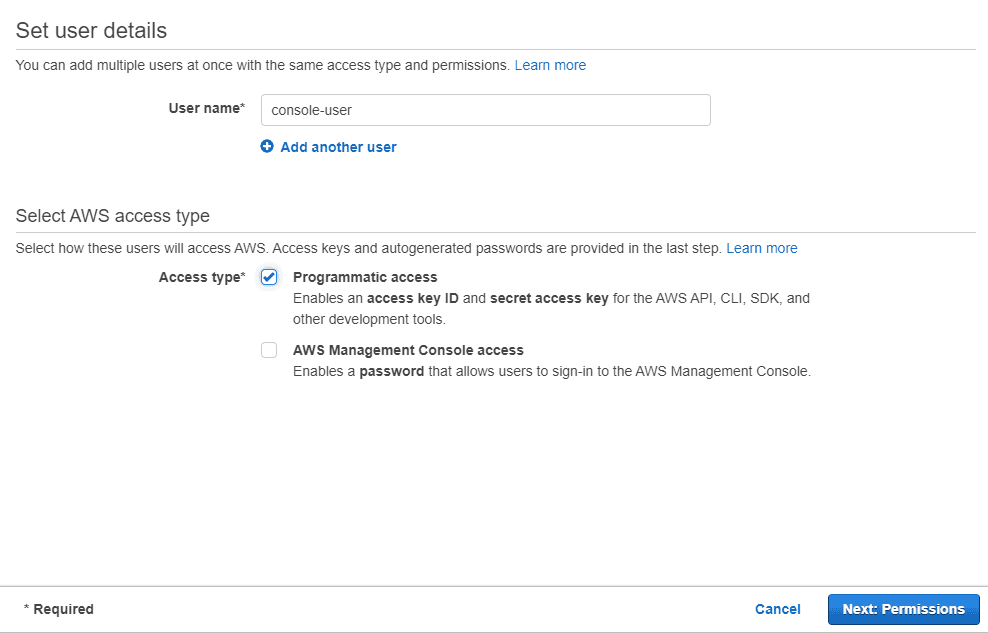
Pick a name, like console-user, for the new user, and check the Programmatic access box. This allows the user to perform actions through the AWS CLI, among other tools from AWS, but it cannot be used to login to the Console. Then, click the Next: Permissions button.
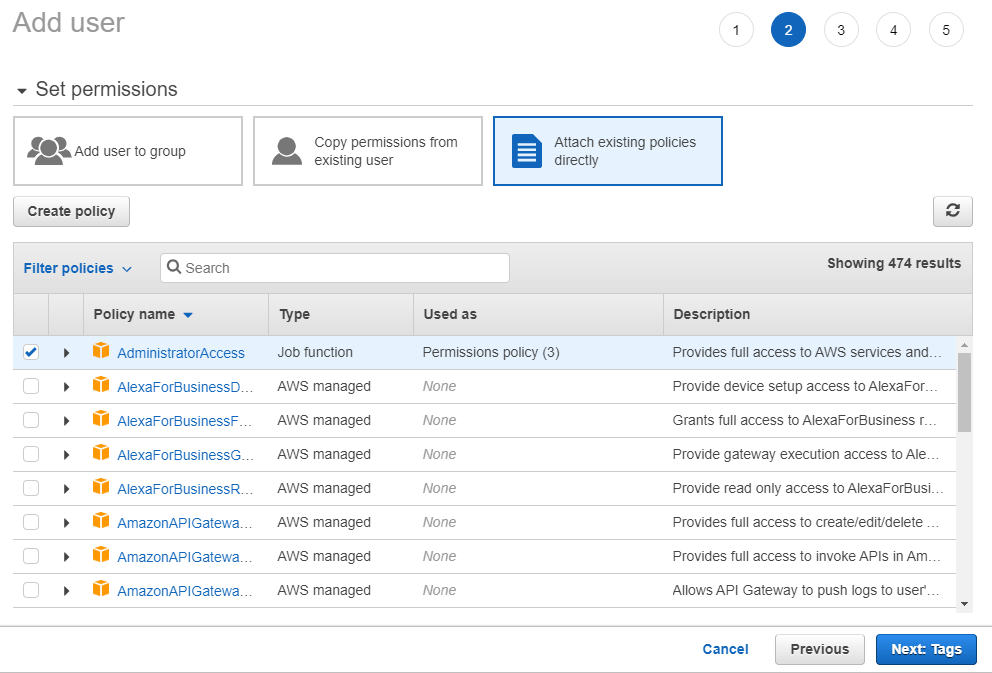
This page allows you to select which actions the user will be able to perform and what resources it can access; it is a good security measure in case someone gains access to your user. Select the Attach existing policies directly and select the AdministratorAccess policy; keep in mind that you should not be doing this in a production scenario, but AWS policies can be tough to work with, so this works for testing purposes. Click the Next buttons and then Create user.
You should now see your newly created user, an access key ID, and a secret access key. In your terminal, run the aws configure command, then paste the required values. For the region, you can use the one that is closest to you from this list, such as eu-central-1.
Make sure that you have also pushed a Docker image to Docker Hub following the instructions in the first article.
Deploying a Single Instance
The first step of deploying your Infrastructure as Code is to find out which resources you need to accomplish your goal. The goal, in this case, is to create an EC2 instance and deploy the previously created Docker image on it.
Once you are aware of what you want to create, the easiest way to gather information is to check the CloudFormation documentation for that resource. Going through the list of properties for the EC2 instance, you can see that none of them is required.
To create the same instance from the previous tutorial, you only need to provide the instance’s image ID. To find the current image ID, go to the EC2 Dashboard and click Launch Instance. Scroll down the list of images until you see the free Ubuntu server. Copy the image ID and save it because you will need to supply it in several scripts.

Click Select to see the sizes. In this case, note t2.micro, which is the free tier. You will be creating your new instance from code, so you can cancel out of the steps after collecting this information.

To write the code to deploy this instance, create a new file called infrastructure.yaml. This is all the code you need, considering you want to deploy an EC2 instance similar to the one from the previous tutorial. Be sure to replace the ImageID property with the image ID you found on the site. Note that you will need to do this each time you copy in a new version of the MainInstance section.
|
1 2 3 4 5 6 7 |
Description: Creating an EC2 instance. Resources: MainInstance: Type: AWS::EC2::Instance Properties: ImageId: ami-0ac05733838eabc06 InstanceType: t2.micro |
After saving the file and modifying the file path if necessary, you can run the following command to deploy your instance to the cloud:
|
1 |
aws cloudformation create-stack --stack-name dotnet-docker --template-body file://infrastructure/infrastructure.yaml |
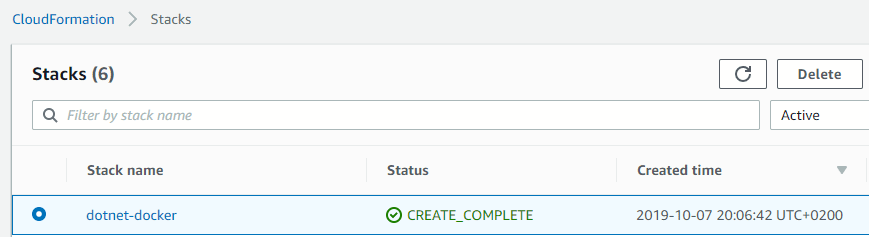
This will return a StackId, so you know the operation has started – it does not mean it was successful, though. The output will look similar to this:

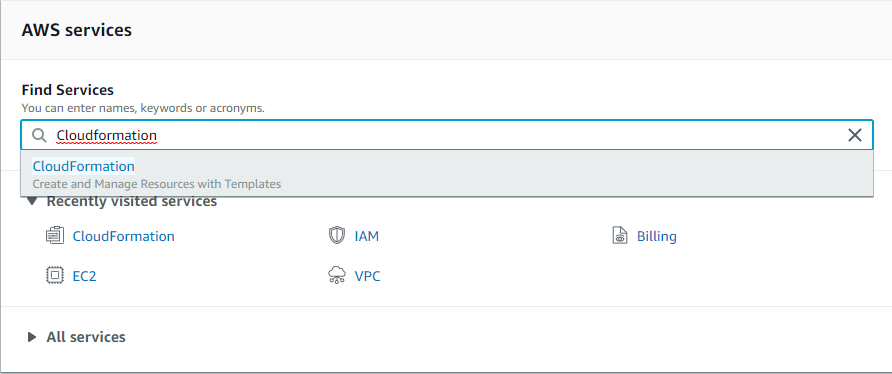
To check on your deployment status, go to the AWS Console and search for CloudFormation in the Find services box.
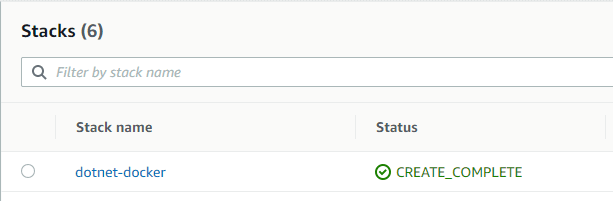
As the stack only contains an EC2 instance, the deployment will complete quite quickly, so you should already see the CREATE_COMPLETE status for your stack.
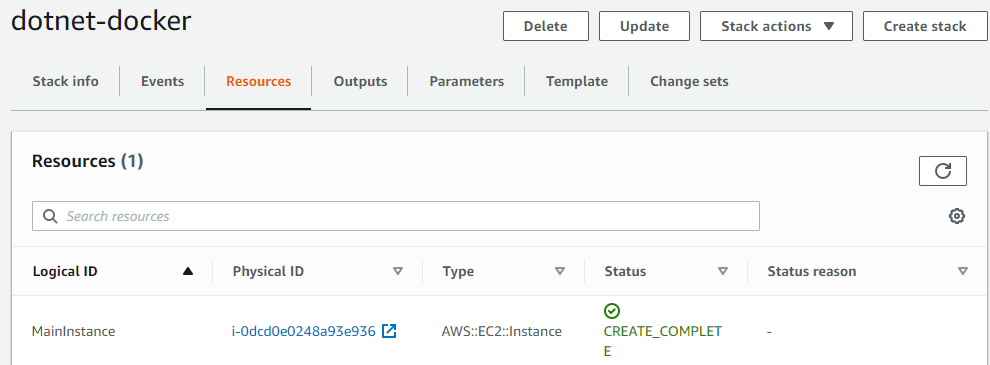
You can click on the stack name and choose the Resources tab to view all the resources inside the stack.
Before pulling and running the Docker image, there is one more thing that needs to be taken care of: allowing the instance to receive (only) HTTP traffic, but to send any type of request. Since you did not provide any security group for the instance, the default one is used – any traffic, to and from any port is allowed; however, this does not provide the level of security and control that you might want for your application.
In the same infrastructure.yaml file, you can define a new resource, SecurityGroup, and then reference it to the instance. However, that is not the only resource that needs to be created, and this is one of the situations where trial and error will lead you to the result. To set the inbound/outbound traffic rules, you need a security group.
|
1 2 3 4 5 6 7 8 9 10 11 12 13 14 15 |
MainSecurityGroup: Type: AWS::EC2::SecurityGroup Properties: GroupDescription: Security group for the API instances. VpcId: !Ref VPC SecurityGroupIngress: - IpProtocol: tcp FromPort: 80 ToPort: 80 CidrIp: 0.0.0.0/0 SecurityGroupEgress: - IpProtocol: tcp FromPort: 0 ToPort: 65535 CidrIp: 0.0.0.0/0 |
The security group must link to a VPC to define outbound rules.
|
1 2 3 4 5 6 |
VPC: Type: AWS::EC2::VPC Properties: CidrBlock: 192.168.0.0/16 EnableDnsSupport: true EnableDnsHostnames: true |
To have your components accessible from the internet, you need an Internet Gateway attached to your VPC.
|
1 2 3 4 5 6 7 |
InternetGateway: Type: AWS::EC2::InternetGateway InternetGatewayAttachment: Type: AWS::EC2::VPCGatewayAttachment Properties: InternetGatewayId: !Ref InternetGateway VpcId: !Ref VPC |
Furthermore, you need a way to specify that all the traffic should go to the Internet Gateway you created; for this, you need to create a route table and a route.
|
1 2 3 4 5 6 7 8 9 10 11 |
RouteTable: Type: AWS::EC2::RouteTable Properties: VpcId: !Ref VPC DefaultRoute: Type: AWS::EC2::Route DependsOn: InternetGatewayAttachment Properties: RouteTableId: !Ref RouteTable DestinationCidrBlock: 0.0.0.0/0 GatewayId: !Ref InternetGateway |
The EC2 is part of the default VPC if not otherwise specified, so the instance and the security group will be part of different VPCs, which means you will not be able to link them; to solve this, you need to create a subnet as part of the new VPC and place the EC2 instance inside that.
|
1 2 3 4 5 6 7 |
Subnet: Type: AWS::EC2::Subnet Properties: VpcId: !Ref VPC AvailabilityZone: !Select [ 0, !GetAZs '' ] CidrBlock: 192.168.0.0/16 MapPublicIpOnLaunch: true |
Finally, the subnet should be associated with the route table created earlier.
|
1 2 3 4 5 |
SubnetRouteTableAssociation: Type: AWS::EC2::SubnetRouteTableAssociation Properties: SubnetId: !Ref Subnet RouteTableId: !Ref RouteTable |
Once everything is added to the file, you can perform an update-stack command to deploy the newly created resources.
|
1 |
aws cloudformation update-stack --stack-name dotnet-docker --template-body file://infrastructure.yaml |
Finally, with the infrastructure ready, you can add the commands to install Docker on the machine, login to Docker Hub, pull the image and run it. You do this by adding a property of the EC2 instance, called UserData.
Since these commands contain your password for Docker Hub, which you would not want to be committed to a Git repository, you can use parameters and specify them when creating or updating the stack. This is what the instance code looks like after adding the commands (be sure to replace your image ID).
|
1 2 3 4 5 6 7 8 9 10 11 12 13 14 15 16 17 |
MainInstance: Type: AWS::EC2::Instance Properties: ImageId: ami-0ac05733838eabc06 InstanceType: t2.micro SecurityGroupIds: - !GetAtt "MainSecurityGroup.GroupId" SubnetId: !Ref Subnet UserData: Fn::Base64: !Sub | #!/bin/bash apt-get update -y apt-get install docker.io -y docker login -username ${DockerUsername} -password ${DockerPassword} docker pull docker.io/${DockerUsername}/dotnet-api docker run -d -p 80:80 ${DockerUsername}/dotnet-api |
Add the parameters to a special section between Description and Resources.
|
1 2 3 4 5 6 7 |
Parameters: DockerUsername: Description: The Docker Hub username. Type: String DockerPassword: Description: The Docker Hub password. Type: String |
If you would like to view the whole file, you can do so here.
To update the stack, you can run the update-stack command with the parameters tag; if you deleted the stack, you can run the create-stack command instead:
|
1 |
aws cloudformation update-stack --stack-name dotnet-docker --template-body <a href="file://infrastructure.yaml">file://infrastructure.yaml</a> --parameters ParameterKey=DockerUsername,ParameterValue=yourusername ParameterKey=DockerPassword,ParameterValue=yourpassword |
If you go to the EC2 dashboard on the AWS console, you should see a new instance being created. Copy the public DNS and append /api/test to it. You should see the same JSON as in the previous tutorial. Note that if you have problems with the test, see the “Debugging your instances” section later in the article.

Debugging Your Instance
What happens after you deploy your instances, and something does not work as intended – such as the test endpoint not returning anything? The easiest way to figure out what went wrong is to connect to the instance via SSH.
First of all, allow connections to your instances via port 22, by adding another ingress rule to the security group.
|
1 2 3 4 5 6 7 8 9 10 11 12 13 14 15 16 17 18 19 |
MainSecurityGroup: Type: AWS::EC2::SecurityGroup Properties: GroupDescription: Security group for the API instances. VpcId: !Ref VPC SecurityGroupIngress: - IpProtocol: tcp FromPort: 80 ToPort: 80 CidrIp: 0.0.0.0/0 - IpProtocol: tcp FromPort: 22 ToPort: 22 CidrIp: 0.0.0.0/0 SecurityGroupEgress: - IpProtocol: tcp FromPort: 0 ToPort: 65535 CidrIp: 0.0.0.0/0 |
Next, in the Instance properties, you have to specify a key-pair name. You can use the one you created during the previous tutorial which you can see by scrolling down to the Network & Security section of the ECW menu.
|
1 2 3 4 5 6 7 8 9 10 11 12 13 14 15 16 17 18 |
MainInstance: Type: AWS::EC2::Instance Properties: KeyName: dotnet-docker-keypair ImageId: ami-0ac05733838eabc06 InstanceType: t2.micro SecurityGroupIds: - !GetAtt "MainSecurityGroup.GroupId" SubnetId: !Ref Subnet UserData: Fn::Base64: !Sub | #!/bin/bash apt-get update -y apt-get install docker.io -y docker login -username ${DockerUsername} -password ${DockerPassword} docker pull docker.io/${DockerUsername}/dotnet-api docker run -d -p 80:80 ${DockerUsername}/dotnet-api |
The update-stack command will not achieve the intended result here, as the instance is already running. Instead, delete your stack first, by running this code.
|
1 |
aws cloudformation delete-stack --stack-name dotnet-docker |
Then create it again with the new configuration.
Afterwards, you can follow the connection technique that you used for the instance created manually in the first article, by the SSH command. Make sure that the pem file is in a secured location.
|
1 |
ssh -i "dotnet-docker-keypair.pem" ubuntu@{public-dns} |
Once you are connected, you can check the logs for any issues that might have appeared while launching the instance, by running the following command.
|
1 |
cat /var/log/cloud-init-output.log |
Don’t forget that this method is something to be used for testing and debugging purposes only – remove such configurations when deploying production environments.
Deploying Multiple Instances
If you remember the series introduction, one of the essential aspects was being able to deploy multiple, identical servers that run the same API. This way, if one of them fails, or if there is an update for the API, the customers are still able to use the service by being redirected to the working instances.
The goal of working with multiple instances is to make it seem like the users are only interacting with one server. For this purpose, a load balancer will be placed in front of the instances – this will receive the traffic and decide where to send it, ensuring a lower response time for the clients.
To achieve the deployment of multiple instances, there are some new resources that need to be added to the infrastructure:
Additional subnets for different availability zones in your region; this ensures that if one availability zone fails, your API is still up and running; the Subnet and the SubnetRouteTableAssociation sections created previously should be deleted.
|
1 2 3 4 5 6 7 8 9 10 11 12 13 14 15 16 17 18 19 20 21 22 23 24 |
Subnet1: Type: AWS::EC2::Subnet Properties: VpcId: !Ref VPC AvailabilityZone: !Select [ 0, !GetAZs '' ] CidrBlock: 192.168.0.0/24 MapPublicIpOnLaunch: true Subnet2: Type: AWS::EC2::Subnet Properties: VpcId: !Ref VPC AvailabilityZone: !Select [ 1, !GetAZs '' ] CidrBlock: 192.168.1.0/24 MapPublicIpOnLaunch: true Subnet1RouteTableAssociation: Type: AWS::EC2::SubnetRouteTableAssociation Properties: SubnetId: !Ref Subnet1 RouteTableId: !Ref RouteTable Subnet2RouteTableAssociation: Type: AWS::EC2::SubnetRouteTableAssociation Properties: SubnetId: !Ref Subnet2 RouteTableId: !Ref RouteTable |
A Launch Configuration, that represents the template for any instance that is going to be created; since you are not creating the instances manually anymore, this will specify the image id, the size and the user data for your servers; as part of this step, you must also delete the EC2 instance code (MainInstance section). This section contains the Image ID, so be sure to replace it.
|
1 2 3 4 5 6 7 8 9 10 11 12 13 14 15 |
LaunchConfiguration: Type: AWS::AutoScaling::LaunchConfiguration Properties: UserData: Fn::Base64: !Sub | #!/bin/bash apt-get update -y apt-get install docker.io -y docker login -u ${DockerUsername} -p ${DockerPassword} docker pull docker.io/${DockerUsername}/dotnet-api docker run -d -p 80:80 ${DockerUsername}/dotnet-api ImageId: ami-0ac05733838eabc06 SecurityGroups: - Ref: MainSecurityGroup InstanceType: t2.micro |
An Auto Scaling Group to control how many instances are created, when to create them and when to stop them.
|
1 2 3 4 5 6 7 8 9 10 11 12 13 |
AutoScalingGroup: Type: AWS::AutoScaling::AutoScalingGroup Properties: VPCZoneIdentifier: - !Ref Subnet1 - !Ref Subnet2 LaunchConfigurationName: Ref: LaunchConfiguration DesiredCapacity: 3 MinSize: 2 MaxSize: 4 TargetGroupARNs: - Ref: TargetGroup |
A Load Balancer that will control the traffic for the instances inside the Auto Scaling Group.
|
1 2 3 4 5 6 7 8 |
LoadBalancer: Type: AWS::ElasticLoadBalancingV2::LoadBalancer Properties: Subnets: - !Ref Subnet1 - !Ref Subnet2 SecurityGroups: - Ref: MainSecurityGroup |
A Load Balancer Listener and a rule for it, as well as a Target Group, to specify how to check the health of each instance and make sure they are still running. Here is the Listener Rule section:
|
1 2 3 4 5 6 7 8 9 10 11 |
ListenerRule: Type: AWS::ElasticLoadBalancingV2::ListenerRule Properties: Actions: - Type: forward TargetGroupArn: !Ref TargetGroup Conditions: - Field: path-pattern Values: [/] ListenerArn: !Ref Listener Priority: 1 |
Add the Listener.
|
1 2 3 4 5 6 7 8 9 10 11 |
Listener: Type: AWS::ElasticLoadBalancingV2::Listener Properties: DefaultActions: - Type: forward TargetGroupArn: Ref: TargetGroup LoadBalancerArn: Ref: LoadBalancer Port: '80' Protocol: HTTP |
Also add the TargetGroup section.
|
1 2 3 4 5 6 7 8 9 10 11 12 |
TargetGroup: Type: AWS::ElasticLoadBalancingV2::TargetGroup Properties: HealthCheckIntervalSeconds: 10 HealthCheckPath: / HealthCheckProtocol: HTTP HealthCheckTimeoutSeconds: 8 HealthyThresholdCount: 2 Port: 80 Protocol: HTTP UnhealthyThresholdCount: 5 VpcId: !Ref VPC |
You can view the file containing all the resources here.
From the CloudFormation Stacks list, delete the original stack. You should now run the same command from earlier with create-stack and the username and password parameters. Once it finishes (and it might take longer than the previous versions, since there are many new resources added), go to the EC2 dashboard on AWS Console to inspect the resources. You should see three instances.

You can go to any of them, copy the public DNS and append /api/test to it, and receive the expected JSON message from earlier. This ensures that all the instances work as expected.
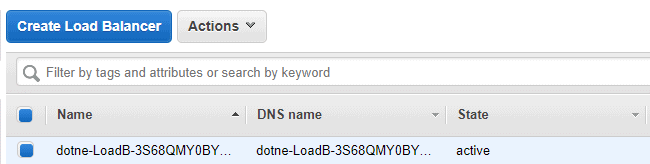
While on the instances page, if you scroll down in the left menu and select Load Balancers, you should see one resource.
Below, you should see a property called DNS Name, which is the URI for your load balancer. You can copy it, append /api/test and receive the same JSON message as from the instances. You are done!
Debugging Your Instances
Enabling SSH connections to your instances is essentially the same process as the one described earlier, for the single instance – however, the key-pair will be added to the launch configuration and propagated to all the EC2 instances.
The first step is adding port 22 as an ingress rule for the security group.
|
1 2 3 4 5 6 7 8 9 10 11 12 13 14 15 16 17 18 19 |
MainSecurityGroup: Type: AWS::EC2::SecurityGroup Properties: GroupDescription: Security group for the API instances. VpcId: !Ref VPC SecurityGroupIngress: - IpProtocol: tcp FromPort: 80 ToPort: 80 CidrIp: 0.0.0.0/0 - IpProtocol: tcp FromPort: 22 ToPort: 22 CidrIp: 0.0.0.0/0 SecurityGroupEgress: - IpProtocol: tcp FromPort: 0 ToPort: 65535 CidrIp: 0.0.0.0/0 |
Next, in the Launch Configuration properties, specify the key-pair name.
|
1 2 3 4 5 6 7 8 9 10 11 12 13 14 15 16 |
LaunchConfiguration: Type: AWS::AutoScaling::LaunchConfiguration Properties: KeyName: dotnet-docker-keypair UserData: Fn::Base64: !Sub | #!/bin/bash apt-get update -y apt-get install docker.io -y docker login -u ${DockerUsername} -p ${DockerPassword} docker pull docker.io/${DockerUsername}/dotnet-api docker run -d -p 80:80 ${DockerUsername}/dotnet-api ImageId: ami-0ac05733838eabc06 SecurityGroups: - Ref: MainSecurityGroup InstanceType: t2.micro |
Again, don’t forget to remove these settings before deploying your instances to production!
Cleaning Up
If you are following this just for testing or learning purposes, you should avoid keeping the resources alive for too long, as it can create additional costs or reach the free tier limits; since all the resources are part of a stack, deleting them is as simple as deleting the stack. You can do it from the console, by running.
|
1 |
aws cloudformation delete-stack --stack-name dotnet-docker |
You can also remove the stack from the CloudFormation dashboard in the AWS Console, by selecting the stack and clicking the Delete button.
What is Next?
It might seem that the goal of the tutorials is more or less achieved: you can pack the code from your Git repository in a Docker image and deploy it to multiple instances, ensuring the high availability of your application. But you are still handling most of this process manually.
Going forward, you will learn how to use Kubernetes to orchestrate your Docker containers, and how to automate the deployment process.
Load comments