One way to scale large complex solutions is to break them out into REST microservices. Microservices unlock testability and reusability of business logic that sits behind an API boundary. This allows organizations to share software modules because REST APIs can be reused by multiple clients. Clients can then call as many APIs from mobile, web, or even static assets via a single-page app.
In this take, I will show you what it takes to build a REST API in .NET Core. I will hit this with real-world demands such as versioning, search, and logging, to name a few. REST is often employed with verbs like POST, PUT, or PATCH, so I plan to cover them all. What I hope you see is a nice, effective way to deliver value with the tools available.
This article assumes a working grasp of ASP.NET, C#, and REST APIs so I will not cover any basics. I recommend the latest .NET Core LTS release at the time of this writing to follow along. If you would like to start with working code, the sample code can be downloaded from GitHub.
You can begin by creating a new folder like BuildRestApiNetCore and firing this up in a shell:
|
1 2 3 |
dotnet new sln dotnet new webapi --no-https dotnet sln add . |
This project is based on a Web API template with HTTPS disabled to make it easier for local development. Double-clicking the solution file brings it up in Visual Studio if you have it installed. For .NET Core 3.1 support, be sure to have the 2019 version of the IDE.
APIs put a layer of separation between clients and the database, so the data is an excellent place to start. To keep data access trivial, Entity Framework has an in-memory alternative so that I can focus on the API itself.
An in-memory database provider comes via NuGet:
|
1 |
dotnet add package Microsoft.EntityFrameworkCore.InMemory |
Then, create the following data model. I put this in the Models folder to indicate this namespace houses raw data. To use the data annotations, add System.ComponentModel.DataAnnotations in a using statement.
|
1 2 3 4 5 6 7 8 9 10 11 12 13 14 15 16 17 18 19 20 |
public class Product { [Key] [Required] [Display(Name = "productNumber")] public string ProductNumber { get; set; } [Required] [Display(Name = "name")] public string Name { get; set; } [Required] [Range(10, 90)] [Display(Name = "price")] public double? Price { get; set; } [Required] [Display(Name = "department")] public string Department { get; set; } } |
In a real solution, this may go in a separate project depending on the team’s needs. Pay attention to the attributes assigned to this model like Required, Display, and Range. These are data annotations in ASP.NET to validate the Product during model binding. Because I use an in-memory database, Entity Framework requires a unique Key. These attributes assign validation rules like price range or whether the property is required.
From a business perspective, this is an e-commerce site with a product number, name, and price. Each product is also assigned a department to make searches by department easier.
Next, set the Entity Framework DbContext in the Models namespace:
|
1 2 3 4 5 6 7 8 |
public class ProductContext : DbContext { public ProductContext(DbContextOptions<ProductContext> options) : base(options) { } public DbSet<Product> Products { get; set; } } |
This database context is the dependency injected in the controller to query or update data. To enable Dependency Injection in ASP.NET Core, crack open the Startup class and add this in ConfigureServices:
|
1 2 3 |
services .AddDbContext<ProductContext>(opt => opt.UseInMemoryDatabase("Products")); |
This code completes the in-memory database. Be sure to add Microsoft.EntityFrameworkCore to both classes in a using statement. Because a blank back end is no fun, this needs seed data.
Create this extension method to help iterate through seed items. This can go in an Extensions namespace or folder:
|
1 2 3 4 5 6 7 |
public static class EnumerableExtensions { public static IEnumerable<T> Times<T>(this int count, Func<int, T> func) { for (var i = 1; i <= count; i++) yield return func.Invoke(i); } } |
The initial seed goes in Models via a static class:
|
1 2 3 4 5 6 7 8 9 10 11 12 13 14 15 16 17 18 19 20 21 22 23 24 25 26 27 28 29 30 31 32 33 34 35 |
public static class ProductSeed { public static void InitData(ProductContext context) { var rnd = new Random(); var adjectives = new [] { "Small", "Ergonomic", "Rustic", "Smart", "Sleek" }; var materials = new [] { "Steel", "Wooden", "Concrete", "Plastic", "Granite", "Rubber" }; var names = new [] { "Chair", "Car", "Computer", "Pants", "Shoes" }; var departments = new [] { "Books", "Movies", "Music", "Games", "Electronics" }; context.Products.AddRange(900.Times(x => { var adjective = adjectives[rnd.Next(0, 5)]; var material = materials[rnd.Next(0, 5)]; var name = names[rnd.Next(0, 5)]; var department = departments[rnd.Next(0, 5)]; var productId = $"{x, -3:000}"; return new Product { ProductNumber = $"{department.First()}{name.First()}{productId}", Name = $"{adjective} {material} {name}", Price = (double) rnd.Next(1000, 9000) / 100, Department = department }; })); context.SaveChanges(); } } |
This code loops through a list of 900 items to create this many products. The names are picked at random with a department and price. Each product gets a “smart” key as the primary key which comes from department, name, and product id.
Once this seed runs, you may get products such as “Smart Wooden Pants” in the Electronics department for a nominal price.
As a preliminary step to start building endpoints, it is a good idea to set up versioning. This allows client apps to upgrade API functionality at their leisure without tight coupling.
API versioning comes in a NuGet package:
|
1 |
dotnet add package Microsoft.AspNetCore.Mvc.Versioning |
Go back to the Startup class and add this to ConfigureServices:
|
1 |
services.AddApiVersioning(opt => opt.ReportApiVersions = true); |
I opted to include available versions in the API response, so clients know when upgrades are available. I recommend using Semantic Versioning to communicate breaking changes in the API. Letting clients know what to expect between upgrades helps everyone stay on the latest features.
Search endpoint in a REST API
To build an endpoint, spin up a Controller in ASP.NET which goes in the Controllers folder.
Create a ProductsController with the following, making sure to add the namespace Microsoft.AspNetCore.Mvc with a using statement:
|
1 2 3 4 5 6 7 8 9 10 11 12 13 14 15 16 17 |
[ApiController] [ApiVersion("1.0")] [Route("v{version:apiVersion}/[controller]")] [Produces("application/json")] public class ProductsController : ControllerBase { private readonly ProductContext _context; public ProductsController(ProductContext context) { _context = context; if (_context.Products.Any()) return; ProductSeed.InitData(context); } } |
Note InitData runs the initial seed when there aren’t any products in the database. I set a Route that uses versioning which is set via ApiVersion. The data context ProductContext gets injected in the constructor with Dependency Injection. The first endpoint is GET which returns a list of Products in the Controller:
|
1 2 3 4 5 6 7 8 9 10 |
[HttpGet] [Route("")] [ProducesResponseType(StatusCodes.Status200OK)] public ActionResult<IQueryable<Product>> GetProducts() { var result = _context.Products as IQueryable<Product>; return Ok(result .OrderBy(p => p.ProductNumber)); } |
Be sure to add Microsoft.AspNetCore.Http in a using statement to set status codes in the response type.
I opted to order products by product number to make it easier to show the results. In a production system, check this sort matches the clustered index, so the database doesn’t work as hard. Always review execution plans and statistics IO to confirm good performance.
This project is ready to go for a test drive! Inside of a CLI type:
|
1 |
dotnet watch run |
Hit the endpoint with curl:
|
1 |
curl -i -X GET "http://localhost:5000/v1/products" -H "accept: application/json" |
I run both commands in separate consoles. One runs the file watcher that automatically refreshes when I make changes. The other terminal is where I keep curl results. Postman is also useful, but curl gets the job done and comes with Windows 10.
Below are the results:
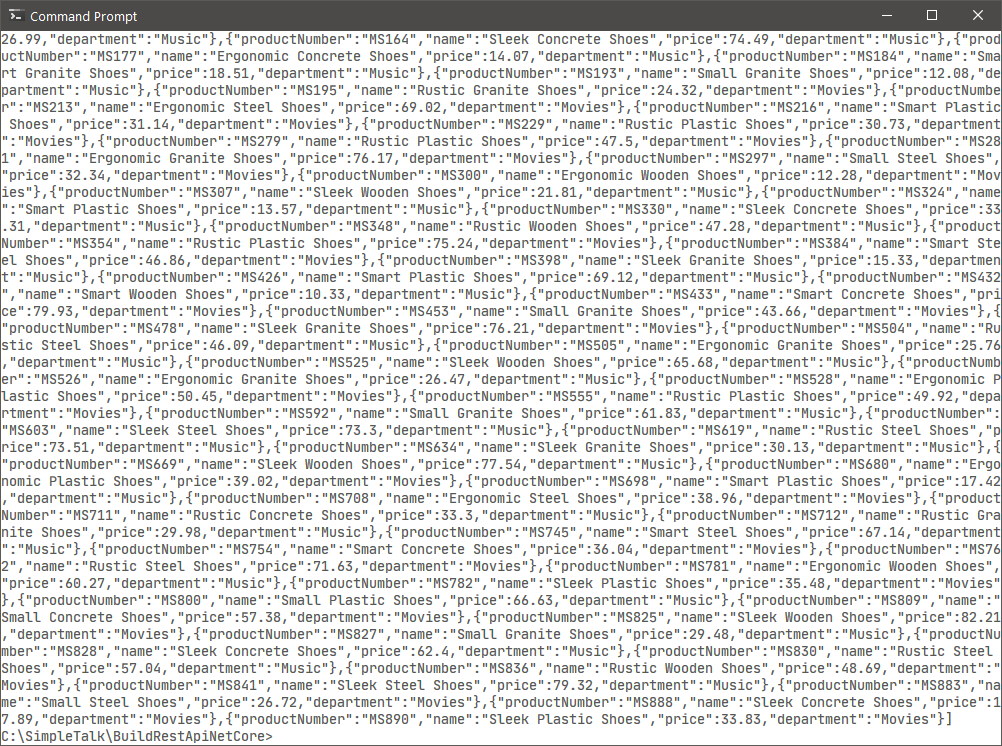
This request returns all products in the database, but it’s not scalable. As the product list grows, clients will get slammed with unbound data, putting more pressure on SQL and network traffic.
A better approach is to introduce limit and offset request parameters in a model:
|
1 2 3 4 5 6 7 8 |
public class ProductRequest { [FromQuery(Name = "limit")] public int Limit { get; set; } = 15; [FromQuery(Name = "offset")] public int Offset { get; set; } } |
Wire this request parameter to the GetProducts endpoint:
|
1 2 3 4 5 6 7 8 9 10 11 12 |
public ActionResult<IQueryable<Product>> GetProducts([FromQuery] ProductRequest request) { // ... Response.Headers["x-total-count"] = result.Count().ToString(); return Ok(result .OrderBy(p => p.ProductNumber) .Skip(request.Offset) .Take(request.Limit)); } |
Note I set an HTTP header x-total-count with the Count. This helps clients that may want to page through the entire result set. When requests parameters are not specified then the API defaults to the first 15 items.
Next, add a search parameter to filter products by department:
|
1 2 3 4 5 6 7 8 9 10 11 12 13 |
public ActionResult<IQueryable<Product>> GetProducts([FromQuery] string department, [FromQuery] ProductRequest request) { // ... if (!string.IsNullOrEmpty(department)) { result = result.Where(p => p.Department.StartsWith(department, StringComparison.InvariantCultureIgnoreCase)); } // .. } |
Search can go inside a conditional block that alters the query. Note I use StartsWith and InvariantCultureIgnoreCase to make it easier to filter products. In actual SQL, the LIKE operator is useful, and case insensitivity can be set via collation.
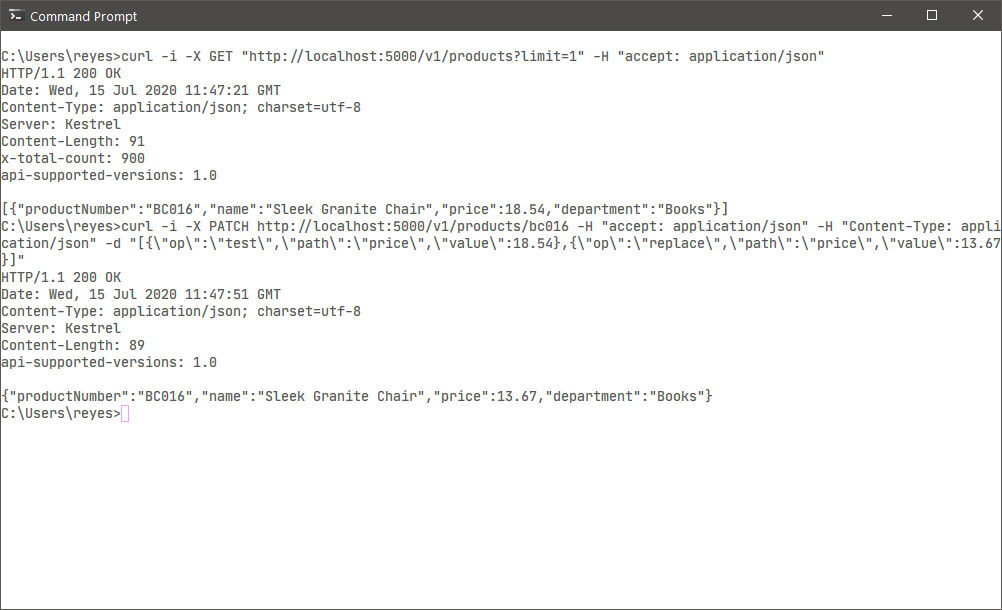
To test out paging and this new filter in curl:
|
1 2 |
curl -i -X GET http://localhost:5000/v1/products?offset=15&department=electronics -H "accept: application/json" |
Be sure to check out HTTP headers which include total count and supported versions:
|
1 2 3 4 5 6 7 |
HTTP/1.1 200 OK Date: Sat, 11 Jul 2020 18:35:07 GMT Content-Type: application/json; charset=utf-8 Server: Kestrel Content-Length: 1459 x-total-count: 194 api-supported-versions: 1.0 |
Logging and API Documentation
With the API taking shape, how can I communicate endpoints to other developers? It is beneficial for teams to know what the API exposes without having to bust open code. Swagger is the tool of choice here; by using reflection, it is capable of documenting what’s available.
What if I told you everything swagger needs is already set in this API? Go ahead, take a second look:
|
1 2 3 4 |
[Produces("application/json")] [ProducesResponseType(StatusCodes.Status200OK)] ActionResult<IQueryable<Product>> GetProducts([FromQuery] string department, [FromQuery] ProductRequest request) |
ASP.NET attributes are useful for documenting endpoints. Swagger also picks up return types from controller methods to figure out what responses look like and picks up request parameters in each controller method via reflection. It produces “living documentation” because it sucks up everything from working code, which reduces mishaps.
The one dependency lacking is a NuGet:
|
1 |
dotnet add package Swashbuckle.AspNetCore |
And wire this up in ConfigureServices:
|
1 2 3 4 5 6 |
services.AddSwaggerGen(c => c.SwaggerDoc("v1", new OpenApiInfo { Title = "Products", Description = "The ultimate e-commerce store for all your needs", Version = "v1" })); |
Then, enable this in Configure:
|
1 2 |
app.UseSwagger(); app.UseSwaggerUI(opt => opt.SwaggerEndpoint("/swagger/v1/swagger.json", "Products v1")); |
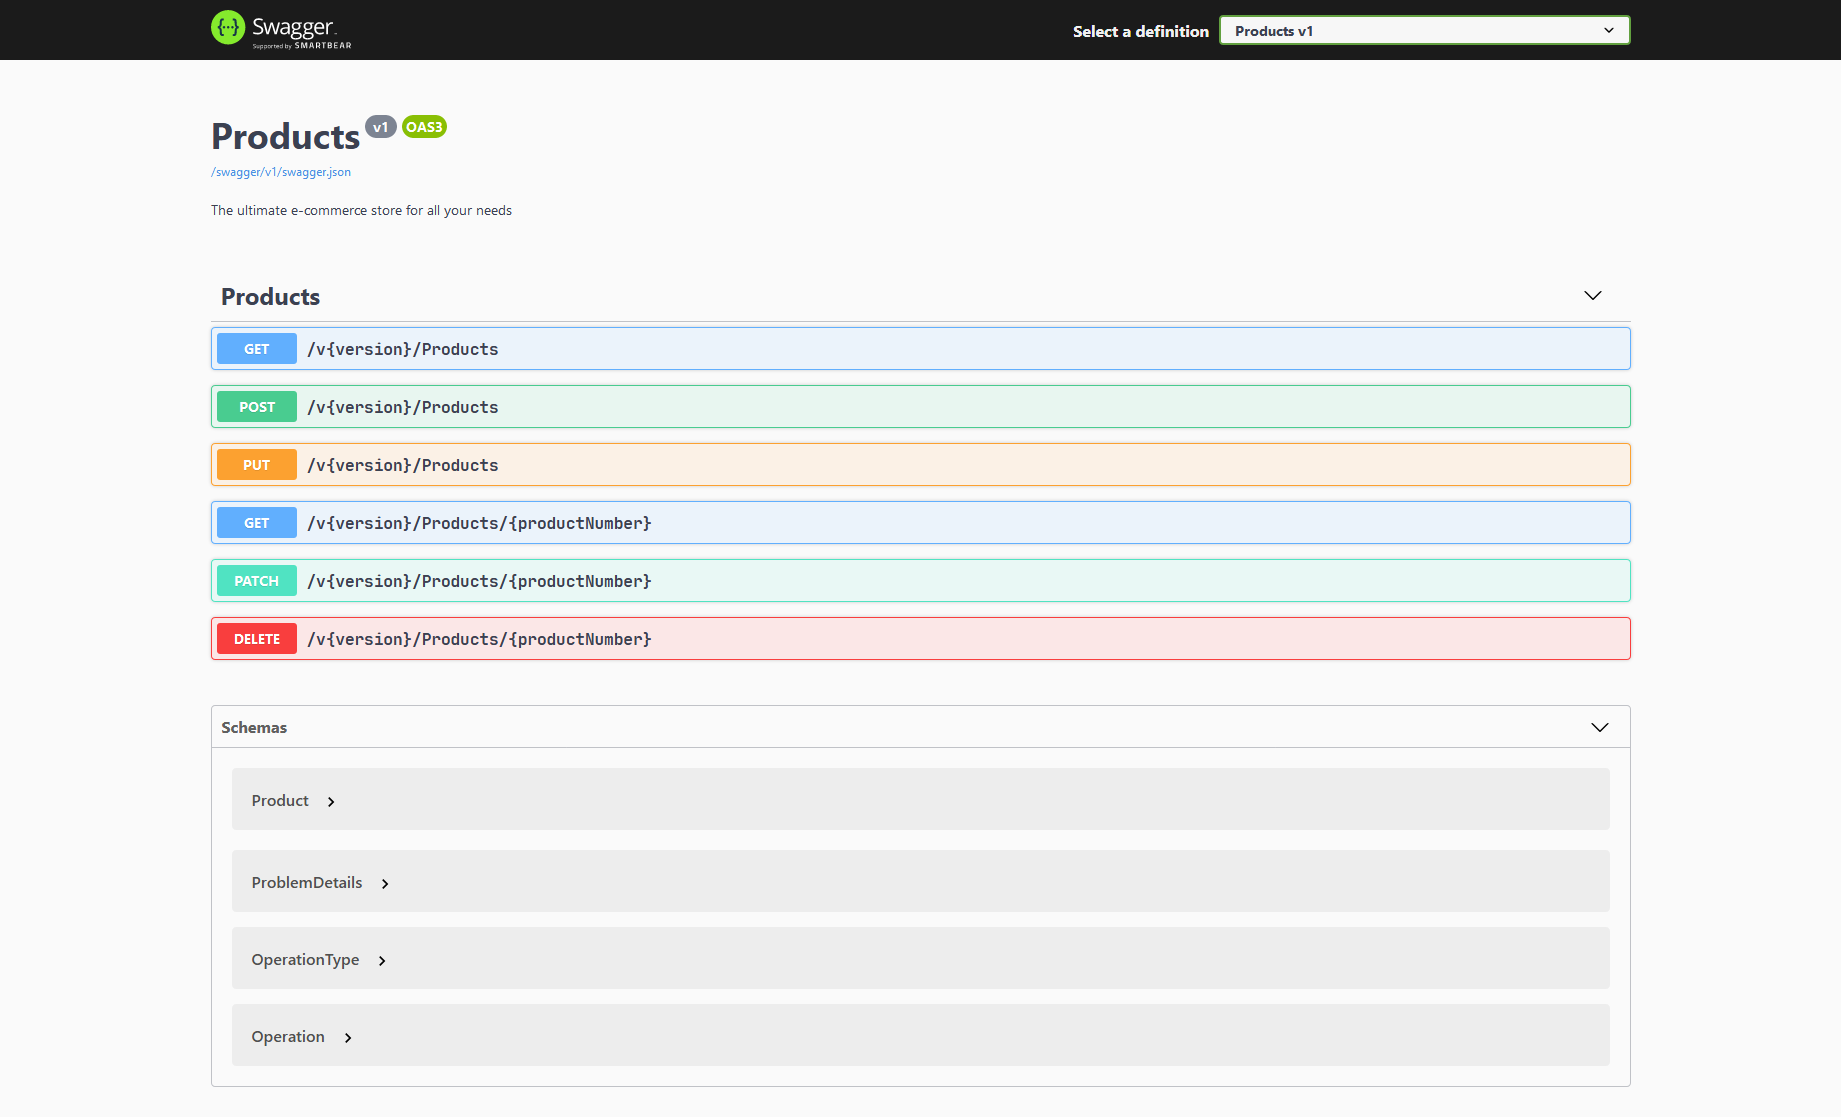
Note OpenApiInfo comes from the Microsoft.OpenApi.Models namespace. With this, navigate to http://localhost:5000/swagger in the browser to check out the swagger doc.
The page should look like this:
From the swagger doc, feel free to poke around and fire requests to the API from this tool. Fellow developers from across the organization might even buy you a cup of coffee for making their lives easier.
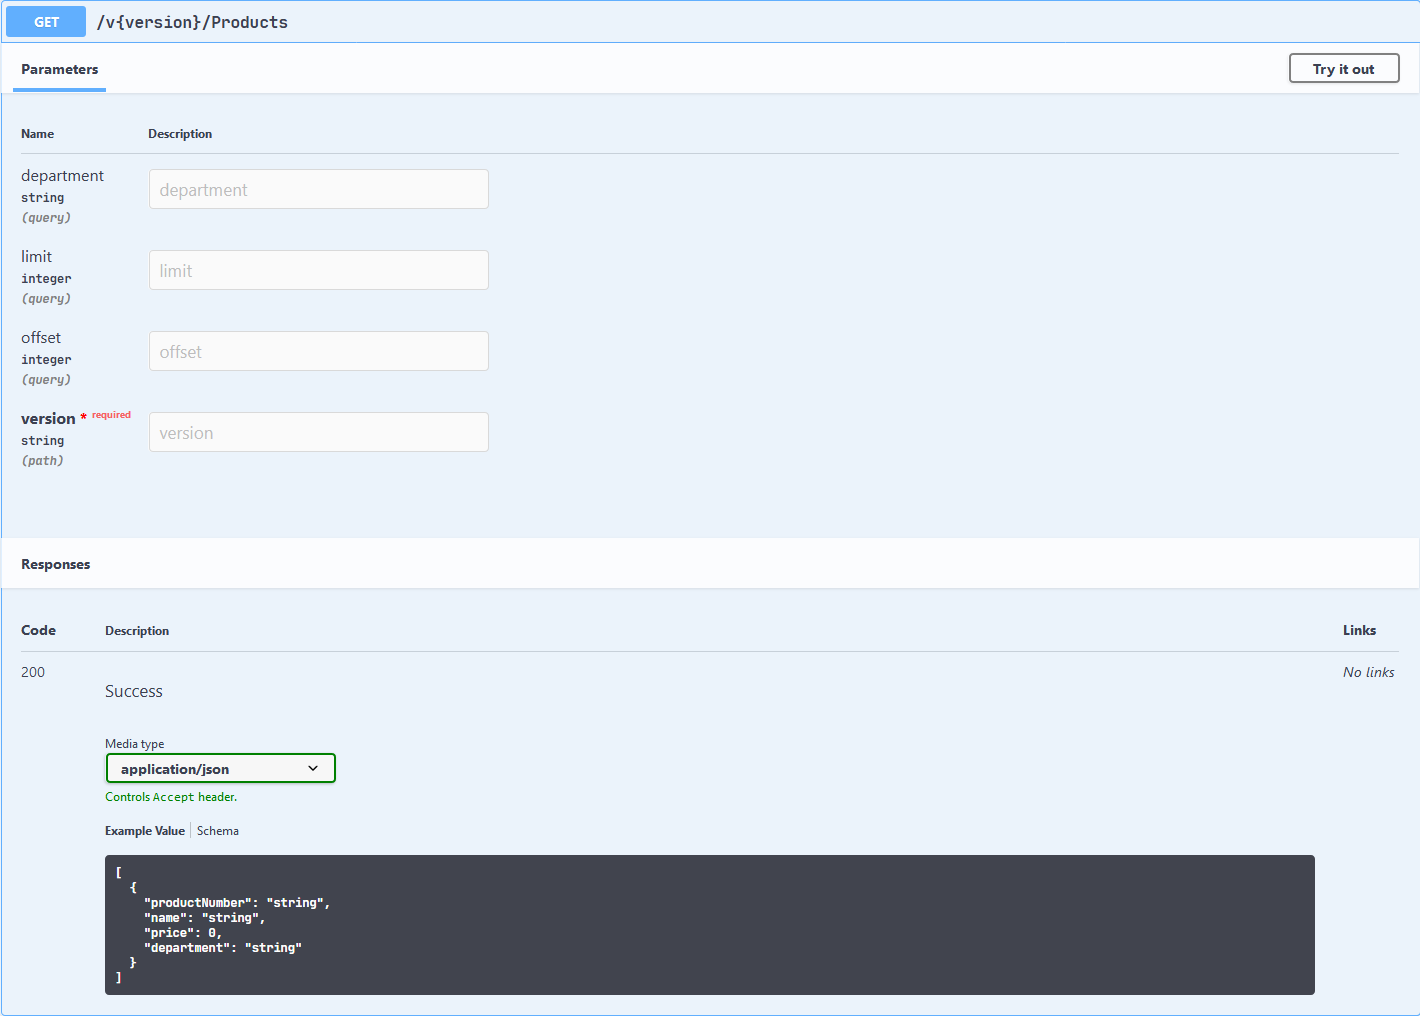
Note how expanding GET /Products picks up C# data types from the method in the controller:
The next stop is the logger. I will use NLog to store logs in the back end. This enables the API to save logs for further analysis. In a real environment, logs are useful for troubleshooting outages. They also aid in gathering telemetry to help understand how the API is utilized in the wild.
To set up the logger, I am going to need the following:
- A NuGet package
- An nlog.config settings file
- Changes in the
Programclass - Tweaks in appsettings.json
To install the NuGet package:
|
1 |
dotnet add package NLog.Web.AspNetCore |
The nlog.config file can be:
|
1 2 3 4 5 6 7 8 9 10 11 12 13 14 15 16 17 18 19 20 21 22 23 24 25 26 27 28 29 30 31 32 33 34 35 36 37 38 |
<?xml version="1.0" encoding="utf-8" ?> <nlog xmlns="http://www.nlog-project.org/schemas/NLog.xsd" xmlns:xsi="http://www.w3.org/2001/XMLSchema-instance" throwExceptions="false" throwConfigExceptions="false" autoReload="true" internalLogLevel="Warn" internalLogFile= "C:\temp\BuildRestApiNetCore\RestApi-internal-nlog.txt"> <extensions> <add assembly="NLog.Web.AspNetCore"/> </extensions> <targets async="true"> <target xsi:type="File" name="ownFile-web" fileName= "C:\temp\BuildRestApiNetCore\RestApi-${shortdate}.log"> <layout xsi:type="JsonLayout"> <attribute name="Timestamp" layout="${longdate}" /> <attribute name="Level" layout="${uppercase:${level}}" /> <attribute name="Logger" layout="${logger}" /> <attribute name="Action" layout="${aspnet-mvc-action}" /> <attribute name="Message" layout="${message}" /> <attribute name="Exception" layout="${exception:format=tostring}" /> </layout> </target> </targets> <rules> <logger name="Microsoft.*" maxlevel="Info" final="true" /> <logger name="*" minlevel="Info" writeTo="ownFile-web" /> </rules> </nlog> |
Pay attention to Layout because it sets the type of log file which is set to JsonLayout. This JSON format has the most flexibility when consuming log files in different analytical tools. Logger rules do not log errors from Microsoft.* to keep chattiness down to a minimum. As a bonus, unhandled exceptions from the API get logged but do not rethrow because throwExceptions is false. Usage here may vary, but it is generally a good idea to handle all unhandled exceptions in the logger.
Inside the Program class, enable NLog, remembering to include using NLog.Web:
|
1 2 3 4 5 6 |
Host.CreateDefaultBuilder(args) .ConfigureWebHostDefaults(webBuilder => { webBuilder.UseStartup<Startup>(); }) .UseNLog(); |
Finally, make these tweaks to configure logging in appsettings.json:
|
1 2 3 4 5 6 7 8 |
"Logging": { "LogLevel": { "Default": "Information", "Microsoft": "None", "Microsoft.AspNetCore": "Error", "Microsoft.Hosting.Lifetime": "Information" } } |
The basic idea is to cut the number of log entries which aren’t relevant to this API. Feel free to poke around with the settings, so it logs exactly what the API needs.
It’s time to take this for a spin. In the Controller class, add using Microsoft.Extensions.Logging and inject a plain old ASP.NET logger:
|
1 2 3 4 5 6 7 8 |
private readonly ILogger<ProductsController> _logger; public ProductsController(ProductContext context, ILogger<ProductsController> logger) { _logger = logger; // ... } |
Say now the team decides to grab telemetry around how often clients ask for 100 records or more.
Put this inside GetProducts:
|
1 2 |
if (request.Limit >= 100) _logger.LogInformation("Requesting more than 100 products."); |
Be sure to have a temp folder handy to check the logs, for example, C:\temp\BuildRestApiNetCore\.
This is what an entry might look like:
|
1 2 3 4 5 6 7 |
{ "Timestamp": "2020-07-12 10:30:30.8960", "Level": "INFO", "Logger": "BuildRestApiNetCore.Controllers.ProductsController", "Action": "GetProducts", "Message": "Requesting more than 100 products." } |
REST Endpoints with Verbs
Take a deep breath in and breath out. This API is almost production-ready with minimal code. I will now quickly turn towards REST features such as POST, PUT, PATCH, and DELETE.
The POST endpoint takes in a body with the new product and adds it to the list. This method is not idempotent because it creates new resources when invoked.
Put this in ProductsController:
|
1 2 3 4 5 6 7 8 9 10 11 12 13 14 15 16 17 18 19 |
[HttpPost] [ProducesResponseType(StatusCodes.Status201Created)] [ProducesResponseType(StatusCodes.Status400BadRequest)] public ActionResult<Product> PostProduct([FromBody] Product product) { try { _context.Products.Add(product); _context.SaveChanges(); return new CreatedResult($"/products/{product.ProductNumber.ToLower()}", product); } catch (Exception e) { _logger.LogWarning(e, "Unable to POST product."); return ValidationProblem(e.Message); } } |
ASP.NET automatically handles exceptions via ValidationProblem. This validation returns an RFC 7807 spec compliant response with a message. In a real system, I recommend making sure this does not expose any internals about the API. Putting the exception message here helps clients troubleshoot their code, but security is also important. I opted to include the error message mostly for demonstration purposes. The exception is also logged as a warning, to avoid logging a bunch of errors. Monitoring tools might page out to whoever is on-call when there are too many exceptions. A best practice is to only log errors during catastrophic failures that might need human intervention.
Using the swagger tool, the curl command is:
|
1 2 3 4 |
curl -i -X POST http://localhost:5000/v1/products -H "accept: application/json" -H "Content-Type: application/json" -d "{\"productNumber\":\"string\",\"name\":\"string\",\"price\":10,\"department\":\"string\"}" |
When there are problems with the request, the API responds with:
|
1 2 3 4 5 6 7 8 |
{ "errors": {}, "type": "https://tools.ietf.org/html/rfc7231#section-6.5.1", "title":"One or more validation errors occurred.", "status": 400, "detail": "An item with the same key has already been added. Key: string", "traceId":"|c445a403-43564e0626f9af50." } |
A 400 (Bad Request) response indicates a user error in the request. Because users can’t be trusted to send valid data, the API logs a warning.
Note that on success POST returns a 201 with Location:
|
1 2 3 4 5 6 7 |
HTTP/1.1 201 Created Date: Mon, 13 Jul 2020 22:52:46 GMT Content-Type: application/json; charset=utf-8 Server: Kestrel Content-Length: 76 Location: /products/bc916 api-supported-versions: 1.0 |
This points the client towards the new resource. So, it is a good idea to spin up this GET endpoint:
|
1 2 3 4 5 6 7 8 9 10 11 12 13 14 15 |
[HttpGet] [Route("{productNumber}")] [ProducesResponseType(StatusCodes.Status200OK)] [ProducesResponseType(StatusCodes.Status404NotFound)] public ActionResult<Product> GetProductByProductNumber([FromRoute] string productNumber) { var productDb = _context.Products .FirstOrDefault(p => p.ProductNumber.Equals(productNumber, StringComparison.InvariantCultureIgnoreCase)); if (productDb == null) return NotFound(); return Ok(productDb); } |
A 404 response indicates the resource does not exist in the API yet but might become available at some point in the future.
PUT is similar:
|
1 2 3 4 5 6 7 8 9 10 11 12 13 14 15 16 17 18 19 20 21 22 23 24 25 26 27 28 |
[HttpPut] [ProducesResponseType(StatusCodes.Status200OK)] [ProducesResponseType(StatusCodes.Status404NotFound)] [ProducesResponseType(StatusCodes.Status400BadRequest)] public ActionResult<Product> PutProduct([FromBody] Product product) { try { var productDb = _context.Products .FirstOrDefault(p => p.ProductNumber.Equals(product.ProductNumber, StringComparison.InvariantCultureIgnoreCase)); if (productDb == null) return NotFound(); productDb.Name = product.Name; productDb.Price = product.Price; productDb.Department = product.Department; _context.SaveChanges(); return Ok(product); } catch (Exception e) { _logger.LogWarning(e, "Unable to PUT product."); return ValidationProblem(e.Message); } } |
In REST design, a PUT allows updates to an entire resource. It is idempotent because multiple identical requests do not alter the number of resources.
Like a GET 404 response, the resource is unavailable for updates, but this might change later. As a bonus, ASP.NET provides model binding validation out of the box. Go ahead, try to update an existing resource with bad data.
This JSON is the Bad Request response you might see:
|
1 2 3 4 5 6 7 8 9 |
{ "errors": { "Price": ["The price field is required."] }, "type": "https://tools.ietf.org/html/rfc7231#section-6.5.1", "title": "One or more validation errors occurred.", "status": 400, "traceId": "|c445a409-43564e0626f9af50." } |
PATCH is the most complex of all verbs because it only updates a part of the resource via a JSON Patch document.
The good news is .NET Core helps with a NuGet package:
|
1 |
dotnet add package Microsoft.AspNetCore.Mvc.NewtonsoftJson |
Then, enable this in ConfigureServices:
|
1 |
services.AddControllers().AddNewtonsoftJson(); |
This is the PATCH endpoint. Remember using Microsoft.AspNetCore.JsonPatch:
|
1 2 3 4 5 6 7 8 9 10 11 12 13 14 15 16 17 18 19 20 21 22 23 24 25 26 27 28 29 30 31 32 |
[HttpPatch] [Route("{productNumber}")] [ProducesResponseType(StatusCodes.Status200OK)] [ProducesResponseType(StatusCodes.Status404NotFound)] [ProducesResponseType(StatusCodes.Status400BadRequest)] public ActionResult<Product> PatchProduct([FromRoute] string productNumber, [FromBody] JsonPatchDocument<Product> patch) { try { var productDb = _context.Products .FirstOrDefault(p => p.ProductNumber.Equals(productNumber, StringComparison.InvariantCultureIgnoreCase)); if (productDb == null) return NotFound(); patch.ApplyTo(productDb, ModelState); if (!ModelState.IsValid || !TryValidateModel(productDb)) return ValidationProblem(ModelState); _context.SaveChanges(); return Ok(productDb); } catch (Exception e) { _logger.LogWarning(e, "Unable to PATCH product."); return ValidationProblem(e.Message); } } |
I hope you see a pattern start to emerge with the different status code response types. A 200 OK means success and a 400 Bad Request means user error. Once a patch gets applied it appends any validation errors in ModelState. Take a closer look at JsonPatchDocument, which does model binding, and ApplyTo, which applies changes. This is how a JSON Patch document gets applied to an existing product in the database. Exceptions get logged and included in the response like all the other endpoints. A 404 (Not Found) response indicates the same situation as all the other verbs. This consistency in response status codes helps clients deal with all possible scenarios.
A JSON patch request body looks like the following:
|
1 2 3 4 5 |
[{ "op": "replace", "path": "price", "value": 13.67 }] |
Model binding validation rules still apply to the patch operation to preserve data integrity. Note the patch gets wrapped around an array, so it supports an arbitrary list of operations.
This is PATCH in curl:
Last stop, a DELETE method:
|
1 2 3 4 5 6 7 8 9 10 11 12 13 14 15 16 17 18 |
[HttpDelete] [Route("{productNumber}")] [ProducesResponseType(StatusCodes.Status200OK)] [ProducesResponseType(StatusCodes.Status404NotFound)] public ActionResult<Product> DeleteProduct([FromRoute] string productNumber) { var productDb = _context.Products .FirstOrDefault(p => p.ProductNumber.Equals(productNumber, StringComparison.InvariantCultureIgnoreCase)); if (productDb == null) return NotFound(); _context.Products.Remove(productDb); _context.SaveChanges(); return NoContent(); } |
The status code response is No Content:
|
1 2 3 4 |
HTTP/1.1 204 No Content Date: Tue, 14 Jul 2020 22:59:20 GMT Server: Kestrel api-supported-versions: 1.0 |
This status signals to clients that the resource is no longer available because the response body is empty. The response can also be 204 (Accepted) if this needs an async background process to clean up the data. In a real system, soft deletes are sometimes preferable to allow rollback during auditing. When deleting data, be sure to comply with GPDR or any policy that applies to the data.
Conclusion
.NET Core adds many useful features to your toolbelt to make working with REST APIs easier. Complex use cases such as documentation, validation, logging, and PATCH requests are simpler to think about.
Load comments