

After installing a SQL Server on Linux, the next logical step is the migration of databases to the new instance. I usually use SQL Server log shipping for migration purposes as that helps me to reduce the maintenance window and database downtime. I use the following 2 stages process.
First Stage
The first part of this is preparation which doesn’t incur any downtime:
- Install the new MS SQL Server instance. How to install MS SQL Server 2017 on Linux is described in my article: SQL Server 2017 for Linux First Impressions
- Restore the databases that will be migrated on the new instance from the recent full backups using NORECOVER.
- Apply differential backups to the target databases (using NORECOVERY) , if that is applicable.
- Apply all the log backups after the last full/differential backup using NORECOVER.
- Establish a log shipping session for each database migrated between old and new servers
There are some prerequisites for this process. The database(s) must be in the full recovery mode, and the new instance must be the same or higher version of SQL Server. For example it is possible to migrate a database from SQL Server 2016 to SQL Server 2017, but it isn't possible to migrate a database from SQL Server 2016 to SQL Server 2014 using this process.
If a migrated database is tiny in size, you probably don’t need to follow this process. In this case a simple backup and restore process will be applicable. In real life, we often have to deal with huge databases in a production environment, and we have a tiny maintenance window.
Note. In order to make my example more realistic, I treat the tiny database in a test environment as a huge production database. In real life I would choose backup and restore method for this particular database.
Second Stage
The second stage is the actual migration, and it does incur some downtime. I usually follow the following process for at this stage:
- Stop the applications that use the databases (that is usually done by an application support team).
- Switch the production databases to read-only mode on the old server. This is optional, but I do prefer to include this step in order to guarantee the consistency of my production data.
- Backup, deliver, and restore the most recent logs on the new instance. This can be done by executing the SQL Server Agent jobs created by the Log Shipping setup.
- Recover the databases on the new instance.
- If the step 2 was implemented, the databases on the new instance will be set to read-only. That is also indicates that the last log backup was successfully implemented and the new databases are in a consistent state. The migrated databases on the new instance have to be switched into read and write mode so the applications can operate with data in the databases.
- Redirect the applications to the new instance (that is usually done by an application support team as well).
- Start the applications and confirm that the migration was successful (that is usually done by an application support team).
As you can see the process described above is designed to minimize downtime during the database migration. That is very common requirement for a business to reduce application downtime during any planned maintenance.
Let’s go through this process in details and using a real database which hosted on the MS SQL Server 2016 on Windows 2016. During this process the database will be migrated to the freshly installed MS SQL Server 2017 on Linux.
An example database migration
I can show how to implement this process on a real database. I have a two different SQL Server instances, one of which is SQL Server 2016 on Windows and the other is SQL Server 2017 on Linux. I will migrate a test database from the SQL Server 2016 instance to 2017. My test environment is shown on the picture below.

Note. Before continuing with the process you need to make sure that you have a samba client installed on your Linux box. Also your Linux box must support cifs and that feature must be installed and enabled. Cifs will allow you to mount a Windows share as a network drive on a Linux box.
Optionally you can install and configure a samba server on a Linux box. I have installed a samba server on my Linux box but it was used only once. I used a samba share on my Linux box in order to transfer initial full backup of the database on that box.
Configuring a Samba Server
First we need to create a directory, which we will share on our Linux box. I have created the directory “logshipping” in the directory “/opt/microsoft/”. I used the command “mkdir”. How that was done is shown on the screenshot below.

In order to configure the Samba server on the Linux box, we need to edit “/etc/samba/smb.conf” and restart the samba service. In my experiment, I used “vi” as the editor for the Samba configuration file and restarted the Samba service using the command “sudo service smb restart”.

The configuration file for my samba server is shown on the screenshot below.

I shared the directory “/opt/microsoft/logshipping” with the resource name “logshipping”. I also granted to all the users from the subnet “192.168.1.” the read and write permissions in that directory. That is probably not the most secusqlservre option but it did work. Anyway I don’t have an AD controller in my laboratory environment so it was the only option in my particular case. If you do this in production environment please contact your Linux administrator(s) in order to make sure that your changes won’t compromise your server security.
Then I created a samba user for my Linux account “sqlserver” as it was shown on the screenshot below.

Note that on the RedHat Linux you need to configure security context for the shared directory as it is shown below. Otherwise the operating system prevents network access to the directory.

If firewall is enabled on your Linux box you must configure it in order to allow other computers in the network communicate with the samba server. That can be done for example using the command “sudo firewall-cmd –add-service=samba --permanent”. Do not forget to bounce firewall and samba services after configuring the firewall.

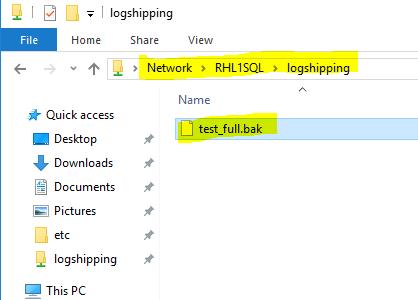
When everything was done I checked my Linux share from the Windows box.

I created a text file in the shared folder in order to make sure that I have write permissions on the shared directory from my Windows box.

Note. This step is optional you may consider skipping that if you do not want to ‘push’ backups from the Windows server to the Linux box. Another option is to ‘pull’ backup files from the Windows box to the Linux box. I used the ‘pull’ option for transact log backups which is discussed later in this article.
Configure Log Shipping
Firstly, I took a full backup of the test database from my SQL Server 2016 instance on Windows. For this purpose I used SQL Server Management Studio as it is shown in the screenshot.

Then I copied that full backup file to the shared folder on my Linux box.
After that I become able to restore that backup on the MS SQL Server 2017 instance on my Linux box. I used SQL Server Management Studio on my Windows box in order to restore the backup. Optionally you can use sqlcmd or Microsoft SQL Operations Studio on your Linux box. Do not forget that Microsoft distributes sqlcmd and Microsoft SQL Operations Studio separately from the SQL Server on Linux distribution package.

Because it is impossible to have the same file on a Linux and on a Windows box you must use move option in the restore command. How to use this option is shown on the screenshot below.

In order to be able to apply additional backups on the target server (MS SQL Server 2017 on Linux) the database must be restored with ‘NORECOVERY’ option. The MS SQL Server Management Studio has this option, which is called ‘Recovery state’. Optionally you can execute the ‘restore database’ command from a query window or as a command in sqlcmd.

After the restore has been complete the new database will stay in the restoring state. That is also means that all the prerequisites for setting up of logshipping have been met and we can configure a logshipping session.

I used GUI of MS SQL Server Management Studio in order to set up logshipping session for the test database.

I used the default option which is backups and restores every 15 minutes. That can be changed latter on. Click Backup Settings.

You need to provide the backup folder to t-log backups and the windows share name for that folder.

The SQL Server 2016 on Windows is my primary instance.

I need to click "Add". My secondary instance is SQL Server 2017on Linux and the secondary database has exactly the same name ’test’ as the primary database. Because I have restored the database the initialization of the secondary database is not required.

Also I need to provide a network folder for copying the backup files on the Linux box.

Again I have an option to choose the scheduler for restores but that can be easily changed later on. That is why I go for a default scheduler.

After that I can complete logshipping wizard and Management Studio will complete process of creation of the logshipping session.

When the logshipping session was created I noticed that SQL Server can take the transaction log backups, but was not able to copy and restore them. The problem is that SQL Server on Linux does not support Windows share names (something like ‘\\myserver\myshare’). So we have to mount the windows share from the primary server as a network filesystem on the Linux box.
There are many ways how to mount a samba share on a Linux server but I used the ‘mount’ command. If you want to instruct your Linux box to mount the network disk after the reboot you should edit the ‘/etc/fstab’ file. I didn’t use the former option only because I need the logshipping session only for the database migration process so that network disk is temporary.

After that I still was not able to see the transact-log backups in the network folder on the Linux box. This meant there was a problem that the new log backups were not being applied to the secondary instance. The problem was that the logshipping wizard in the SQL Server Management Studio does not support the Linux paths. In order to remediate this problem I asked the wizard to generate the script instead of implementing the changes.

In the script the paths for the primary server were correct.

For the secondary server, I changed the destination directory to the Linux folder ‘/opt/microsoft/logshipping’ and the source directory to ‘/var/opt/mssql/tlogs’. The Linux folder ‘/var/opt/mssql/tlogs’ is just an alternative name for the network share ‘//192.168.1.2/backups’.

After fixing these issues the log backups started to restore as expected.

Database Migration
As it was described above, during a migration I usually switch the primary database into read-only mode. I did this in the database options, as shown below.

Once this was done, I executed the log shipping backup job on the primary server.

I executed the log shipping copy job on the secondary server. That job copied the last log backup from the Windows server to the Linux server.

I executed the restore job on the secondary server in order to apply the last log backup from the primary server.

My secondary database was in the restoring state and I had to run recovery in order to make it available for the users. I used T-SQL command below. After that my database switched to the read-only state, the same as it was on the primary server.

Finally I switched the database in the read-write mode and changed the compatibility level from 130 to 140. At this point, the applications could be redirected to the migrated database.

With this process, I successfully completed my first database migration from SQL Server 2016 on Windows to SQL Server 2017 on Linux. The database was unavailable only for a very short period of time.
After this was done, I cleaned up the system by removing the log shipping jobs, unmounting the samba drives, stopping the samba server, and decommissioning the old SQL Server 2016 on Windows instance.
Conclusion
We can employ log shipping in order to perform a migration of our databases from Windows to Linux. But there are some differences from how you do it between two Windows servers and how you do it between Windows and Linux servers. The process is relatively simple and even a person with limited Linux background, like me, can do this.
The most inconvenient thing I found is that SQL Server Management Studio (at least version 17.4) does not support Linux paths in the wizard mode. I hope that it will be fixed in the feature versions of the product.

