My previous article, Create VMs In Azure Part 1, described the process of creating virtual machines in Azure using PowerShell. It covered foundational information, such as making Azure logins from PowerShell easier, and determining what images are available to create VMs with on Azure. This included extracting the exact values needed for parameters when creating your VM. Virtual networking was covered next. This included not just creating the network but the security group to allow traffic through the firewall, such as HTTP and RDP. Finally, the article demonstrated the creation of a virtual NIC, or Network Interface Card, the object that handles communication between the virtual machine and the network.
All of this was done using the PSAzure module, a new project available on my GitHub site.
The previous article goes more into the details on the module, so if you haven’t read it yet you’re missing out on a lot of fun! (If you want to go read it now, go ahead. I’ll wait.) You do need to have the module installed and the Azure objects created from the previous article if you wish to follow along with this article.
This article will continue the journey. You’ll create the virtual machine itself, then discuss some management techniques for your VM. Mom always taught me to clean up after myself, so at the end you’ll see how to remove all the objects created in these articles.
Creating the VM
We’ll assume you are picking up where we left off in the last article. You are in the Create-AzureVM.ps1 sample script, have logged in, created the resource group, storage, and virtual network. As a reminder, here are some of the variables from that part of the article you’ll be using when you create the VM.
|
1 2 3 4 |
$resourceGroup = 'AzurePSTestRG' $storageAccount = 'azurepsteststorageacct' $location = 'southcentralus' $nicName = 'ArcanePSTestNIC' |
If it’s been awhile since you read the first article and don’t remember the values you used, just locate the resource group in the Azure Portal and view the objects in the Overview page. Alternatively, you can run this command to see the objects in PowerShell.
|
1 |
Get-AzureRmResourceGroup -Name @resourceGroup |
To continue the process, you’ll need to layout a few more variables. You’ll start by providing the machine name, the name for its primary disk, along with the administrator login and password.
|
1 2 3 4 |
$vmName = 'AzurePSTestVM' $adminName = 'ArcaneCode' $adminPW = 'mySuperStr0ngP@ssword' $diskName = 'AzurePSTestDisk' |
Many of the standards around passwords for real computers also exist in Azure. They should be between 8 and 123 characters in length and must include characters from at least three of the following: an uppercase character, a lowercase character, a number, and a special character. Note that control characters, such as the ENTER key, are not allowed.
Next, define variables that dictate the image you want to use to create the VM, as well as the size of the machine.
|
1 2 3 4 5 |
$vmSize = 'Basic_A3' $vmPublisher = 'MicrosoftSQLServer' $vmOffer = 'SQL2016SP1-WS2016' $vmSKU = 'SQLDEV' # By default it uses the latest version for a SKU |
Where did these values come from? In the previous article, the section Knowing Your VM Options explored how to determine what images are available for building a VM. You can think of an image as a virtual ISO or DVD that you’d use to install an operating system and software on a new computer. The first variable, $vmSize, indicates the virtualized hardware platform. How many CPUs, cores, RAM, disk space and the like.
At this point, you are ready to create your new virtual machine in Azure. If you followed along in the last article, you have the network created, set the firewall rules, and established the virtual NIC for the VM to use. As seen above, you have the information needed to indicate what image to use and how much hardware to allocate to the machine. Now all that’s left is to simply call the PSAzure module’s New-PSAzureVM function.
|
1 2 3 4 5 6 7 8 9 10 11 12 13 14 |
New-PSAzureVM ` -ResourceGroupName $resourceGroup ` -VMName $vmName ` -VMAdminName $adminName ` -VMAdminPassword $adminPW ` -VMSize $vmSize ` -Publisher $vmPublisher ` -Offer $vmOffer ` -SKU $vmSKU ` -StorageAccountName $storageAccount ` -DiskName $diskName ` -NICName $nicName ` -Location $location ` -Verbose |
‘Simply’ is a bit misleading, there’s actually a lot going on inside the function. Here’s what needs to be done.
- Make sure the VM doesn’t already exist; if it does just quit the function.
- Create the administrator credentials.
- Generate an Azure RM configuration object.
- Specify the base operating system (Windows or Linux)
- Indicate which image to use to build the VM, in other words the specific operating system and software.
- Add the virtual NIC to the configuration.
- Designate which storage account should be used to save the VM.
- Get the URI for the virtual disk and add that to the VM configuration.
- Create the VM!
Step 1 – Does the VM already exist?
It starts like almost every other function in the PSAzure module, by checking to see if the VM already exists.
NOTE: The code shown in these steps is from the module, so you will not run them.
|
1 |
$exists = Test-PSAzureVM -ResourceGroupName $ResourceGroupName -VMName $VMName |
The Test-PSAzureVM function is pretty simple. It starts with a check to see if the virtual machine exists:
|
1 2 |
$exists = <strong>Get-AzureRmVm</strong> -ResourceGroupName $ResourceGroupName | <strong>Where-Object</strong> Name -eq $VMName |
It then returns either true or false. Back in the New-PSAzureVM function, it checks this result at the beginning of an if statement. Should the VM not exist the code in the if, consisting of the remaining steps, will be executed.
Step 2 – Administrator Credentials
Like any other computer, real or virtual, the VM will need an administrator account. The first order of business then is to take the password and convert it to a secure string. With that you can create a credential object.
|
1 2 3 |
$password = $VMAdminPassword | <strong>ConvertTo-SecureString</strong> -AsPlainText -Force $cred = <strong>New-Object</strong> PSCredential ($VMAdminName, $password) |
Step 3 – Create the VM Configuration Object
The next step is to begin creating an Azure VM configuration object. A shopping list is a good analogy for a VM configuration object. The configuration object is the shopping list itself, and it’s created like this:
|
1 |
$vm = <strong>New-AzureRmVMConfig</strong> -VMName $VMName -VMSize $VMSize |
In addition to creating the ‘shopping list’, you also indicated what you want to name the list ($VMName), and how big the shopping cart should be ($VMSize). Now you just start adding items to the ‘shopping list’. Of course, in this case you are actually going to continue to add more information to the configuration in order to tell Azure what you want the finished VM to look like.
Step 4 – Base Operating System
The next step is to indicate what operating system you want, at a high level. The two choices, at least at the time of this writing, are Windows and Linux.
|
1 2 3 4 5 6 |
$vm = Set-AzureRmVMOperatingSystem -VM $vm ` -Windows ` -ComputerName $VMName ` -Credential $cred ` -ProvisionVMAgent ` -EnableAutoUpdate |
The syntax may look a bit odd here. In the -VM parameter, you pass in the $vm configuration. But then you return that back to the $vm variable. Technically, you are simply replacing whatever had been in the $vm variable with the result returned from Set-AzureRmVMOperatingSystem. Conceptually though, you are continuing to build enough information into a variable to create a virtual machine.
Step 5 – Set the Image to Use
At this point the $vm variable has information about the base configuration as well as which operating system to run. Next is to indicate the image you want.
|
1 2 3 4 5 |
$vm = Set-AzureRmVMSourceImage -VM $vm ` -PublisherName $Publisher ` -Offer $Offer ` -Skus $SKU ` -Version $Version |
You pass in the $vm variable built so far, along with the publisher, offer, SKU, and version. This adds to the VM configuration telling not only that you want Windows, but specifically which operating system and software as well. A note about the $version variable. When you called the New-PSAzureVM function, you didn’t pass in a version parameter. In the parameter list at the top of the function you’ll see that the $Version parameter defaults to ‘latest’.
|
1 |
[string]$Version = 'latest' |
You could have course overridden this if you needed a specific version.
Step 6 – Adding the NIC
The next thing you need is an object variable for the virtual NIC. However, only the name of the NIC was passed in. That’s where the PSAzure module’s Get-PSAzureVirtualNIC function comes in handy.
|
1 2 |
$nic = Get-PSAzureVirtualNIC -ResourceGroupName $ResourceGroupName ` -NICName $NICName |
The Get-PSAzureVirtualNIC function uses the Get-AzureRmNetworkInterface cmdlet to get a NIC object based on just the name of the NIC and its resource group. The critical thing you need from the NIC object is its Id property. Once you have the NIC Id, you are ready to add the NIC to the configuration.
|
1 |
$vm = <strong>Add-AzureRmVMNetworkInterface</strong> -VM $vm -Id $nic.Id |
Step 7 – Where to Store the VM
At this point you now know what you want to create but haven’t yet said where to store it. That’s where the next step comes in. You will need to have a reference to the storage account created (in the previous article) for this purpose.
|
1 2 3 |
$storageAccount = Get-AzureRMStorageAccount ` -ResourceGroupName $ResourceGroupName ` -Name $StorageAccountName |
Just to be clear, what you will actually be storing is the disk for the VM. In this step you now have a reference to the Azure storage account. This will be used in the next step to get the disk URI.
Step 8 – Get the Disk URI and Add to The Configuration
In this step you get the URI, or Uniform Resource Indicator, for the disk object. A URI is similar to a URL, except it doesn’t point to a web page but instead to an object. You begin composing the URI by first accessing the endpoint of the storage account.
|
1 2 |
$diskURI = $storageAccount.PrimaryEndpoints.Blob.ToString() ` + 'vhds/' + $DiskName + '.vhd' |
After accessing the primary endpoint of the blob and converting that to a string, you then compose a file name by adding the disk name with a VHD extension. By prepending the disk name with vhds/ you create what is in essence a virtual folder. This makes it easy to group the virtual disks together within this storage account. For example, you may want to come back later and add a second virtual drive to your VM, using this method would allow them to be grouped together.
Once you have the URI, you can then add that to the VM configuration.
|
1 2 3 4 |
$vm = <strong>Set-AzureRmVMOSDisk</strong> -VM $vm ` -Name $DiskName ` -VhdUri $diskURI ` -CreateOption FromImage |
Now the configuration is complete, and you can finally create your VM!
Step 9 – Create the VM!
That was a lot of work to get to the final step, calling the New-AzureRmVm cmdlet to create your virtual machine. In it you pass in the resource group, location, and configuration you so lovingly built.
|
1 2 3 |
<strong>New-AzureRmVm</strong> -ResourceGroupName $ResourceGroupName ` -Location $Location ` -VM $vm |
If you are following along at home, and call the New-PSAzureVM function, it can take several minutes for Azure to generate your virtual machine, so be patient. On average the time is between 3 and 5 minutes, although it has taken as long as 20 during what must have been a heavy load time for Azure. Again, be patient, this can be an excellent time to get some coffee.
Did It Work?
So, the New-PSAzureVM function completed without errors. How can you validate that it worked? Well, of course you could login to the Azure web portal, and look at your list of virtual machines.

You can also run the following function, built into the PSAzure module, as shown in the Create-AzureVM.ps1 example script.
|
1 2 |
Get-PSAzureVMStatus -ResourceGroupName $resourceGroup ` -VMName $vmName |
It returns the following letting you know it is indeed there, and that it is running.
|
1 |
VM running |
The next step would be to access the new Azure VM. To do so, there’s another function in PSAzure that will create an RDP file for you.
|
1 2 3 4 5 |
$rdpFile = "$($dir)\$($vmName).rdp" New-PSAzureVMRDP -ResourceGroupName $resourceGroup ` -VMName $vmName ` -Path $rdpFile ` -Verbose |
The $rdpFile variable contains the path and name to give the RDP file. The $dir variable was set at the top of the Create-AzureVM.ps1 script. The output should be an RDP file on your drive.
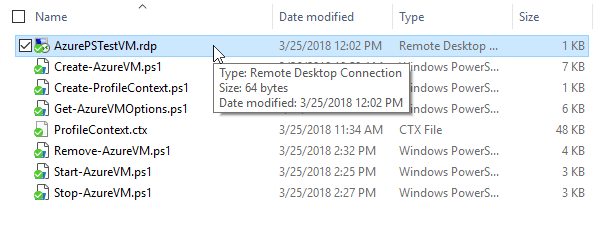
You can either double click on the RDP file and run it from an explorer window, or you can launch it right inside PowerShell.
|
1 |
Invoke-Item $rdpFile |
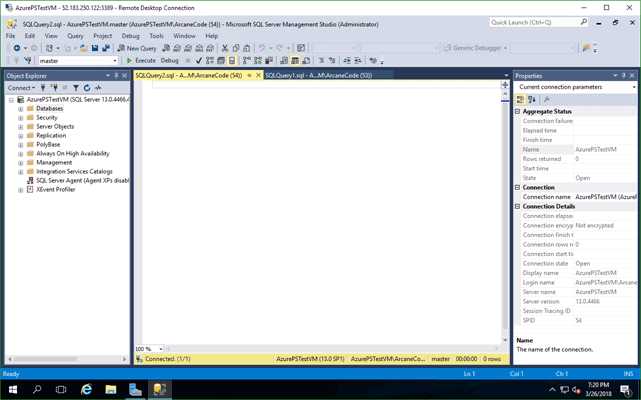
In either case, you will then login to your VM using the admin name and password you setup. In this example, it was ArcaneCode and mySuperStr0ngP@ssword.
Managing Your Money – Stopping and Starting Azure VMs
There’s no doubt, Azure is not an inexpensive proposition, although in many cases much cheaper than setting up physical computers. The PSAzure module has two functions for starting and stopping your VMs, Stop-PSAzureVM and Start-PSAzureVM. These are shown in the corresponding example scripts Stop-AzureVM.ps1 and Start-AzureVM.ps1.
After validating the VM exists, the Start-PSAzureVM function checks to see if the state of the VM is something other than VM running. If so, it uses the Start-AzureRmVm cmdlet to start it.
|
1 2 |
<strong>Start-AzureRmVM</strong> -ResourceGroupName $ResourceGroup ` -Name $VMName |
The Stop-PSAzureRmVm is similar. After it validates the VM exists, it checks the status. If it is in a state VM running, it then attempts to stop it.
|
1 2 3 |
<strong>Stop-AzureRmVM</strong> -ResourceGroupName $ResourceGroup ` -Name $VMName ` -Force |
Note that there are actually two types of ‘stopped’ states for a VM. In the first state the VM is stopped, in other words turned off. This is similar, but not exactly like, putting a physical computer into a hibernate state. The VM can be started again, and quickly. The down side is you still incur costs for the VM in this state. While not as much as when it is running, there is still a cost. This is what happens when you are inside the virtual machine and use the Shut Down option from the Start menu. Within the Azure portal, the VM will show its status as Stopped.
The second option is to deallocate the VM, which is the method the Stop-PSAzureRmVm function uses. It turns off the VM completely. While deallocated, there is no cost to the VM (other than the storage space), the downside is it can take a little bit longer to restart the VM. If you are in the portal and pick Stop on a VM, it goes to a Stopped (deallocated) status (whether the machine had been in a Running or Stopped status).
To be clear, in both cases there are costs to store the VM within the storage account. In addition to storage account costs, in a stopped state the VM will still incur further minimal charges. In a deallocated state, there is no additional charge, at least at the time of this writing.
Putting Away Your Toys
When I was young, mom always taught me to put away my toys. In this case it means removing any objects created during this series, including the virtual machine, storage, networks and resource group. The example script Remove-AzureVM.ps1 found in the PSAzure-Examples folder from the PSAzure module downloaded from the first article demonstrates these methods.
First, if all you want to do is delete the virtual machine itself, you can use the Remove-PSAzureVM function in the PSAzure module.
|
1 2 |
Remove-PSAzureVM -ResourceGroupName $resourceGroup ` -VMName $vmName |
This function does several things. First, it verifies the VM exists. If it does, it calls the Stop-PSAzureRmVm which stops the VM if it is running. Finally, it uses the Azure cmdlet Remove-AzureRmVm to delete it. This is yet another example that demonstrates the usefulness of writing your own functions to combine cmdlets typically called together. Here I’ve combined three common tasks into one function. Checking to see if the VM exists, and only proceeding if it does, as opposed to giving an error. Then it checks to see if the VM is running and if so stops it, again to avoid an error. Finally, it removes the VM.
After you remove the VM you’ll likely want to remove the virtual NIC, unless of course you plan to reuse it.
|
1 2 3 |
Remove-PSAzureVirtualNIC -ResourceGroupName $resourceGroup ` -NICName $nicName ` -Verbose |
With the NIC gone, you can proceed to remove the virtual network (often abbreviated vnet). Note if there is a NIC attached to the vnet, removing it will result in an error.
|
1 2 |
Remove-PSAzureVirtualNetwork -ResourceGroupName $resourceGroup ` -VirtualNetworkName $networkName |
It should be obvious at this point, but if you have other machines using this vnet you are going to have issues.
If the VM is gone, you may not need the storage account. Assume you are not using it for other tasks, you could delete it as well.
|
1 2 3 |
Remove-PsAzureStorageAccount -ResourceGroupName $resourceGroup ` -StorageAccountName $storageAccount ` -Verbose |
All of these removal functions assume you know what you are doing, and don’t waste your time with “Are you sure?” warnings or asking you to confirm. They assume you are an adult and are taking responsibility for your code. Suppressing these is also important should you be running your scripts in an automated fashion. There won’t be anyone around to hit ‘yes’ when the script is run automatically.
These are listed individually, so you can pick and choose. For example, you may wish to just delete a VM, but reuse the network for other virtual machines. Having individual functions for each object allows you flexibility in removing the things you no longer need but retaining those you do want.
There is one final function you can use to obliterate everything with one fell swoop. (If this article was a movie, this is the point where the scary music starts playing.) The PSAzure module has Remove-PsAzureResourceGroup, which deletes a resource group, and everything in it. Everything. It’s all gone. So, to make this perfectly clear:
USE AT YOUR OWN RISK!
|
1 |
Remove-PsAzureResourceGroup -ResourceGroupName $resourceGroup |
Like the other functions in PSAzure, it doesn’t ask “Are You Sure” questions. Once you run this, everything gets wiped out, just like the dinosaurs when that big meteor hit a few (million) years back. However, it can be a great way to clean up everything you created during this series with a single line of code.
Summary
In this two-part series you learned how to create virtual machines using functions in the freely available PSAzure module. Creating wrapper functions for many Azure tasks and bundling them in a module offers many advantages, as outlined in a previous article PowerShell Functions for Reusablity and Restartability in Azure.
Each function was examined, detailing the cmdlets in the AzureRM module that they called. This was especially true with the New-PSAzureVM function, as there were multiple steps that needed to be called, in a specific order, to create the new Azure VM. Wrapping these steps into a function ensures that all the prerequisites were handled so the VM could be created successfully.
You can download the complete PSAzure module code, along with samples of using it, on GitHub.

Load comments