
This is the twentieth article in a series entitled Stairway to Integration Services. Previous articles in the series include:
- What is SSIS? Level 1 of the Stairway to Integration Services
- The SSIS Data Pump - Level 2 of the Stairway to Integration Services
- Adding Rows in Incremental Loads – Level 3 of the Stairway to Integration Services
- Updating Rows in Incremental Loads – Level 4 of the Stairway to Integration Services
- Deleting Rows in Incremental Loads – Level 5 of the Stairway to Integration Services
- Basic SSIS Workflow Management – Level 6 of the Stairway to Integration Services
- Intermediate SSIS Workflow Management – Level 7 of the Stairway to Integration Services
- Advanced SSIS Workflow Management – Level 8 of the Stairway to Integration Services
- Control Flow Task Errors – Level 9 of the Stairway to Integration Services
- Advanced Event Behavior – Level 10 of the Stairway to Integration Services
- Logging – Level 11 of the Stairway to Integration Services
- Advanced Logging – Level 12 of the Stairway to Integration Services
- An Overview of SSIS Variables - Level 13 of the Stairway to Integration Services
- An Overview of Project Conversion - Level 14 of the Stairway to Integration Services
- An Overview of SSIS Parameters - Level 15 of the Stairway to Integration Services
- Flexible Source Locations - Level 16 of the Stairway to Integration Services
- Multiple Flexible Source Locations – Level 17 of the Stairway to Integration Services
- Deployment and Execution – Level 18 of the Stairway to Integration Services
- A Custom Execution Method – Level 19 of the Stairway to Integration Services
Introduction
In the previous installment we discussed the current design of the SQL Server Integration Services Catalog and some implications for the enterprise posed by this design. We extended SSISDB, the SSIS Catalog database, and examined an alternate method for executing SSIS packages in the SSIS Catalog. In this article we will explore SSIS Catalog Environments, the Catalog’s built-in functionality for managing parameters.
Why Discuss SSIS Catalog Environments Now?
That is an excellent question. In Level 18 we took a look at how the SSIS Catalog executes an SSIS package from the Graphical User Interface (GUI) provided in the SQL Server Management Studio (SSMS) Object Explorer. In Level 19 we opened the GUI’s Execute Package page and clicked the Script button to get a peek under the hood of the SSIS Catalog, generating the Transact-SQL scripts that execute during an SSIS package’s execution from within the SSIS Catalog that are shown in Figure 1:

Figure 1
The flow of package execution from within the SSIS Catalog consists of three basic steps:
- Create an Intent-to-Execute
- Configure the Intent-to-Execute
- Execute
Calling the catalog.create_execution stored procedure creates the Intent-to-Execute. The catalog.create_execution stored procedure supplies the value for the parameter @execution_id. The parameters passed to the catalog.create_execution stored procedure are @package_name, @folder_name, @project_name, @use32bitruntime, and @reference_id.
The @reference_id parameter identifies a relationship between an SSIS Catalog Environment and an SSIS package.
Let’s continue our exploration with a condensed introduction describing SSIS Catalog Environments and References, followed by a more detailed description with examples.
A Brief Introduction to SSIS Catalog Environments and References
SSIS Catalog Environments are collections of variables and their values. Scoped at the SSIS Catalog Folder level, Environments are available to every SSIS project and package in an SSIS Catalog. In order for an SSIS package or project to use an Environment, the package or project must reference the environment. When a project or package references an environment, a unique reference_id (bigint) is created. Once a reference is created, Environment variables may be mapped to package and project parameters and connection manager properties.
Many packages and projects may reference the same Environment. Packages and projects may be configured to reference 0, 1, or many Environments, but a maximum of one Environment may be referenced when the package or project is executed.
The SSIS Catalog Environment: Scoped at the Folder Level
Open SQL Server Management Studio (SSMS) and connect to an instance of SQL Server with an SSIS Catalog configured. If you have been working through this series, connect to the instance where you deployed the My_First_SSIS_Project project. In Object Explorer, expand the Integration Services Catalogs node, then expand the SSISDB catalog node, then expand the TestFolder folder node, and then expand the Projects node, as shown in Figure 2:

Figure 2
In the TestFolder folder, we find a Projects virtual folder that contains our project – My_First_SSIS_Project – and a virtual folder named Environments. Remember, SSIS Catalog Environments are scoped to Catalog folders. SSIS packages and SSIS projects can reference Environments stored in other Catalog folders.
To provide a separation of concerns between enterprise Environments and the packages and projects referencing them, you may want to create an SSIS Catalog folder that only contains Environments. To do this, right-click the SSISDB Catalog node and click “Create folder…” as shown in Figure 3:

Figure 3
When the Create Folder window displays, provide a name for the folder in the Folder Name textbox and an (optional) description in the Folder Description text box as shown in Figure 4:

Figure 4
When I create a “utility” folder such as this, I like giving it a name that places it near the top of the folders in my Catalog, so I named my folder “_Environments”. When I click the OK button, the _Environments folder is created as shown in Figure 5:

Figure 5
I can hear you thinking, “But Andy, the _Environments folder is not at the top of the Catalog folder list.” Patience, okay? The folder was just added. The treeview control is doing the very best job it can by displaying the new folder at all. It’s there, but it’s the last treenode… for now. Right-click the SSISDB Catalog node and click “Refresh” as shown in Figure 6:

Figure 6
After the refresh, the new _Environments folder appears where it will appear from now on, at the top of the list of folders as shown in Figure 7:

Figure 7
Since the folders are listed in alphabetical order, using the underscore as the first character moves the folder “up” the tree.
Expand the _Environments folder and note that it, like every SSIS Catalog folder, contains two virtual folders named Projects and Environments. We’re going to ignore the Projects virtual folder. Right-click the Environments virtual folder and click “Create Environment…” as shown in Figure 8:

Figure 8
When the Create Environment window displays, provide an Environment Name and (optional) Environment Description in the appropriate textboxes as shown in Figure 9:
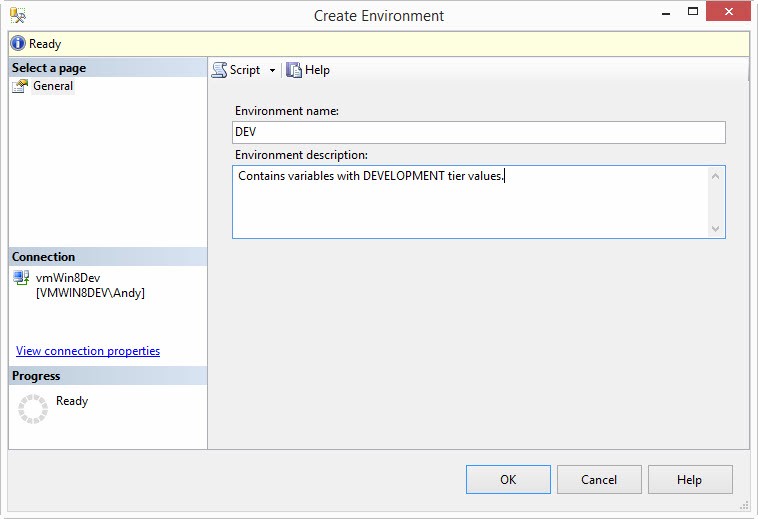
Figure 9
I named this Catalog Environment “DEV” and it will contain my connection string values for the development tier in my enterprise Data Integration Lifecycle Management (DILM) scheme.
Think of Data Integration Lifecycle Management (DILM) as Application Lifecycle Management (ALM) tailored to enterprise data integration solutions. DevOps is an increasingly important consideration in the modern enterprise, and *LM – which includes ALM, DILM, and DLM (Database Lifecycle Management) – are garnering more attention as a result. To learn more about DevOps, I recommend The Phoenix Project: A Novel About IT, DevOps, and Helping Your Business Win.
Click the OK button to create the DEV Environment, as shown in Figure 10:

Figure 10
The SSIS Catalog Environment: A Collection of Variables
As stated in the brief introduction, the SSIS Catalog Environment is a collection variables and values. To configure the DEV Environment, right-click the DEV Environment and click Properties as shown in Figure 11:

Figure 11
The Environment Properties window displays, showing the General page, as shown in Figure 12:

Figure 12
Click on the Variables page to configure variables and values. I’m going to use this Environment with the weather data SSIS packages in the My_First_SSIS_Project project. I enter “WeatherDataConnectionString” in the Name field of the Environment Variables page as shown in Figure 13:

Figure 13
When I begin typing in the Name field, a second Environment Variable row appears in the grid, ready to accept the next Variable configuration.
Next I supply the Type (String) from the dropdown list, an (optional) Description, and the Value, as shown in Listing 1 and Figure 14:
Data Source=vmWin8Dev;User ID=weatherDataReader;Initial Catalog=WeatherData;Provider=SQLNCLI11.1;Persist Security Info=True;Auto Translate=False;
Listing 1

Figure 14
I do not check the Sensitive checkbox because the WeatherData ConnectionString – a Windows Authentication connection – contains no sensitive information. But what if I was configuring a connection string that uses a SQL Login? That’s different. Before we move on, let’s look at an example.
A ConnectionString for a SQL Login looks a little different than a Window Authentication ConnectionString. Here are examples of each:
- Windows Authentication: Data Source=vmWin8Dev;Initial Catalog=WeatherData;Provider=SQLNCLI11.1;Integrated Security=SSPI;Auto Translate=False;Application Name=[SSIS].LoadTemperatureData.WeatherData
- SQL Login: Data Source=vmWin8Dev;User ID=weatherDataReader;Initial Catalog=WeatherData;Provider=SQLNCLI11.1;Persist Security Info=True;Auto Translate=False;
Note that the password is not displayed in the SQL Login ConnectionString. Why is the password not included in the ConnectionString? How would one configure an Environment Variable to store a SQL Login’s ConnectionString?
Why the Password is Not Included in a SQL Login ConnectionString
The password is not included in a SQL Login connection string because the password is Sensitive. I copied these connection string values from an SSIS package that has two connection managers; one connection manager uses a Windows Authentication connection string and the other connection manager uses a SQL Login connection string. I clicked on each connection manager, pressed the F4 key to display the Connection Manager Properties, double-clicked the ConnectionString property to select the ConnectionString value, and copied it to the clipboard. From there, I pasted it in the bulleted list above. There is no “Password=…” attribute listed because SSIS doesn’t store the password unencrypted.
How to configure an Environment Variable to Store a SQL Login ConnectionString
You may think, as I initially did, “Not a problem. I’ll manually add the ‘Password=’ attribute and mark the entire connection string as Sensitive,” as shown in Listng 2 and Figure 15:
Data Source=vmWin8Dev;Password=12345;User ID=weatherDataReader;Initial Catalog=WeatherData;Provider=SQLNCLI11.1;Persist Security Info=True;Auto Translate=False;
Listing 2

Figure 15
This almost works.
The Environment doesn’t really care which Variables you mark as Sensitive. To the Environment, WeatherDataConnectionString is just another string variable with an encrypted value. You will receive no error if you click the OK button with the variable configured as shown in Figure 15.
I’m going to skip ahead here for a couple paragraphs. Please just trust what I am sharing is accurate and important. I promise these next two paragraphs will make sense if you read the remainder of this article.
An issue appears when we attempt to execute an SSIS package – like the LoadTemperatureData.dtsx package – configured to use the reference to the DEV Environment in the My_First_SSIS_Project SSIS Catalog project after assigning the WeatherDataConnectionString Environment Variable to override the “(local).WeatherData” project connection manager’s ConnectionString property. When we click the OK button on the Execute Package window, we get an error similar to that shown in Figure 16:

Figure 16
In sum, we cannot map an Environment Variable marked Sensitive to a non-Sensitive parameter. And the ConnectionString parameter is not Sensitive. So manually adding the “Password=” attribute the connection string Environment Variable and marking the Variable as Sensitive is not a valid solution.
I can hear you thinking, “So how do we store SQL Login connection strings in an SSIS Catalog Environment, Andy?” I’m glad you asked. First, return to the DEV Environment Variables page and uncheck the Sensitive checkbox for the WeatherDataConnectionString Variable as shown in Figure 17:

Figure 17
“Where’s my connection string?” It’s gone. That happens – by design – when you uncheck the Sensitive checkbox. I agree with this design decision; we don’t want anyone with access to Environments decrypting Sensitive information with a click. Incidentally, as long as the Environment Properties window remains open, you can check and uncheck the Sensitive checkbox and still see the Sensitive value. Unchecking the Sensitive checkbox only deletes the value after closing and re-opening the Environment Properties window.
Re-enter the SQL Login ConnectionString value, minus the “Password=” attribute, as shown in Listing 3 and Figure 18:
Data Source=vmWin8Dev;User ID=weatherDataReader;Initial Catalog=WeatherData;Provider=SQLNCLI11.1;Persist Security Info=True;Auto Translate=False;
Listing 3

Figure 18
Next, create a second Variable to hold only the value of the ConnectionString Password as shown in Figure 19:

Figure 19
Click the OK button to close the Environment Properties window.
Creating an Environment Reference
Before the Environment Variable values can be used by an SSIS package or project in the SSIS Catalog, we must reference the Environment from the SSIS project. To create a reference, expand the TestFolder folder, then expand the Projects virtual folder to reveal the My_First_SSIS_Project project as shown in Figure 20:

Figure 20
Right-click the My_First_SSIS_Project project and click “Configure…” as shown in Figure 21:

Figure 21
The Configure window displays as shown in Figure 22:

Figure 22
To access Environment Variables contained and configured in the DEV Environment, we must first create a Reference to the DEV Environment in the My_First_SSIS_Project project. Click the References page as shown in Figure 23:

Figure 23
Click the Add button to add a Reference. When the Browse Environments window displays, expand the _Environments folder and click on the DEV Environment as shown in Figure 24:

Figure 24
Click the OK button to add a Reference to the DEV Environment to the My_First_SSIS_Project project as shown in Figure 25:

Figure 25
Overriding Parameters with Environment Variable Values
Now that the Reference exists, we can use the Variables configured in the DEV Environment to configure parameter value overrides in the SSIS project.
Before we take this next step, let’s pause for a moment and look at the larger picture. We are configuring the SSIS project at this time. In the three-step execution process we specified at the beginning of this article, this is part of step 2: Configure the Intent-to-Execute.
Click the Parameters page and then click the Connection Managers tab as shown in Figure 26:

Figure 26
In the leftmost grid, please note the list of project and package connection managers. The Container column lists the project or package at which each connection manager is scoped. The (local).WeatherData connection manager is the only project-scoped connection manager at this time. Select the (local).WeatherData connection manager, then click the ellipsis next to the ConnectionString property value in the rightmost grid as shown in Figure 27:

Figure 27
When the Set Parameter Value window displays it will appear as shown in Figure 28:

Figure 28
Select the “Use environment variable” option and select the “WeatherDataConnectionString” variable from the dropdown as shown in Figure 29:

Figure 29
It’s important to note that if you have not yet created a reference to an Environment in a project, the “Use environment variable” option is disabled, as shown in Figure 30:

Figure 30
Click the OK button to complete the assignment of the WeatherDataConnectionString Variable to the ConnectionString property. A properly configured override is shown in Figure 31:

Figure 31
Note the name of the Environment Variable – WeatherDataConnectionString – appears underlined in the ConnectionString property’s value textbox for the (local).WeatherData project-scoped connection manager. This decoration helps identify overridden values at a glance, and is a nice feature.
Notice the ServerName property of the (local).WeatherData connection manager displays “(local)”. If you recall, the WeatherDataConnectionString sets the “Data Source” attribute to the name of the virtual machine I’m using, “vmWin8Dev”. It’s important to note the value configured for the ConnectionString property will take precedence over the properties listed for the Connection Manager… with the exception of the Password property. The ServerName property will never display the value assigned to the “Data Source” attribute of the value stored in the Environment Variable.
Remember, the WeatherDataConnectionString is configured for a SQL Login. We must override the Password property next. Click the ellipsis beside the Password property’s textbox to display the Set Parameter Value window as shown in Figure 32:

Figure 32
Note the “Use default value from package” option is disabled. Why? SSIS doesn’t stored Sensitive information and the password is Sensitive. We can manually configure a literal value for the next execution by entering the password in the “Edit value” textbox as shown in Figure 33:

Figure 33
To use the value we have stored in the DEV Environment’s WeatherDataConnectionStringPassword variable, select the “Use environment variable” option and then select the WeatherDataConnectionStringPassword variable from the dropdown as shown in Figure 34:

Figure 34
Click the OK button to complete the override. Your Configure window should appear as shown in Figure 35:

Figure 35
We have configured the My_First_SSIS_Project’s (local).WeatherData connection manager so that it’s connection string and password properties are now overridden by the values stored in the DEV Environment’s variables.
Click the OK button to close the Configure window.
Let’s Test!
Expand the My_First_SSIS_Project node in the SSIS Catalog, then expand the Packages virtual folder. Right-click the LoadTemperatureData.dtsx package and click “Execute…” as shown in Figure 36:

Figure 36
The Execute Package window displays as shown in Figure 37:

Figure 37
Note the important error shown in Figure 37, shown expanded in Figure 38:

Figure 38
This error is telling us the (local).WeatherData connection manager’s ConnectionString property is configured to use an environment variable, but no environment variable has been selected. There’s a second error related to the Password property of the same connection manager. Both error messages conclude with instructions: Select the “Environment” checkbox and specify the environment to use, or specify a literal value for the property.
That’s excellent advice, and exactly what we’re going to do next. As instructed, check the Environment checkbox at the bottom of this dialog. Since we have only one Environment Reference configured, the only value in our dropdown is “_Environments\DEV” as shown in Figure 39:
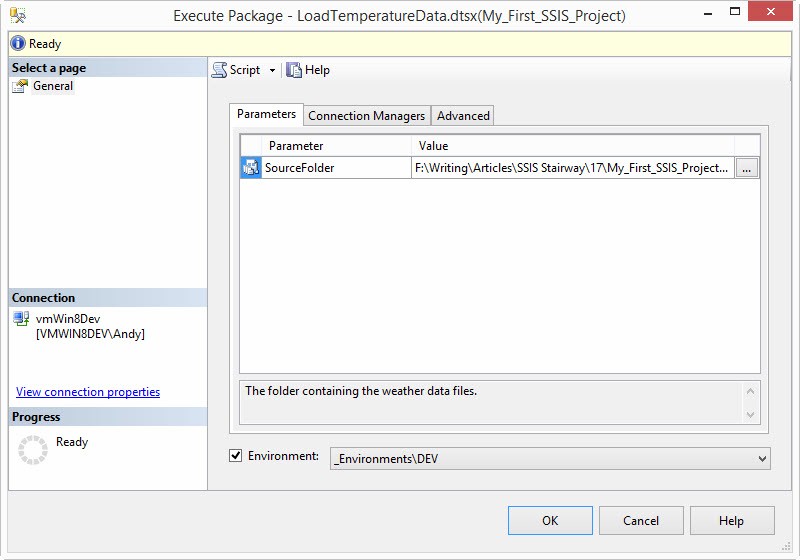
Figure 39
Note the banner at the top of the Execute Package window now contains no errors or warnings, but states “Ready” instead.
Before we execute from the Catalog GUI, click the Script button. The results of clicking this button – formatted some to make them more presentable – are shown in Figure 40:

Figure 40
In the Transact-SQL script above we find our three basic steps to SSIS Catalog package execution:
- Create an Intent-to-Execute
- Configure the Intent-to-Execute
- Execute
The difference between this Transact-SQL and the version shown earlier is found in the call the the catalog.create_execution stored procedure. Specifically, the @reference_id parameter shown in Figure 1 was supplied a NULL value. In Figure 40, the @reference_id parameter is supplied a value of 1. This Intent-to-Execute is being created with a pointer to the reference we created – a reference in the My_First_SSIS_Project SSIS Catalog project to the SSIS Catalog Environment named “DEV” and stored in the “_Environments” folder.
If you’ve followed my instructions, you have a choice for execution. You can either execute the Transact-SQL script or click the OK button on the Execute Package window. Executing the script will run the package in the exact same manner as clicking the OK button. The one advantage of clicking the OK button is you will be prompted to open the SSIS Catalog Overview Report as shown in Figure 42:

Figure 41
If you click Yes, the Overview Report will open as shown in Figure 42:
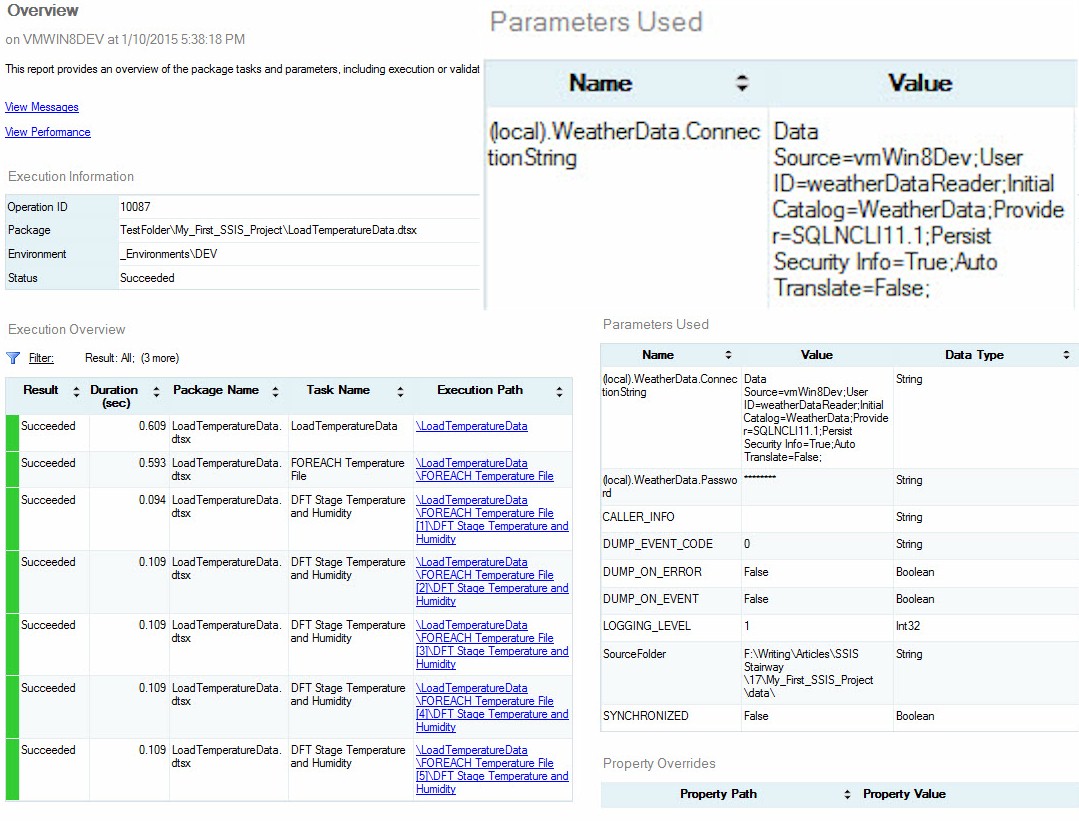
Figure 42
In the image above, I enlarged one portion – the Parameters Used section of the overview report – to show the value of the (local).WeatherData.ConnectionString property was overridden from the DEV Environment’s WeatherDataConnectionString Variable. How do I know? The Data Source attribute is set to “vmWin8Dev”, not “(local)”.
Executing from the Transact-SQL script produces the results shown in Figure 43:

Figure 43
Figure 44 shows the Overview Report for Operation_Id 10086, executed from the Transact-SQL script. Note the same results in the Parameters Used callout:

Figure 44
By examining the Operation_Id values, you can tell I executed from the Transact-SQL script before executing from the Execute Package window, even though I wrote about them in the inverse order. Busted.
I hope this is all coming together for you now. If not, that’s ok. In my opinion, connections management is the most difficult topic in DILM. If you find yourself struggling with this topic you are not alone. This is hard. Read this article again and work through the examples carefully. If you have concerns or questions, please post them in the forum or email me directly at andy.leonard@gmail.com. I am here to help.
Tying Environments and References to Extending the SSIS Catalog
The custom.execute_catalog_package stored procedure introduced in Level 19 already supports connection management via SSIS Catalog Environments and References to those Environments via the @reference_id parameter. In the next article, we will refactor the custom.execute_catalog_package stored procedure to improve this design by clarifying which Environment we intend to reference.
Conclusion
In this article we explored SSIS Catalog Environments, the Catalog’s built-in functionality for managing parameters. We provided a practical demonstration of SSIS Catalog Environments by building, configuring, and referencing an Environment for connections management, the most difficult aspect of enterprise Data Integration Lifecycle Management (DILM).