

Introduction
In Part 18 of this series, we created a cube using data from Azure SQL Data Warehouse (ASDW). Now, we will do some common tasks in SSAS of the data extracted from our Azure Data Warehouse. This article will work on the cube and complete the following tasks:
- Backup a SSAS database
- Simulate a database corruption
- Restore a database.
- Run a backup automatically using the SQL Agent
Requirements
- The same requirements than the Azure DWH part 18.
- SSMS installed.
Backup an SSAS Database
We will create a SSAS backup using SSMS. In SSMS, connect to your Analysis Services Database:

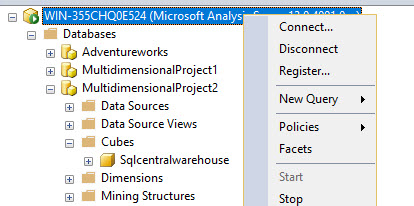
Right click the SSAS database and select Back Up:

To simplify the task, we will disable the Encrypt backup file. Encrypting the back up is a best practice, and you need to specify a password to decrypt the file. However, for the simplicity of the demo, we will uncheck this option. You can also check the Allow file overwrite:

Press the browse button to specify the path of the backup. By default, there are 3 places where you can store your backup. The data folder, the log folder, or the backup folder:

If you want to change the folders by default in the SSAS Server, right click and select properties:

In the General page, you can see the Backup Directory (BackupDir), Data Directory (DataDir) and Log Directory (LogDir). You can change the value to change the path:

Return to the backup window. Once that the path is selected in the backup window, select the backup path and press OK to create the backup:
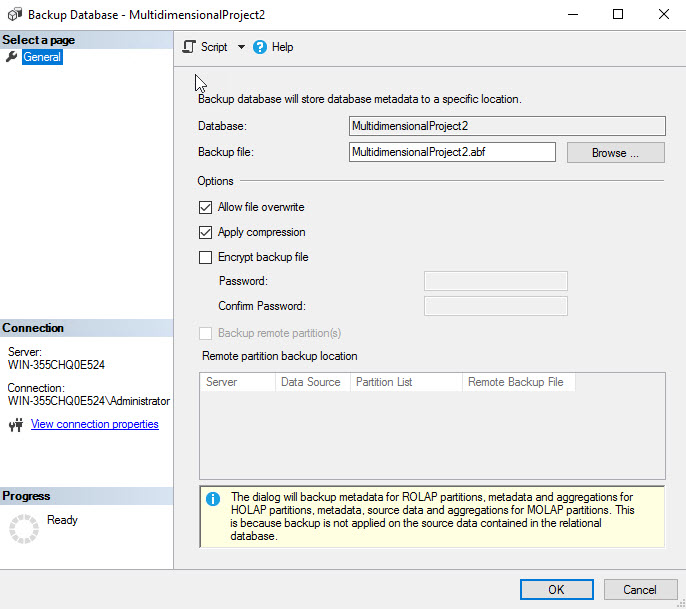
If everything is OK, a backup file will be created:

Simulate Database Corruption
We want to restore a database if we lose data or if the data is corrupted because of hardware, software problems, disasters, etc. In this example, we will simulate that the data is corrupted and the cube is damaged. To do this, we will first stop the SSAS server using the SSMS. Right click the SSAS Server and press stop:
The cube data is stored in drive:\Program Files\Microsoft SQL Server\MSAS13.MSSQLSERVER\OLAP\Data or a similar path. MSAS13 means that it is a SQL Server 2016. MSAS12 is SQL Server 2014.
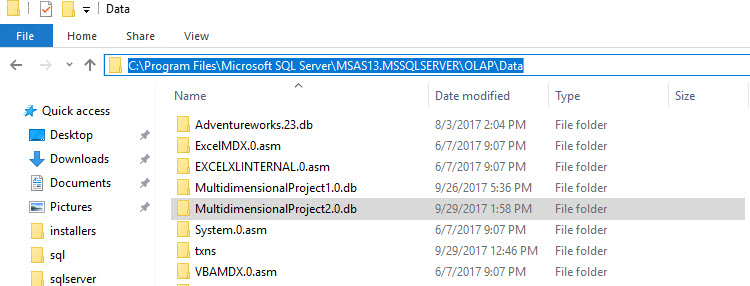
In the folder, select the files and delete them:

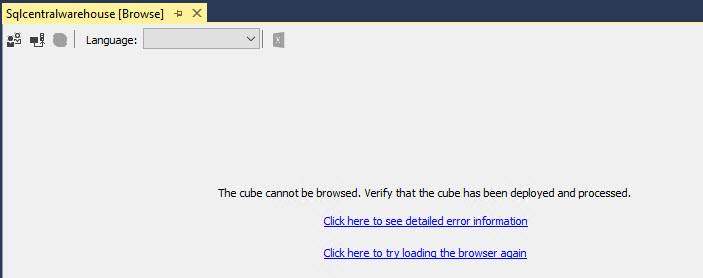
Start the SSAS Service again. In SSMS, go to the SSAS Database>Cubes and right click on the cube and select Browse:

You will notice that the cube cannot be browsed. This is because we deleted all the database files (cubes, dimensions, data sources and more):
Restore an SSAS Database
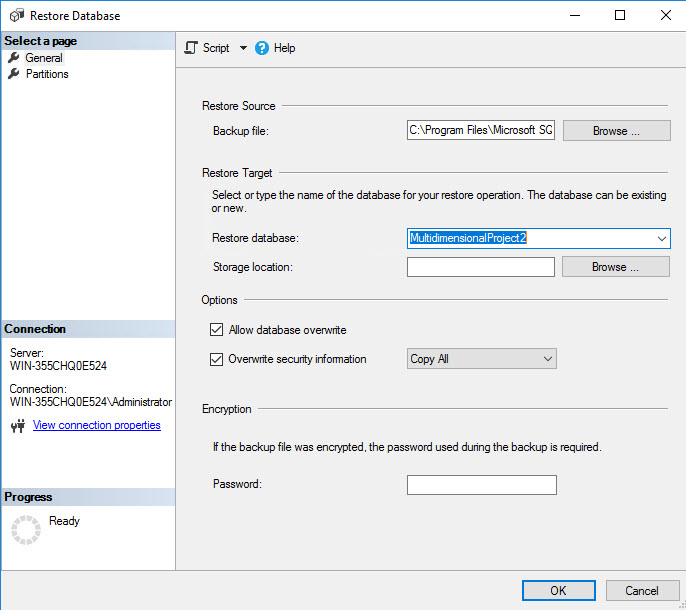
In order to solve the database damaged, we will restore the database using a backup. The database is corrupt and we want to Restore it. To do that, in SSMS, right click on Databases and select Restore:

Select the backup by pressing Browse:

Select the backup file:

In Restore database, select the database. Make sure that Allow database overwrite and Overwrite security information are checked:
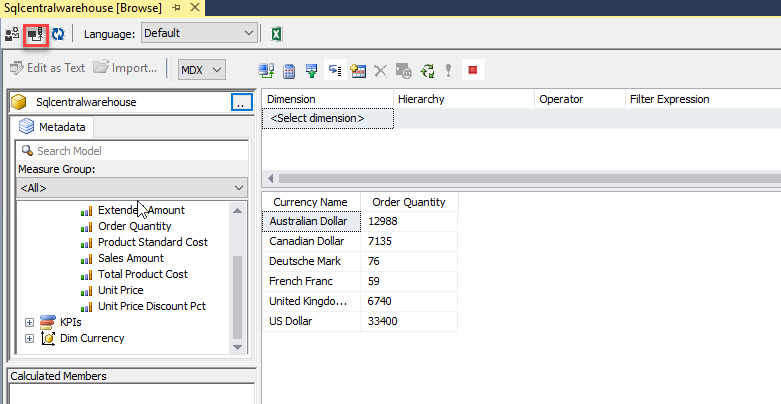
Once restored try to Browse again the Cube:

Press the reconnect icon. Drag and drop the Order Quantity measure and then the Dim Currency and execute the query. If everything is OK, the data should be displayed successfully:
Run a Backup Automatically Using SQL Agent
If we want to run a backup daily, in the Backup Window in SSMS there is an option named Script. This option will generate a script to create backups. Select the Script Action to New Query Window:

Copy the code generated in the script:

You will need to create a job in SSMS connecting to the SQL Server Engine:

Create a step in the job of Type SQL Server Analysis Services and copy and paste the backup script information in the command section:

You will need a credential with higher privileges to run the backup script. By default, the jobs run with the SQL Server Agent Account. You will need more privileges to run the job.
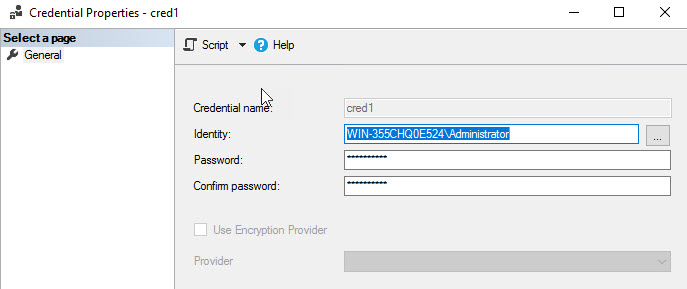
In the SQL Server Database Engine in SSMS, go to Object Explorer. Go to Security>Credential and select New Credential:

The credential can run with administrative privileges. You can specify Windows login and password:
In SQL Server Agent go to Proxies, right click and select New Proxy:

Specify a name, the credential just created before and check SQL Server Analysis Services Commands and PowerShell:

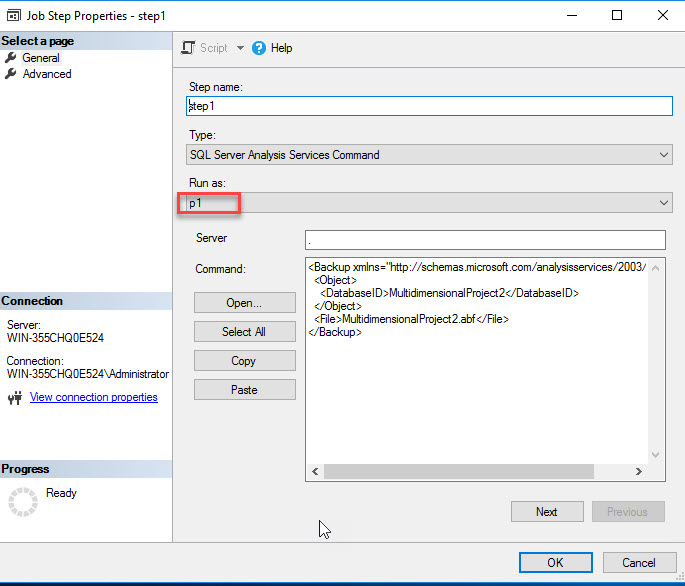
Once created, in the Job Step in the Run as section select p1. With this option you will be able to run using administrator privileges:
We will create a second step of type, PowerShell. In command we will add code to replace the backup file name with a name that includes the current date (we will explain the code after the picture). Note that in the Run as section we are also using proxies and credentials. The PowerShell will not execute the code successfully with the SQL Server Agent Account:

Here it is the PowerShell code used:
$mydate=get-date -Format ddMMyyyy
$mydate="Multidimensionalproject02"+$mydate+".abf"
Rename-Item "C:\Program Files\Microsoft SQL Server\MSAS13.MSSQLSERVER\OLAP\Backup\MultidimensionalProject2.abf" $mydate
The first line gets the current date in the format ddMMyyyy. The second line appends the date with the file name. The third like replace the name of the current backup with the file name with the current date.
You will have 2 steps in the job. One step to create a backup and the second step will replace the name by default with a name including the current date:


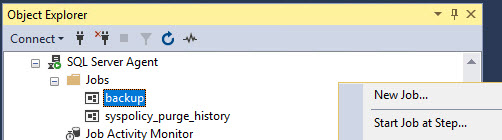
Once the job is created select the option Start Job at Step:
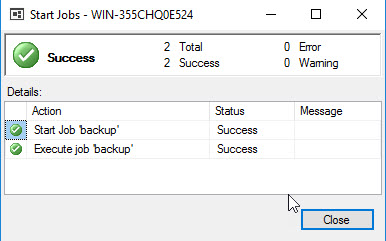
If everything is OK, you will receive a Success message (PowerShell does not detect errors and it may show a success message even if it fails):
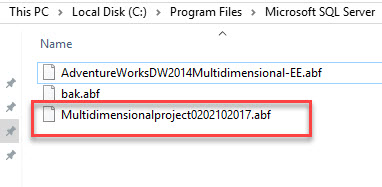
If everything is OK, you will have a backup with the current date:
Conclusion
In this article, we learned how to create SSAS backups from data processed in ASDW. We also learned how to change the default folders for SSAS backups, data and logs. We also learned where are the data files for SSAS databases. We deleted these files to corrupt the database and simulate a failure. We also learned how to restore the data files.
Finally, automating the backups to run daily. We learned how to create backups in SQL Server Agent using jobs and we also learned how to use Proxies to increase privileges.